How to Migrate from Magento to Shopify
At some point, every growing eCommerce business faces a choice: keep investing in a complex platform or switch to something easier to scale.
Magento offers deep customization, but often at the cost of:
- Long developer hours
- Server maintenance
- Security patches
- Technical overhead.
Shopify eliminates these pain points with a fully hosted, scalable solution. That’s why thousands of businesses have migrated to simplify operations, reduce costs, and focus on growth.
This guide walks you through every step of the Magento-to-Shopify migration process carefully and without jargon.
Even if you’re not a techie, you’ll know exactly what to do, when, and why.
Should You Switch to Shopify? (Quick Comparison)
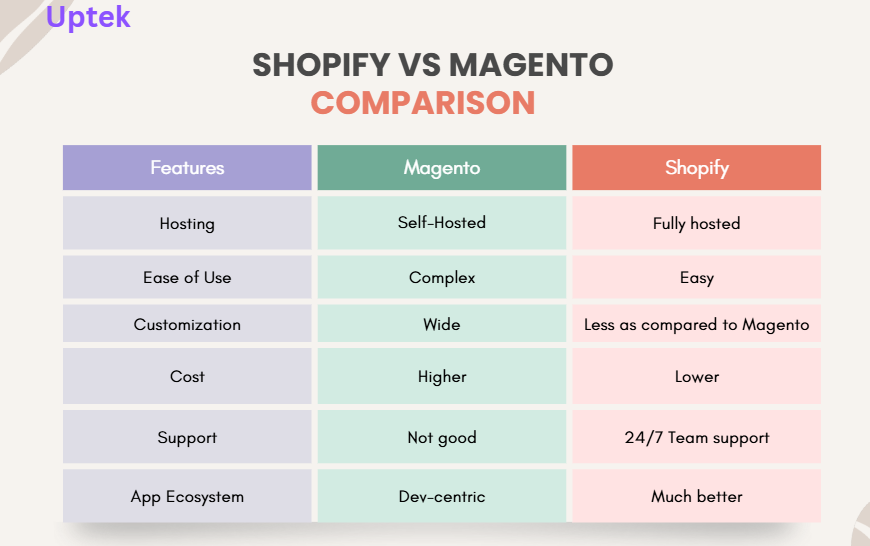
To ensure that you’re switching for the right reasons and that Shopify is truly a better fit for your business than Magento, here’s a side-by-side comparison:
| Feature / Concern | Magento | Shopify |
|---|---|---|
| Hosting | Self-hosted (you manage servers) | Fully hosted (Shopify handles everything) |
| Ease of Use | Developer-friendly but complex | Beginner-friendly, clean UI |
| Customization | Highly flexible, but requires coding | Flexible via apps/themes (less custom code) |
| Total Cost of Ownership | Can be high (devs, hosting, security) | Predictable monthly fee |
| Speed to Launch | Weeks to months | Days to weeks |
| Security & Updates | Manual patches and maintenance | Handled by Shopify |
| Support | Community-based or agency-dependent | 24/7 direct Shopify support |
| App Ecosystem | Smaller, more dev-centric | Massive app store, plug-and-play options |
Pre-Migration Preparation

Before you touch your Shopify dashboard, you need to get your Magento store in order. A rushed or unplanned migration often leads to broken pages, lost data, and hours of troubleshooting.
This phase ensures your data is clean, your store is backed up, and your Shopify environment is ready.
Each of the following steps is critical. Skip one, and you risk bringing chaos into your new platform.
Let’s go through it in detail.
Step 1: Back Up Your Magento Store
A full backup is non-negotiable. You are about to move years of data, and if anything breaks, you need a fallback. This is your safety net.
You need to create copies of the following:
1. Database
- Log in to your hosting control panel (usually cPanel or Plesk).
- Find and open phpMyAdmin under the Databases section.
- Select your Magento database from the left sidebar. The name may be something like magento_db or mage_store.
- Click the Export tab at the top.
- Choose the Quick export method and format it as SQL.
- Click Go to download the SQL file to your computer.
Tip: If your store is large, you may want to use the “Custom” export method to selectively back up key tables or compress the file as a ZIP.
Alternative Method: SSH (Command Line)
If you have shell access and prefer the command line:
bash
CopyEdit
mysqldump -u your_db_user -p your_db_name > magento_backup.sql
You will be prompted for your database password. The file magento_backup.sql will contain the full dump.
2. Media Files
Magento stores product images, banners, category thumbnails, and downloadable files inside its media folder. These are important for the visual consistency of your store.
- Access your server using FTP or File Manager in cPanel.
- Navigate to the Magento root directory, then open the pub/media folder.
- Download the entire media folder to your local computer.
This folder includes:
- catalog/product: All product images
- wysiwyg: Any images used in CMS pages
- downloadable: Files attached to downloadable products
If using a command line, run:
bash
CopyEdit
zip -r media-backup.zip pub/media
Then download the media-backup.zip file using FTP.
3. Theme Files
If your Magento store has a custom-designed front (most stores do), you’ll want to preserve that code. This includes layout templates, stylesheets, and front-end logic.
- Go to your Magento installation directory.
- Head to app/design/frontend.
- Identify your active theme folder (e.g., Vendor/ThemeName).
- Download this theme folder entirely.
You may also want to back up any static content deployed under:
- pub/static/frontend
However, this can be regenerated later, so it’s optional.
4. Extensions and Modules
Magento often relies on third-party or custom-built modules for extended functionality, things like custom shipping rules, layered navigation, B2B pricing, etc.
- Go to app/code in your Magento root directory.
- Download any folders that relate to custom modules. These are typically organized as:
bash
CopyEdit
app/code/Vendor/ModuleName
- If you installed extensions via Composer, you may also want to back up your composer.json and composer.lock files for reference.
Tip: Note down which modules you’ve used. You’ll need to check whether a Shopify equivalent exists or whether a workaround will be needed.
Step 2: Create a Feature Inventory
Every Magento store has a unique setup. Before migrating, document everything that powers your current store. This will help you find equivalent features or apps in Shopify.
Open a Google Sheet or spreadsheet and make a table like this:
| Magento Feature or Extension | What It Does | Needed in Shopify? | Shopify Alternative |
|---|---|---|---|
| Amasty Layered Navigation | Product filtering by attributes | Yes | Shopify Search & Discovery App |
| Blog Extension | On-site content marketing | Yes | Bloggle or native Shopify blog |
| B2B Pricing Module | Tiered pricing for wholesale | Yes | Shopify Plus B2B tools or custom apps |
| Custom Shipping Calculator | Dynamic shipping rates | Yes | Advanced Shipping Rules app |
Not everything in Magento has a direct match in Shopify. Knowing this early lets you plan for replacements or workarounds before launch.
Step 3: Clean Up Your Magento Data
Cleaning your Magento data is like decluttering a house before you move. The cleaner your content, the smoother your Shopify setup will be.
Each of the following areas should be reviewed carefully. Start by cleaning:
1. Old or Inactive Products
Over time, many Magento stores accumulate products that are no longer relevant, such as items that are out of stock, discontinued, replaced by newer versions, or simply never sold well.
- Log in to your Magento Admin Panel.
- Go to Catalog > Categories.
- Use filters to sort by:
- Status: Disabled
- Quantity: 0 (out of stock)
- Visibility: Not visible individually
- Review the product creation or the last updated date.
For any products you no longer intend to sell:- Either delete them or disable them using bulk actions.
Tip: If some of these products have historical order data, consider keeping them disabled instead of deleting them to maintain customer/order relationships in the database.
2. Duplicate Entries
Duplicates can exist in the form of products, customers, or even coupon codes. Migrating duplicates can create confusion and errors in your Shopify store, such as multiple listings of the same item or customers with multiple accounts.
For Products:
- Go to Catalog > Categories.
- Sort or filter by product name or SKU.
- Identify duplicate titles or products with identical content/images.
- Consolidate them into one correct listing.
- Delete the duplicates after confirming.
For Customers:
- Go to Customers > All Customers.
- Arrange by name or email address.
- Merge or remove duplicate accounts manually.
Note: Magento does not have native merge functionality, so if there are many, you may need a cleanup extension or export the list and clean it in Excel first.
3. Broken Images or Links
Migrating products with broken images or invalid URLs will cause display issues on your Shopify store.
This not only looks unprofessional, but it can also hurt performance and SEO.
- Use Magento reports or a third-party SEO audit tool (like Screaming Frog or Ahrefs) to crawl your site.
- Identify:
- Missing product images (404 errors)
- CMS pages with broken links
- Redirect loops or dead-end navigation
- For products:
- Go to Catalog > Products and use the media tab to verify image files exist.
- Go to Catalog > Products and use the media tab to verify image files exist.
- Remove or replace broken links in product descriptions and CMS pages.
Tip: If an image is broken due to a file path issue (not deleted), you may be able to fix it by reuploading the original image.
4. Empty or Irrelevant Categories
Your new Shopify store should have a clean and logical category structure. Migrating empty or unused categories only clutters your navigation and can confuse both users and search engines.
- Go to Catalog > Categories.
- Review each category.
- Delete or disable categories that:
- Have zero products
- Are no longer aligned with your current product strategy
- Were used for one-time campaigns or old collections
Shopify uses a different structure (called Collections), so migrating unnecessary categories will only make the setup harder later.
Outdated Discount Rules
Magento often accumulates dozens of outdated cart rules, coupon codes, and promotional conditions. These rules won’t carry over cleanly and may cause logic conflicts if re-created blindly in Shopify.
- Go to Marketing > Cart Price Rules.
- Review each rule:
- Delete expired rules or rename them for clarity before migration.
- Do the same under Catalog Price Rules for product-specific discounts.
Step 4: Set Up Your Shopify Store
You are not designing your new store yet. This is about preparing Shopify, which will receive your data.
1. Create Your Shopify Account
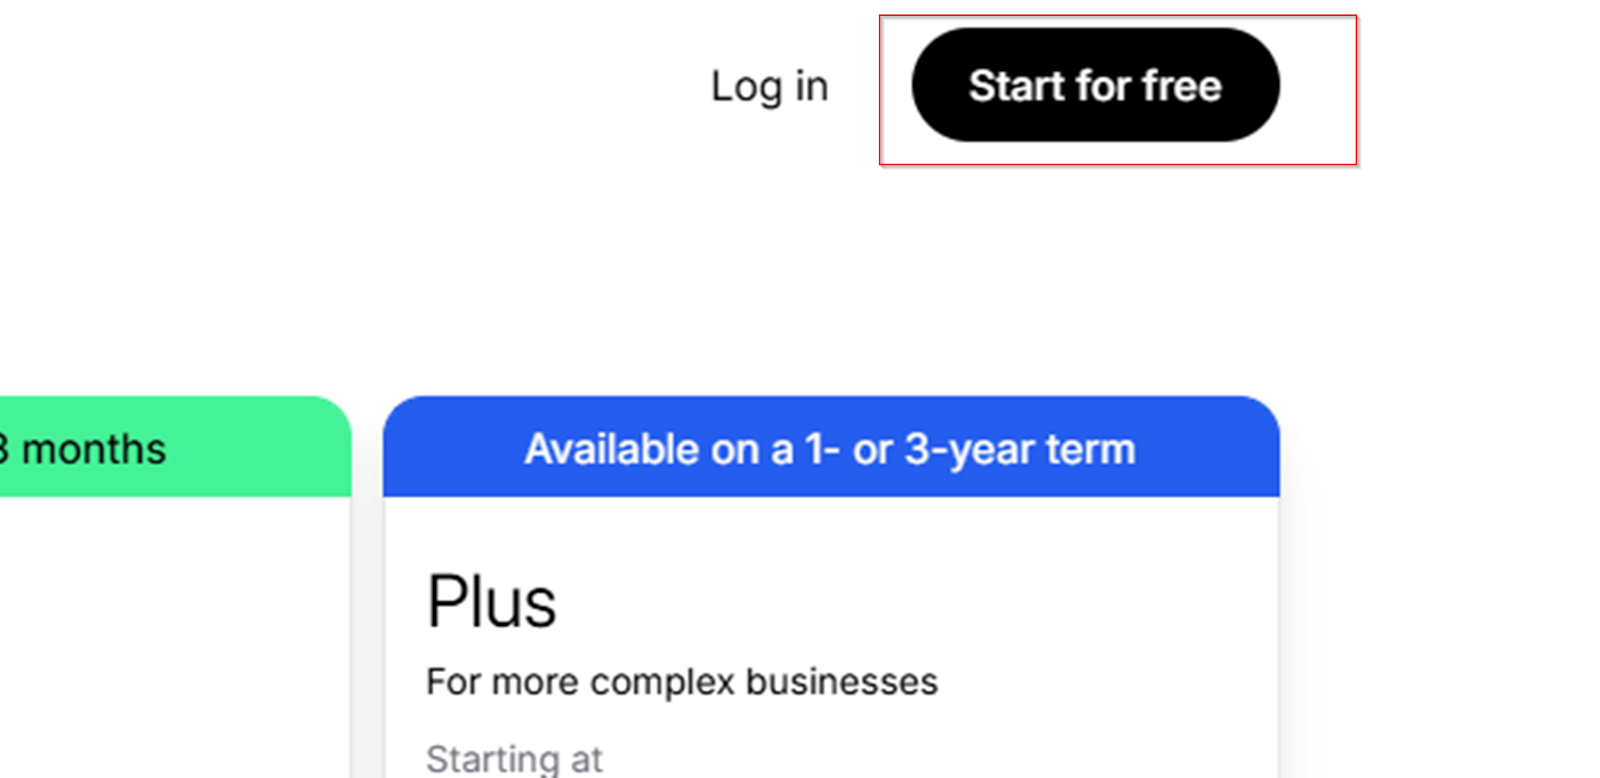
- Go to shopify.com and click “Start Free Trial.”
- Enter your business email, choose a secure password, and name your store.
2. Enter Store Information
Once inside the dashboard:
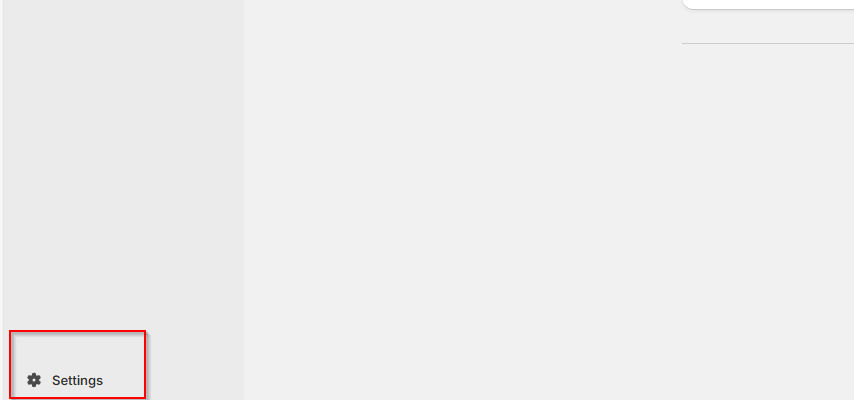
- Go to Settings > Store Details.
- Fill out your business name, contact email, address, and time zone.
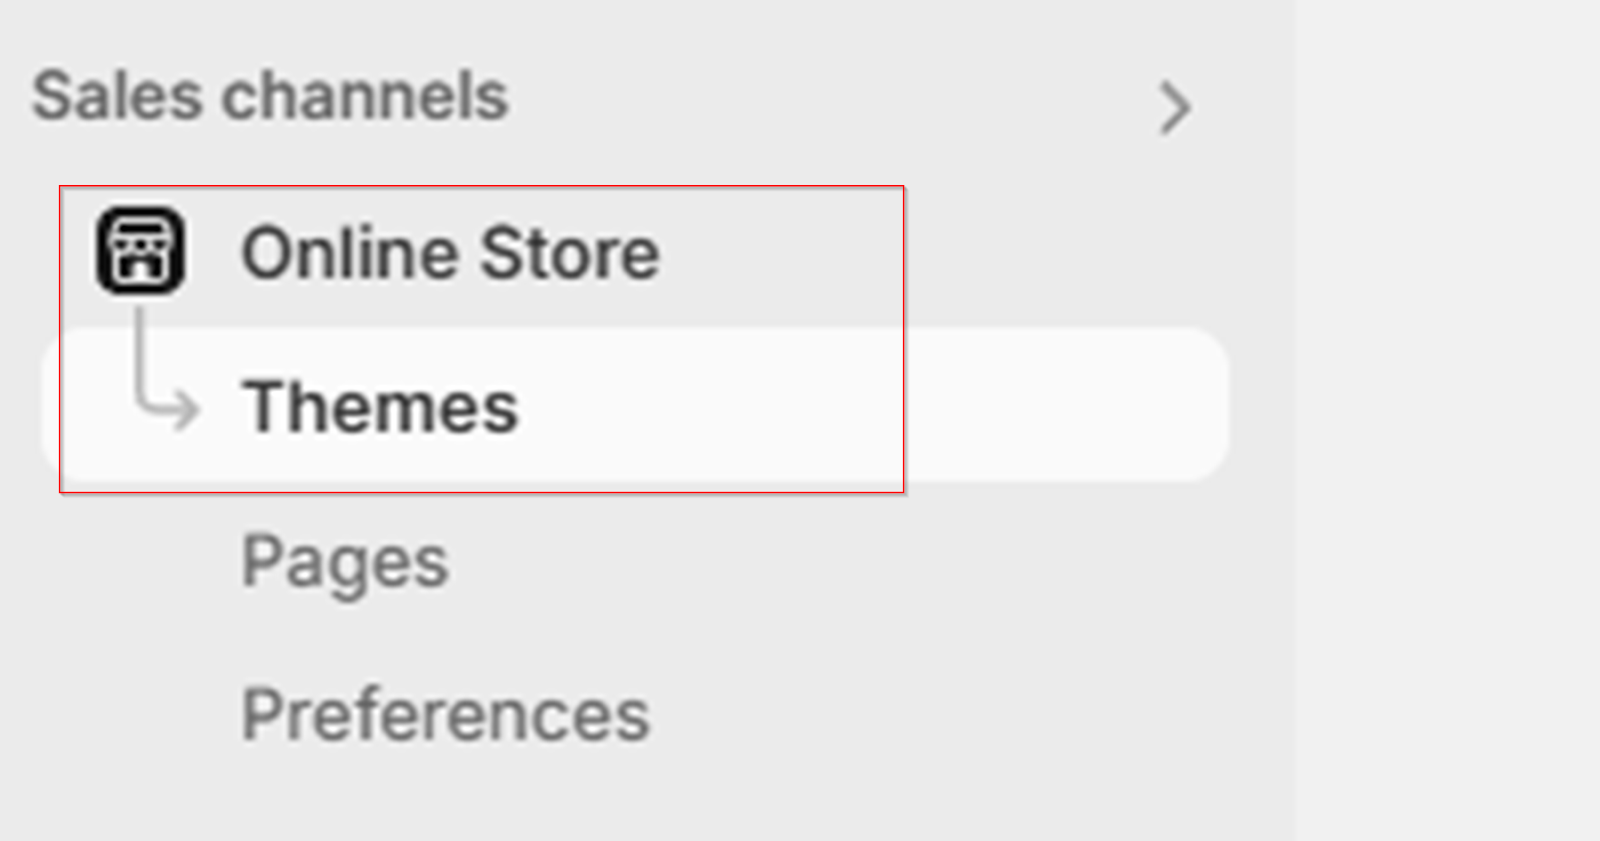
3. Choose and Install a Starter Theme
Go to Online Store > Themes.
- Click “Explore free themes.”
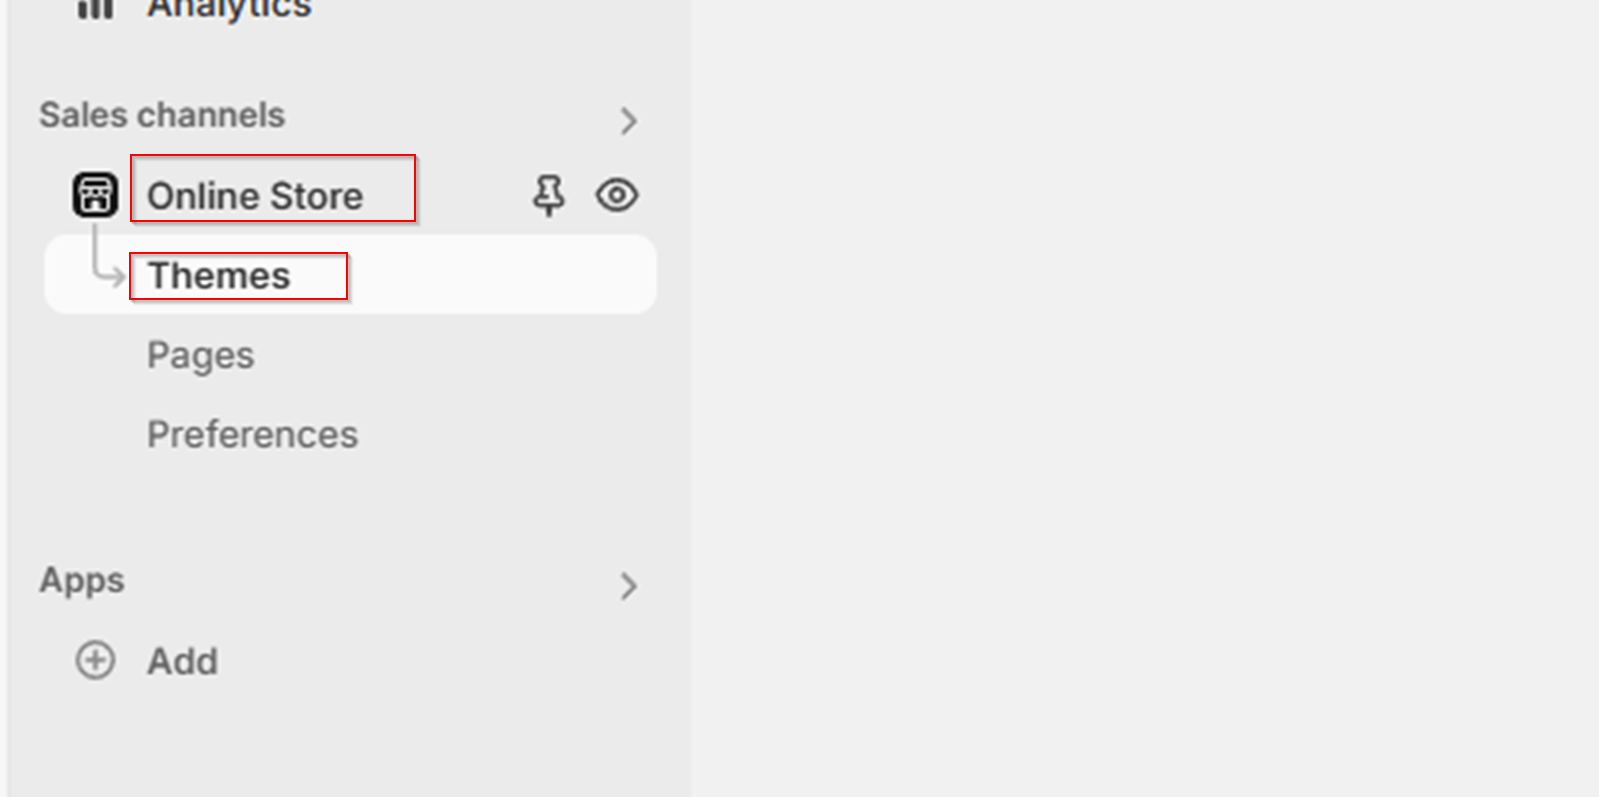
- Choose something simple like Dawn or Refresh.
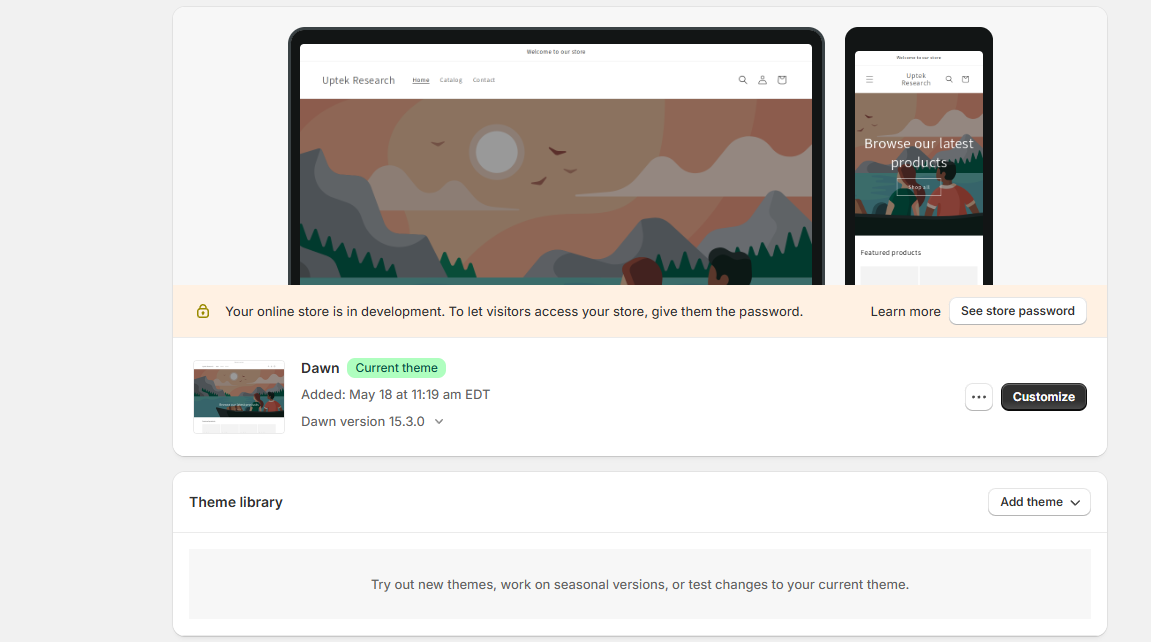
- Click “Add to Theme Library.”
You can customize this theme later, but for now, just install it so Shopify has a base layout in place when data is imported.
4. Add Staff Accounts
- Go to Settings > Users and Permissions.
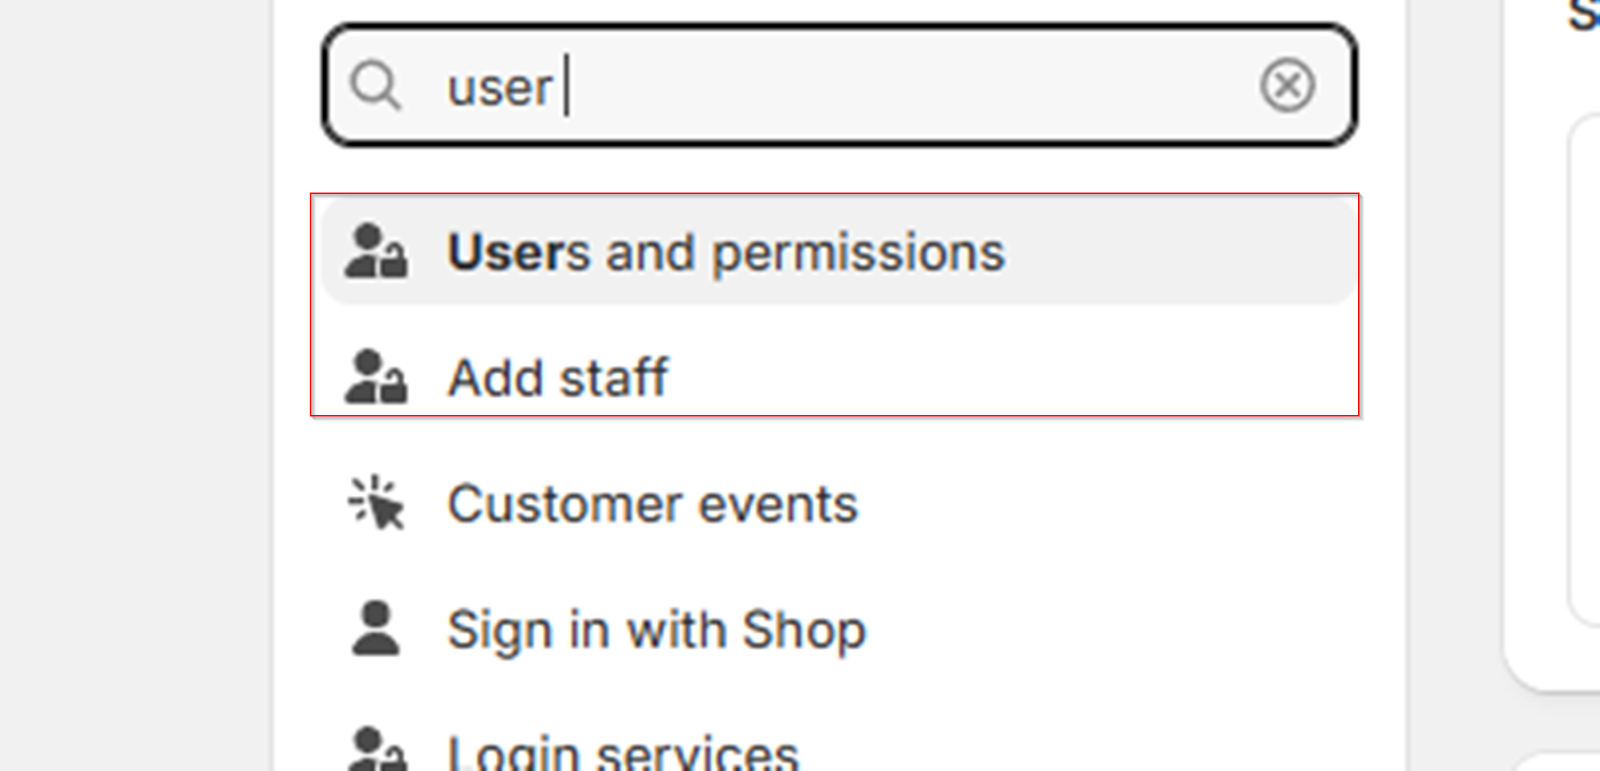
- Add your team members so they can help review the store and assist with setup.
How to Migrate From Magento To Shopify: Your Perfect Guide
So your data is cleaned, your Shopify store is initialized, and now it’s time to move everything over.
A complete Magento-to-Shopify migration involves handling multiple types of data, each with its own format, dependencies, and quirks.
Done wrong, it can result in broken product pages, mismatched orders, or customer account issues.
In this section, we’ll walk through each part of the migration process in precise, executable steps.
We’ll cover:
- Exporting clean product, customer, and order data from Magento
- Migrating media, reviews, metadata, and URL redirects
- Importing and validating that data in Shopify
- Post-import testing and QA
Each of these steps will be broken down in plain language with zero assumptions and no dev jargon.
Let’s first:
1: Migrate Products from Magento to Shopify
If you get your product data right, everything else gets easier.
But Magento’s export format is different from Shopify’s, and the way Magento handles variants, categories, and custom attributes doesn’t map 1:1.
Let’s walk through the process end-to-end.
Export Your Products from Magento
Magento offers two options: export via the admin panel (easy) or command line/API (advanced). Most merchants can start with the admin panel.
Option A: Use the Admin Panel
- Go to System → Data Transfer → Export
- Set Entity Type to Products
- Choose CSV as the file format
- (Optional) Under Entity Attributes, deselect any fields you don’t need
- Click Continue to generate the export file
- Download and open the file in Excel or Google Sheets
This file will include:
- Product titles
- SKUs
- Descriptions
- Prices (regular and special)
- Product types (simple, configurable)
- Inventory quantities
- Meta titles and descriptions
- Image file names
Note: Configurable products and variants (e.g., size/color) may appear in separate rows or nested in the same row. Shopify requires a flat variant structure, so this will need to be cleaned up later.
Option B: Use CLI or Magento API (Advanced)
If your catalog is large (10,000+ SKUs), you may want to export via the command line or API.
- Use bin/magento CLI tools
- Or export via Magento’s REST API as JSON
- These methods allow advanced filtering or batching, but require developer access
For most store owners, the Admin panel export is sufficient, just be sure to check variant formatting.
Prepare Your Data for Shopify’s Import Format
Once you have the CSV, you’ll need to restructure it to match Shopify’s product import format.
Download Shopify’s product CSV template:
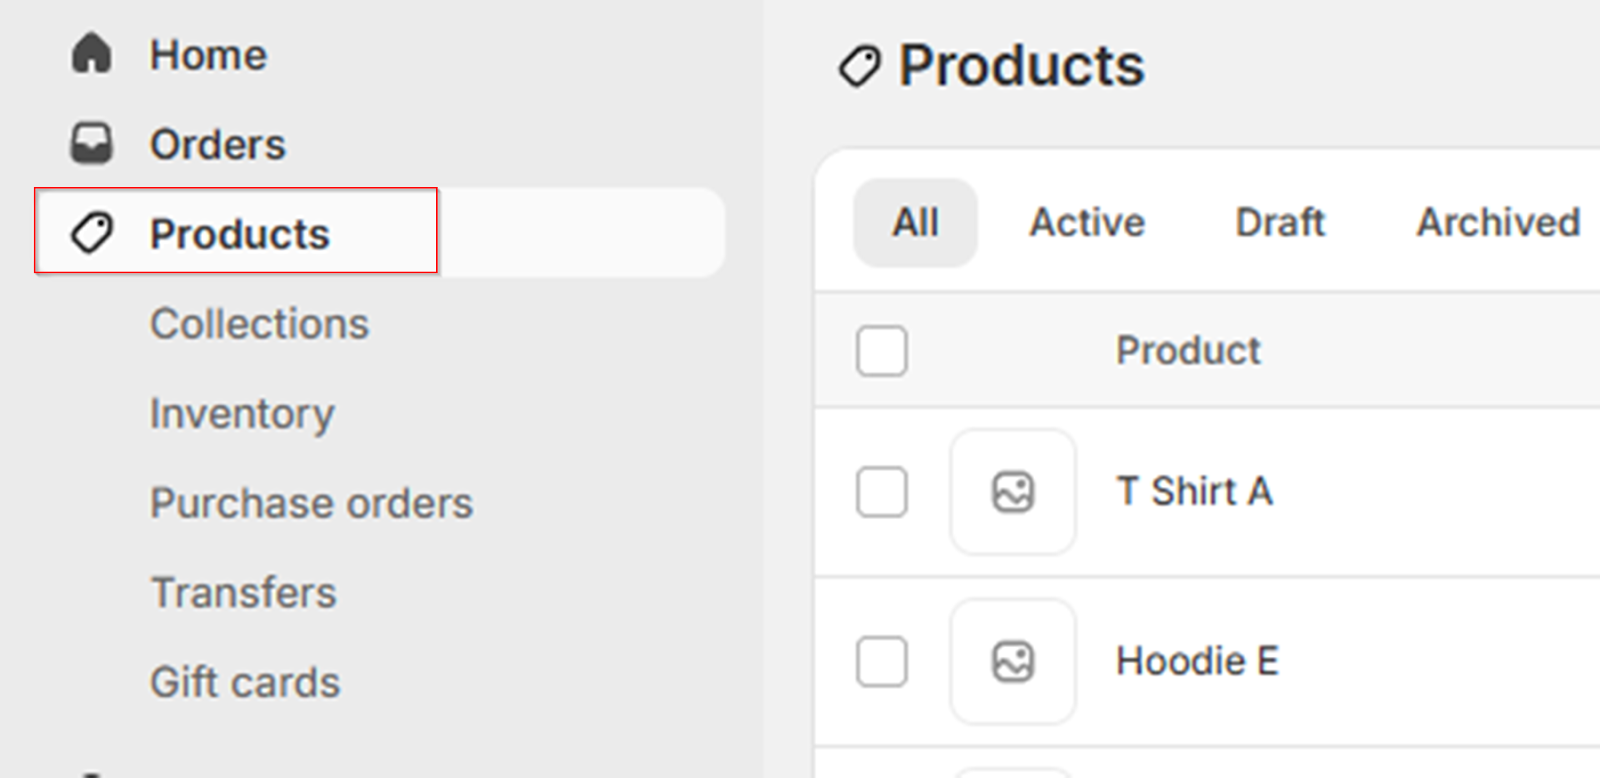
- Go to Shopify Admin → Products
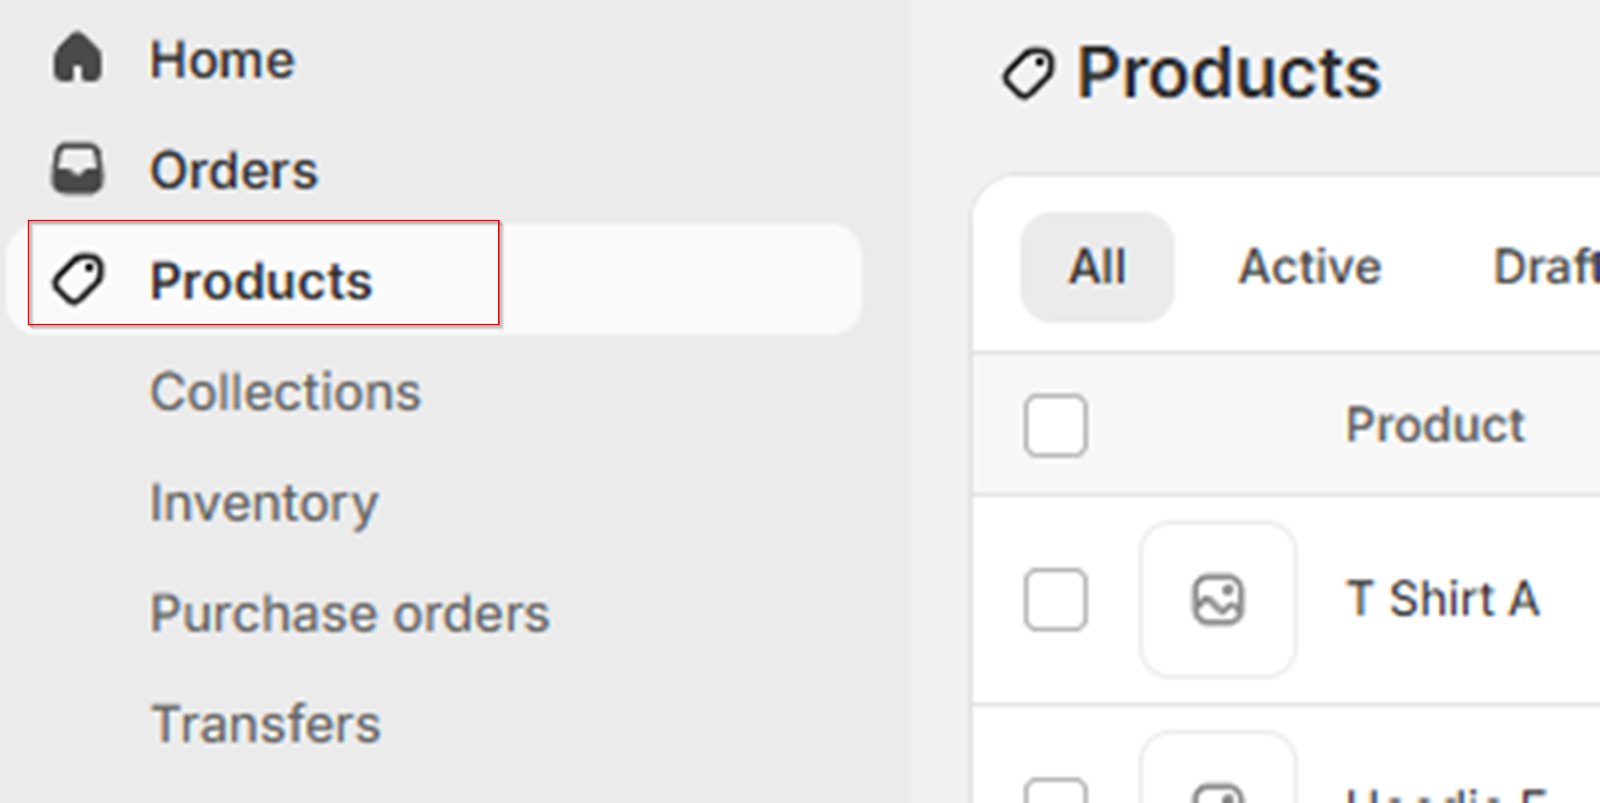
- Click Import
- Then click Download Sample CSV Template
Now open both files side-by-side.
Here’s how to map and reformat your data:
| Magento Field | Shopify Equivalent |
|---|---|
| name | Title |
| sku | Handle + Variant SKU |
| description | Body (HTML) |
| price / special_price | Variant Price |
| type_id | Shopify uses one product type field (Type) |
| qty | Variant Inventory Qty |
| image | Image Src (must be full URLs or reuploaded manually) |
| meta_title, meta_description | SEO title, SEO description (entered manually or via app) |
Also ensure:
- Each variant (e.g., color, size) gets its own row.
- Each variant row shares the same Handle (used to group them into one product).
- Use Option1 Name, Option1 Value, etc., for variant fields.
- Image Src must be a publicly accessible URL if using remote images.
If your Magento export uses relative image paths (e.g., catalog/product/abc.jpg), you’ll need to convert those to full URLs or re-upload the images into Shopify manually.
Choose Your Import Method
Depending on catalog size and complexity, you have two options:
Option A: Import Using Shopify’s Native CSV Tool
- Go to Shopify Admin → Products
- Click Import
- Upload your cleaned CSV
- Review the sample rows in the preview screen
- Click Import Products
Shopify will process the file and show a summary with:
- Success count
- Skipped rows
- Any formatting issues
If you notice errors (e.g., variants not grouped correctly), cancel the import, fix your file, and try again.
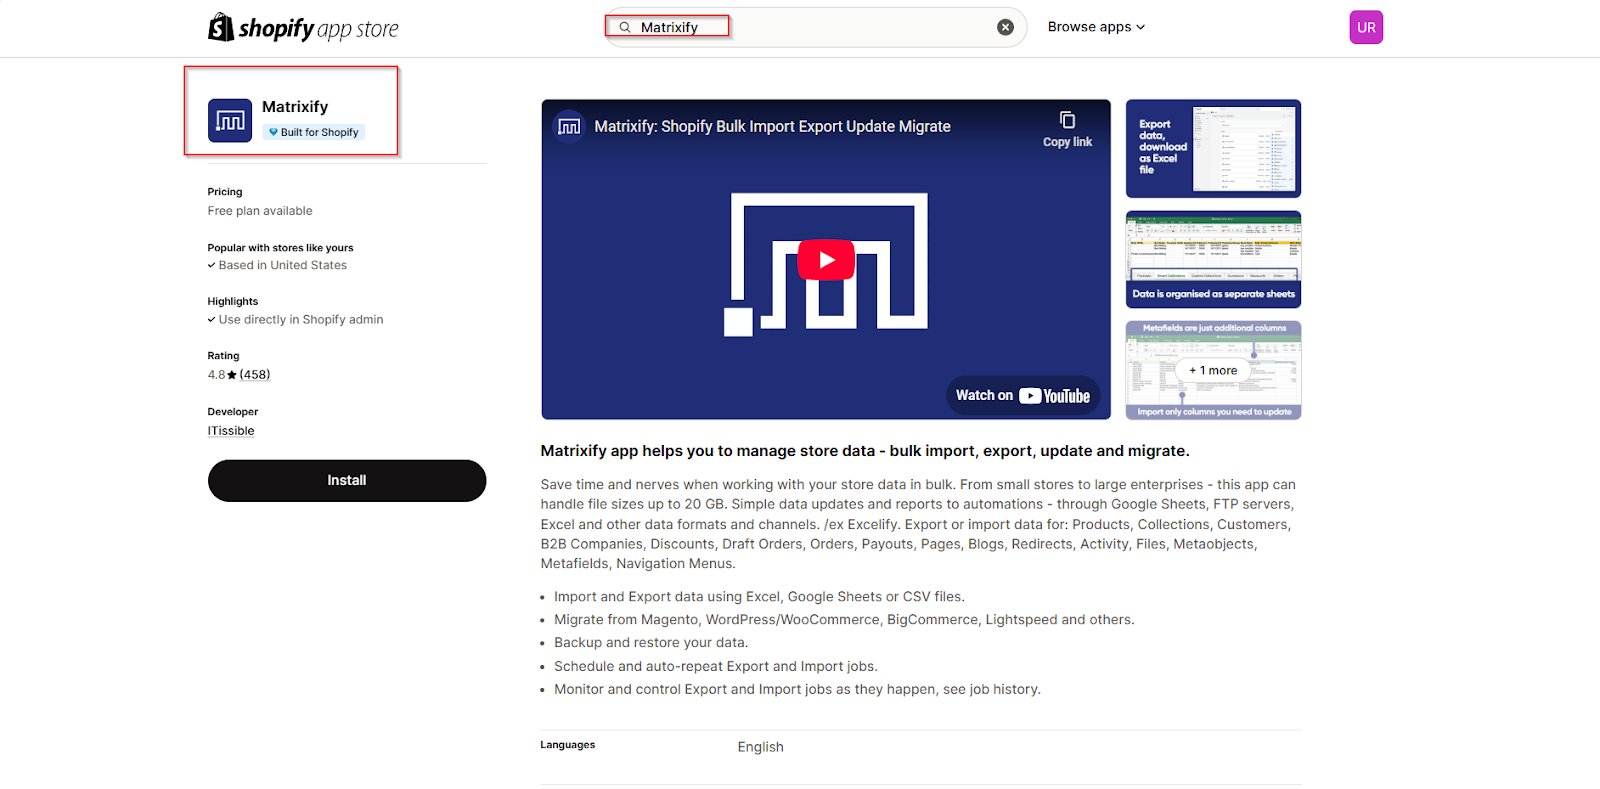
Option B: Use Matrixify for Better Control
For complex product structures, or if you want rollback capability, Matrixify is a safer option.
- Install Matrixify from the Shopify App Store.
- Download their product import template from their docs
- Map your Magento data to their format (more forgiving than Shopify’s native CSV)
- Upload the CSV to the Matrixify dashboard
- Start with a Dry Run (test mode) to preview issues
- If everything checks out, run the full import
Matrixify also lets you import product images, tags, metafields, and collections in one go, making it ideal for large or customized catalogs.
Fixing Image Issues
Magento doesn’t always include full image URLs in exports, especially if your images are hosted internally.
If Shopify can’t pull them in, you’ll see blank thumbnails or missing files.
Here’s how to fix that
- Go to Shopify Admin → Content → Files
- Upload product images manually (drag and drop or bulk upload)
- Then go to each product and assign the correct image
- For bulk image assignments, Matrixify supports image re-mapping if the filenames match SKUs
Always check a few product pages after import to ensure that thumbnails, variant images, and zoomed views are working.
Validate Your Product Catalog in Shopify
Once your products are imported, run through this checklist:
| What to Check | Why It Matters |
|---|---|
| Titles and prices are accurate | Avoid pricing errors that cost you revenue |
| Variants are grouped correctly | Each product should show dropdowns like size/color |
| Images load properly | Broken visuals hurt trust and UX |
| Tags and collections assigned | Helps with filtering and navigation |
| Product descriptions are clean | Look for formatting errors or broken HTML |
If anything looks off:
- Delete the batch via Products → All Products → Bulk Actions → Delete
- Fix the CSV
- Reimport a clean version
Shopify won’t overwrite products with a new import unless the Handle matches, so double-check that field when retrying.
2: Migrate Customers from Magento to Shopify
Customer data is critical to retain, not just for marketing or CRM, but for a perfect shopping experience.
Shopify makes it relatively easy to import customer profiles.
Here’s how to start:
Export Customer Data from Magento
- Go to System → Data Transfer → Export
- Set Entity Type to Customers Main File
- Choose CSV as the file format
- Click Continue to generate the file
- Download the CSV and open it in Google Sheets or Excel
Your export should include fields like:
- First Name
- Last Name
- Email Address
- Phone
- Billing Address
- Shipping Address
- Customer Group
- Account Creation Date
Note: Magento’s customer export doesn’t include order history, which is migrated separately. Also, encrypted passwords will not transfer to Shopify.
Reformat for Shopify’s Import Template
Shopify provides a simple customer import format. You can either:
- Use Shopify’s built-in Import Customers function
- Or use Matrixify for bulk imports and add flexibility
Start by downloading Shopify’s sample template:
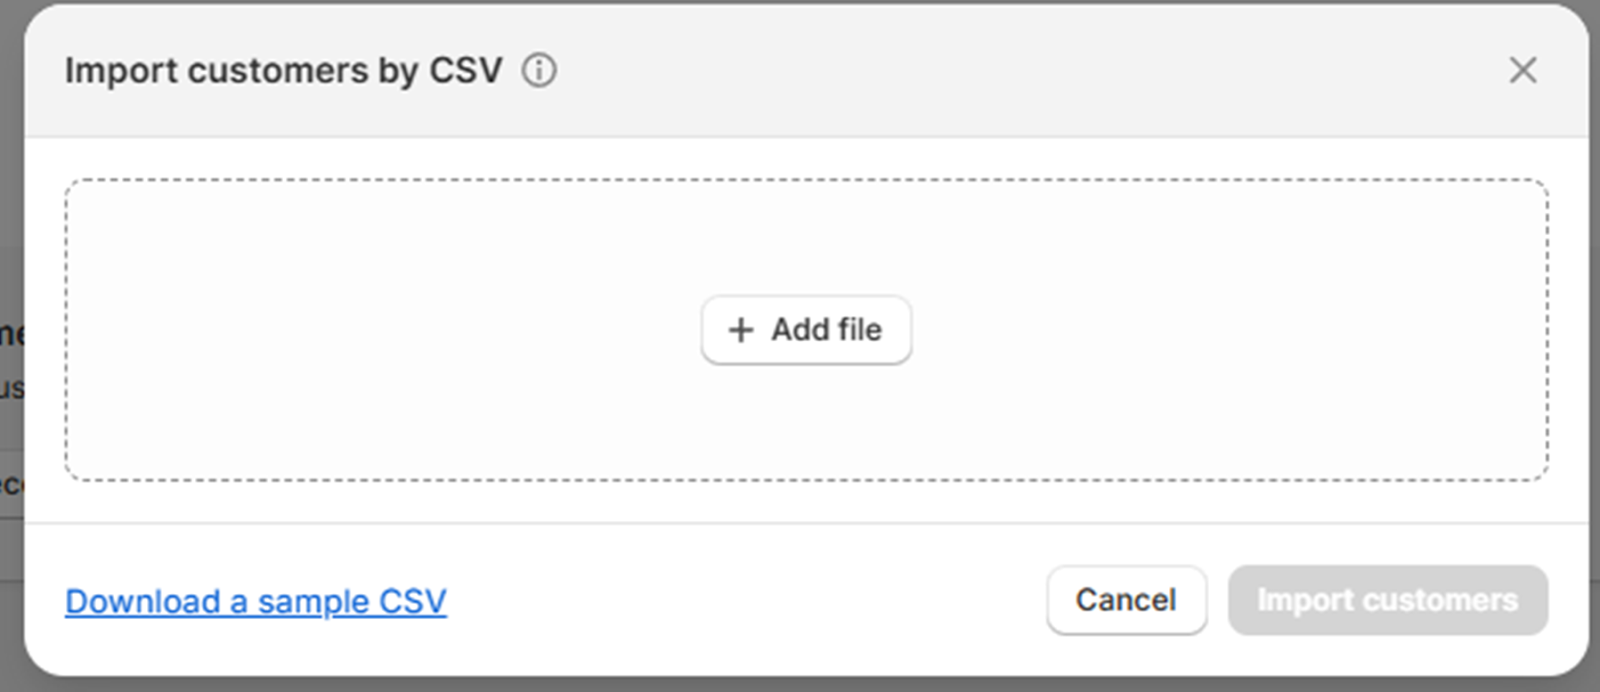
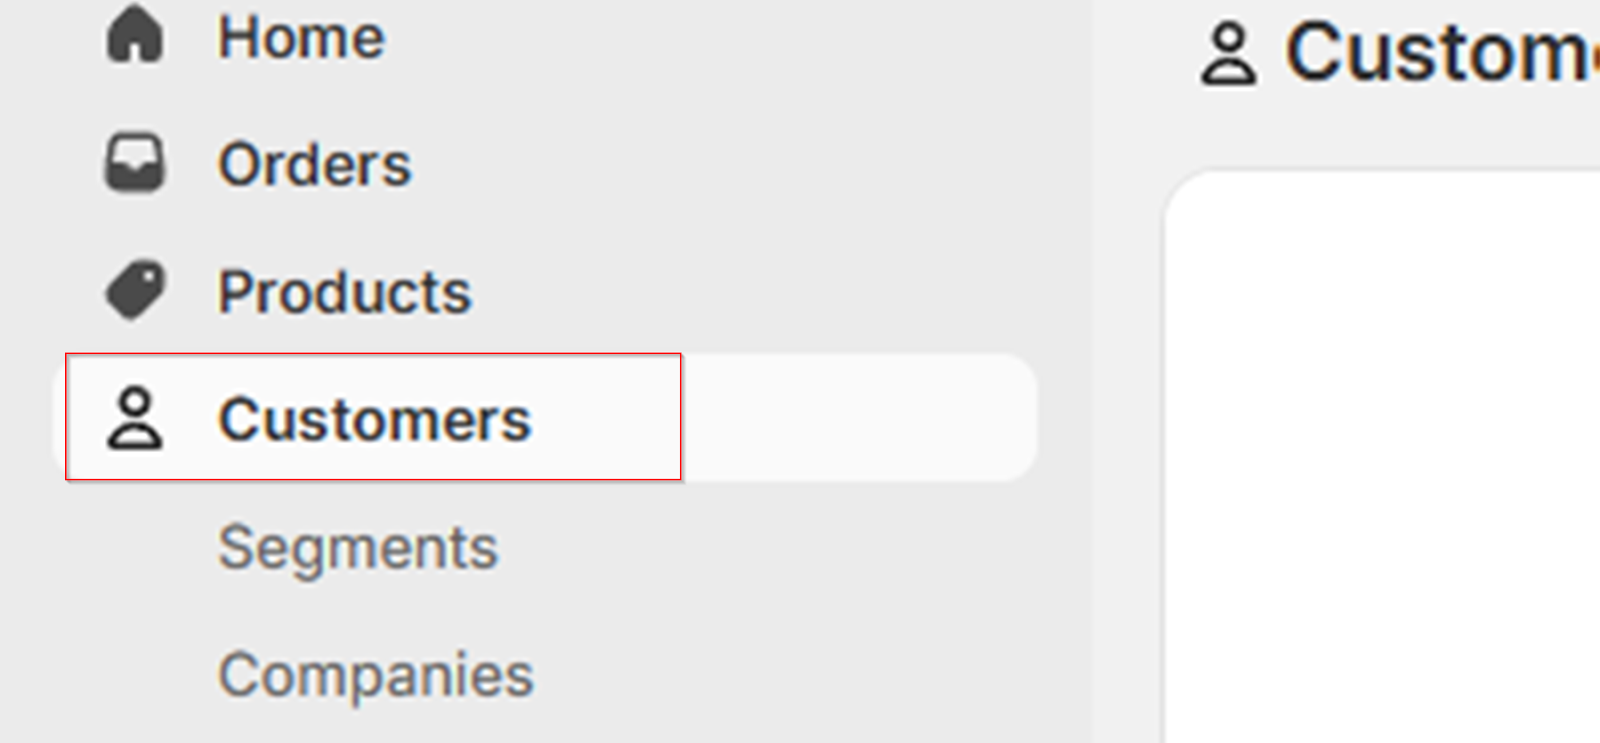
- Go to Shopify Admin → Customers
- Click Import
- Select Download Sample CSV
Now compare your Magento export to Shopify’s expected fields:
| Magento Field | Shopify Equivalent |
|---|---|
| firstname | First Name |
| lastname | Last Name |
| telephone | Phone |
| street, city, etc. | Address1, City, etc. |
| group_id | Tags or Customer Group |
| created_at | Not required, but useful as a custom field |
Make sure:
- Emails are unique and clean
- Phone numbers follow international formatting
- There are no special characters or broken line breaks in address fields
- Optional: Add tags like “wholesale” or “VIP” to segment imported customers
Shopify will automatically associate customers with their order history later if you import orders using the same email address.
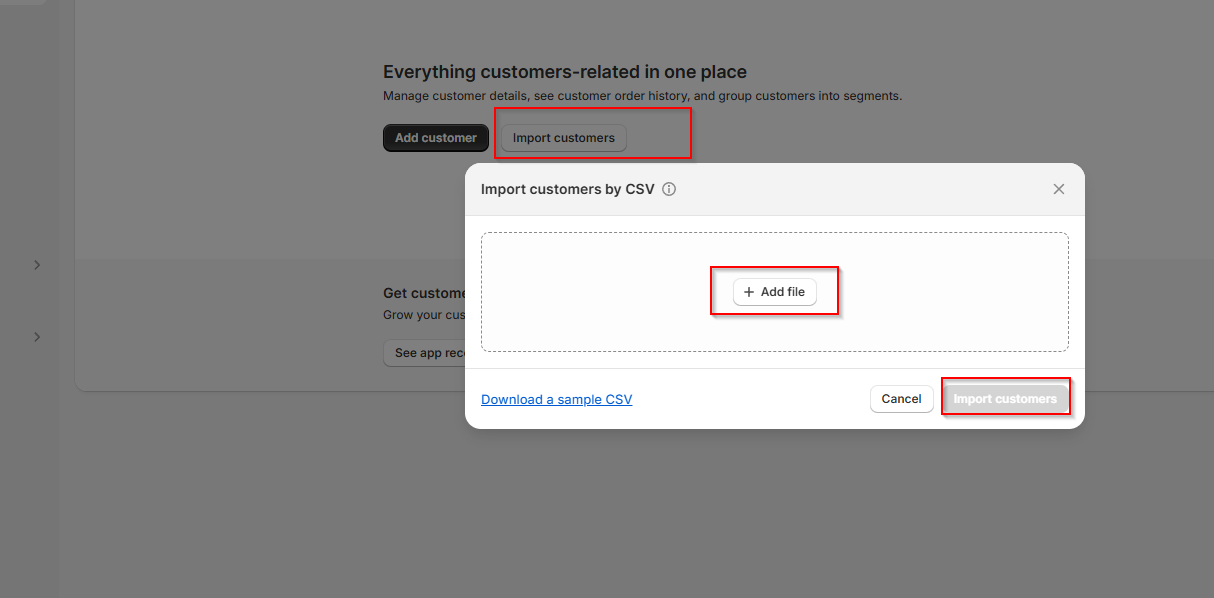
Importing Customers into Shopify
Option A: Shopify Native Import
- Go to Shopify Admin → Customers
- Click Import in the top right
- Upload your formatted CSV
- Preview the customer rows
- Click Import Customers
If there are format errors, Shopify will stop the process and prompt corrections.
Option B: Matrixify (Advanced or Large Datasets)
Matrixify allows bulk importing with rollback support and expanded field mapping (like metafields and multiple tags).
Follow the steps:
- Install Matrixify from the Shopify App Store
- Download the Matrixify Customers template
- Map Magento fields to Matrixify format
- Upload your CSV to the Matrixify dashboard
- Run a Dry Run first to catch errors
- Then execute the full import
Handle Passwords and Customer Account Activation
You can’t import passwords into Shopify; they’re encrypted in Magento and incompatible.
Instead, once your customers are imported:
- Go to Shopify Admin → Customers
- Filter by Imported or Active = No
- Select all, then click Send Account Invite
This sends each customer a secure email with a link to activate their account by creating a new password.
Verify Your Customer Data
Before moving on, spot-check a few customer profiles in Shopify:
| What to Check | Why It Matters |
|---|---|
| Names and emails match | Prevent login issues or duplicates |
| Addresses are correct | Ensures successful shipping and tax rules |
| Tags and groups applied | Allows segmentation for future marketing |
| Account status | Confirm if the invites were sent and accepted |
If you see duplicate profiles, it’s usually due to email mismatches. Fix manually or deduplicate using Matrixify or Shopify Plus tools.
4: Migrate Order History from Magento to Shopify
Order history is a goldmine of insight, and for repeat customers, it’s part of your relationship with them.
While Shopify doesn’t support native order import through the admin panel, you can import historical order records using third-party tools like Matrixify.
In this step, we’ll export your Magento order data, format it correctly, and import it into Shopify as archived orders.
Export Orders from Magento
Magento allows you to export a high-level snapshot of all past orders via the admin panel.
If you need more detail (like product SKUs, taxes, or shipping methods), you’ll need to run a more advanced export or use direct database queries.
Option A: Export via Magento Admin Pane
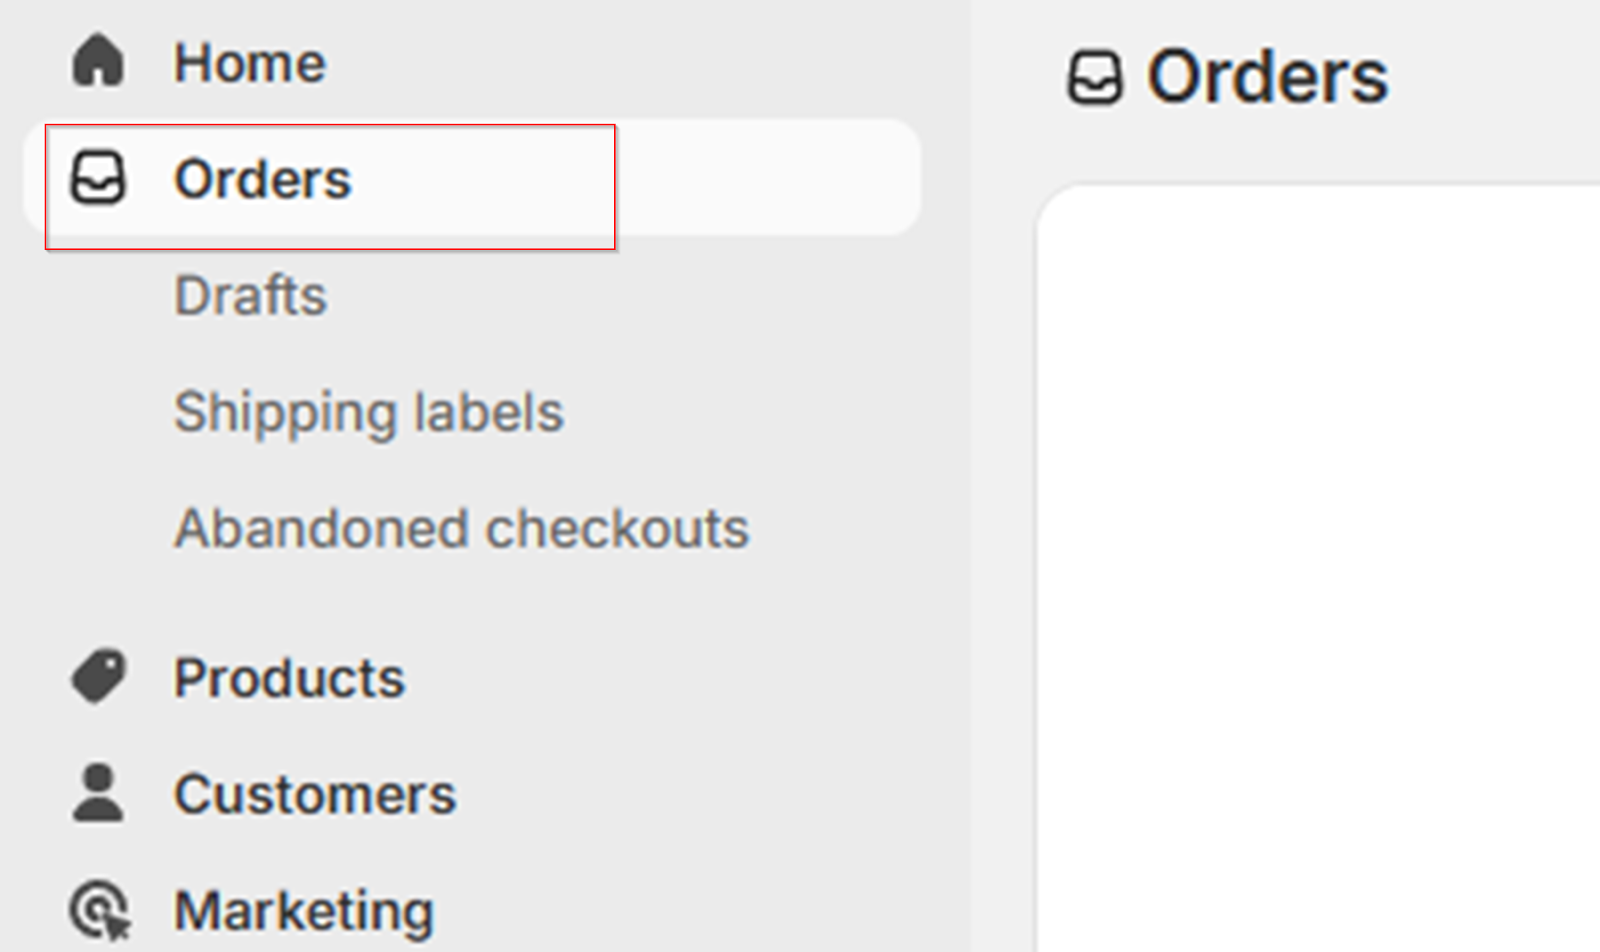
- Go to Sales → Orders
- Use filters to narrow the timeframe if needed
- Click Export → CSV (top right of the grid)
- Download and open the file in Excel or Google Sheets
This file will include:
- Order Number
- Customer Email
- Order Date
- Product Name/SKU
- Quantity
- Order Status
- Total Paid
- Shipping/Billing Address
The CSV might look something like this:
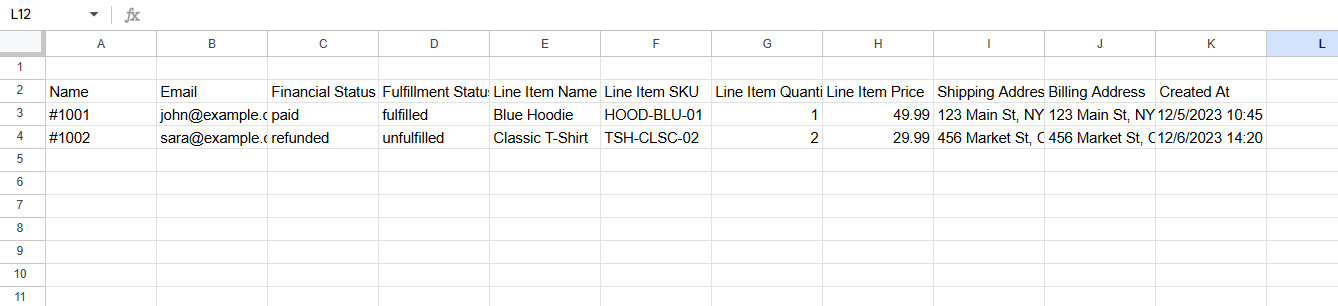
For most stores, this is sufficient, especially if you don’t need line-item taxes or payment gateway logs.
Option B: Export via SQL or Reporting Tools
For a more complete view (e.g., line-item details, order comments, and payment history), you can:
- Run SQL queries on the sales_order and sales_order_item tables
- Use an advanced reporting extension (like Mirasvit or MageReport)
- Or extract via Magento’s API (if available)
These methods are ideal for stores with complex B2B orders, bundles, or custom attributes.
Format Orders for Shopify (via Matrixify)
Shopify cannot import orders via its admin panel. You’ll need to use Matrixify, which supports archived historical orders with line-item data.
Start by downloading Matrixify’s Orders template from their official documentation.
Match your Magento fields to Matrixify’s structure:
| Magento Field | Matrixify Field |
|---|---|
| increment_id | Name (Order #) |
| created_at | Created At |
| customer_email | |
| sku, qty_ordered | Line Item SKU, Quantity |
| grand_total | Total |
| status | Financial Status / Fulfillment Status |
| shipping_address | Shipping Address 1, City, etc. |
| billing_address | Billing Address 1, etc. |
Additional required fields include:
- Currency
- Line Item Price
- Line Item Name
- Gateway (e.g., manual, PayPal)
- Tags (optional: use “imported”, “historic”, etc.)
Make sure SKUs in your order file match those already imported into Shopify; otherwise, the items won’t link correctly.
Import Orders Using Matrixify
Once your CSV is ready:
- Open Matrixify from your Shopify Admin
- Go to the Import section
- Upload your order CSV
- Select Dry Run to preview errors
- Review and fix any warnings (common issues: missing SKUs, date format, or customer mismatch)
- Run the actual Import when ready
Matrixify will import orders as archived records, meaning they:
- Don’t trigger fulfillment
- Don’t show up in your Shopify revenue reports
- But do appear under Orders and on the customer’s profile
These orders are for reference only and are clearly labeled as imported.
Verify Historical Orders
Once imported, go to:
- Shopify Admin → Orders
- Filter by Payment Method = manual or Tags = imported
- Open 5–10 orders and check:
| What to Verify | What You’re Looking For |
|---|---|
| Customer link | Order is tied to correct customer profile |
| SKUs and product names | Match your product catalog |
| Shipping + billing info | Full and correctly formatted |
| Totals and dates | Match Magento export |
| Fulfillment + payment | Set as fulfilled and paid (if appropriate) |
If something looks off:
- Delete the batch from Matrixify
- Correct the CSV
- Reimport using the corrected file
5: Migrate Reviews, SEO Metadata, and Custom Attributes
Reviews, SEO metadata, and custom attributes (like materials, compatibility, or specs) shape how your store ranks and builds trust.
In Magento, these data types are often managed through extensions or the admin panel. Shopify, while more streamlined, requires apps or metafields to support similar functionality. This step ensures nothing gets lost.
Migrate Product Reviews from Magento
If you’re using Magento’s built-in review system:
- Go to Marketing → User Content → Reviews
- Use filters to select all reviews
- Click Export
- Choose CSV format and download
Your file should include:
- Product Name
- SKU or Product ID
- Reviewer Name
- Rating
- Review Title
- Review Body
- Date Created
Next, choose a compatible Shopify review app. Popular options include:
| App | Features | CSV Import Support |
|---|---|---|
| Loox | Photo reviews, automated emails | Yes |
| Judge.me | Free plan, Q&A section, and syndication | Yes |
| Stamped.io | Integrates with Klaviyo, loyalty | Yes |
Once formatted:
- Go to the review app dashboard
- Choose Import Reviews
- Upload your CSV and wait for confirmation
Most apps support batch uploads of 1,000–10,000 reviews, depending on the plan.
Migrate SEO Metadata (Titles & Descriptions)
This is important for preserving your rankings and reducing traffic loss post-migration.
Magento stores SEO metadata per product, category, and CMS page.
To export:
- Go to Catalog → Products
- Add columns for:
- Meta Title
- Meta Description
- URL Key
- Export as CSV
Repeat for Categories and Pages if needed.
Once done, apply SEO data in Shopify.
- Go to Products → [Product Name]
- Scroll to Search Engine Listing Preview
- Click Edit

- Paste your Magento Meta Title and Meta Description
- Update the URL to match the old slug if possible
For bulk updates, use:
- Shopify’s product CSV template, or
- Matrixify, if you’re already using it
Handle Custom Attributes (Magento to Shopify Metafields)
Magento stores product specs like dimensions, material, compatibility, or warranty as attributes.
In Shopify, these are added using Metafields.
Make a short list:
| Magento Attribute | Example Value | Needed in Shopify? |
|---|---|---|
| Material | 100% Cotton | Yes |
| Battery Life | 10 hours | Yes |
| Compatible With | iPhone 12, 13 | Yes |
| Internal Notes | (admin-only) | No |
Now, it’s time to create metafields in Shopify.
- Go to Settings → Custom Data → Products
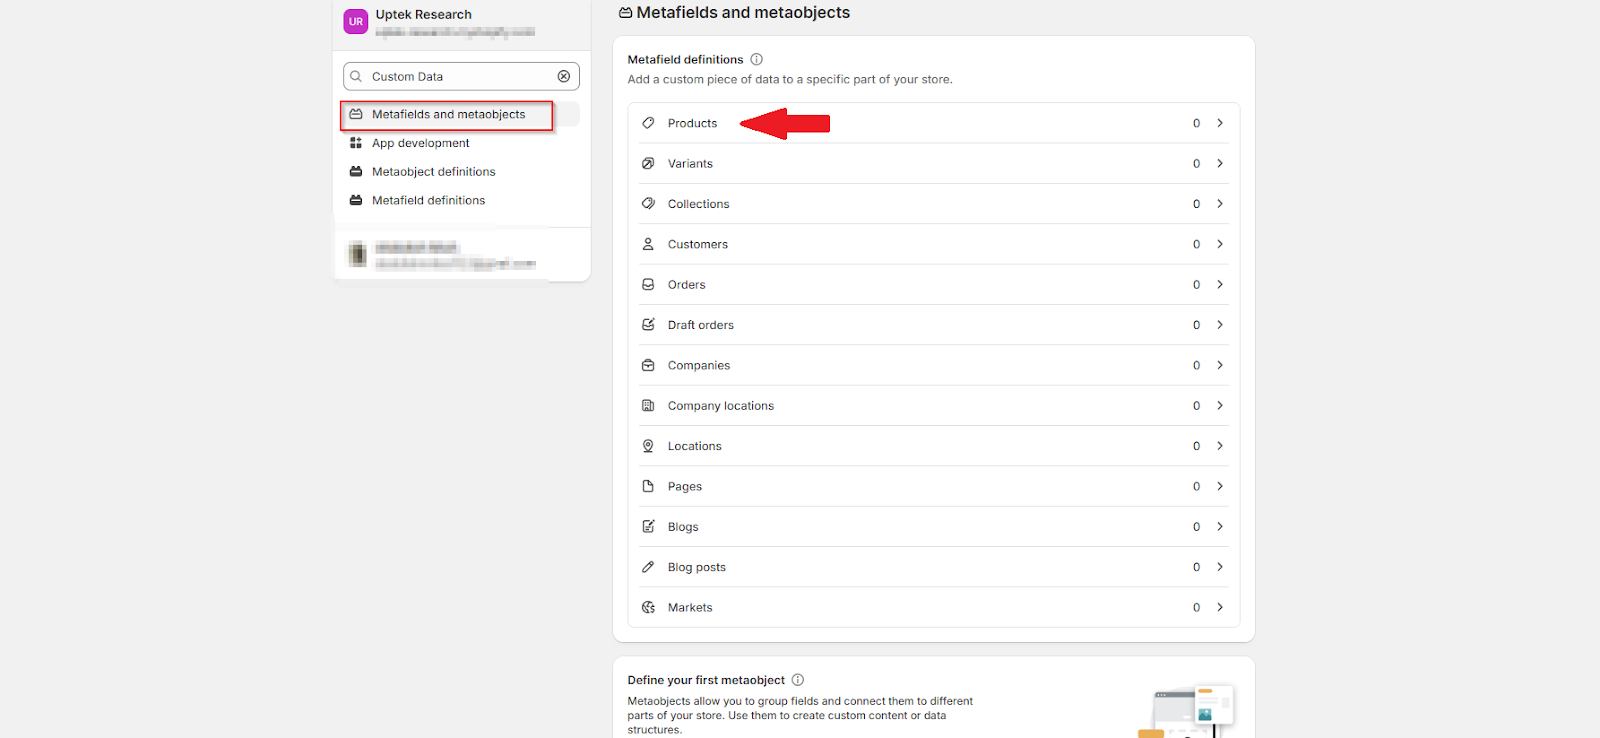
- Click Add Definition
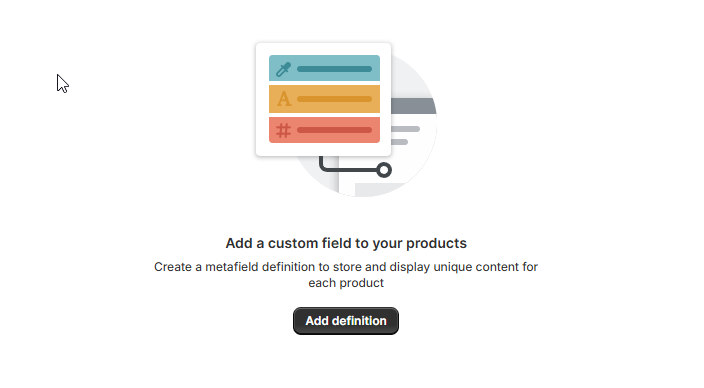
- Set a Name (e.g., “Material”)
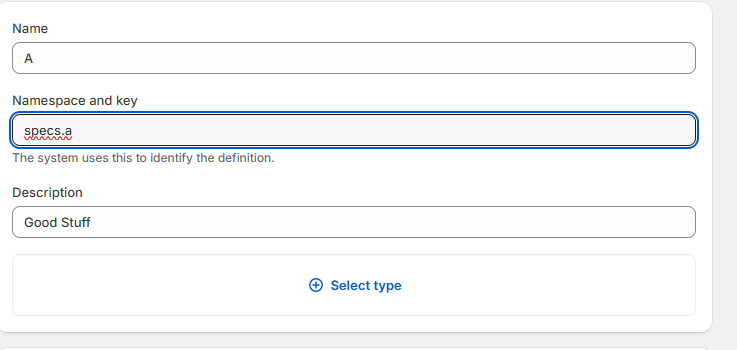
- Choose a content type (e.g., Text, Number)
- Set namespace/key (e.g., specs.material)
- Save
6: Rebuild Storefront Pages and Navigation in Shopify
Your data might be migrated, but unless your home page, policy pages, blogs, and navigation feel cohesive, your store won’t feel complete.
This section walks you through how to recreate essential pages, optimize layouts, and rebuild your menu structure, all using Shopify’s built-in design tools.
Recreate Static Pages (About, Contact, FAQs, Policies)
Magento stores your static content under Content → Pages. You’ll need to manually transfer each page into Shopify.
To do that:
- Open each important page (About Us, Privacy Policy, etc.)
- Copy the title, page content, and URL slug
- Paste them into a Google Doc for safekeeping
Then in Shopify:
- Go to Online Store → Pages
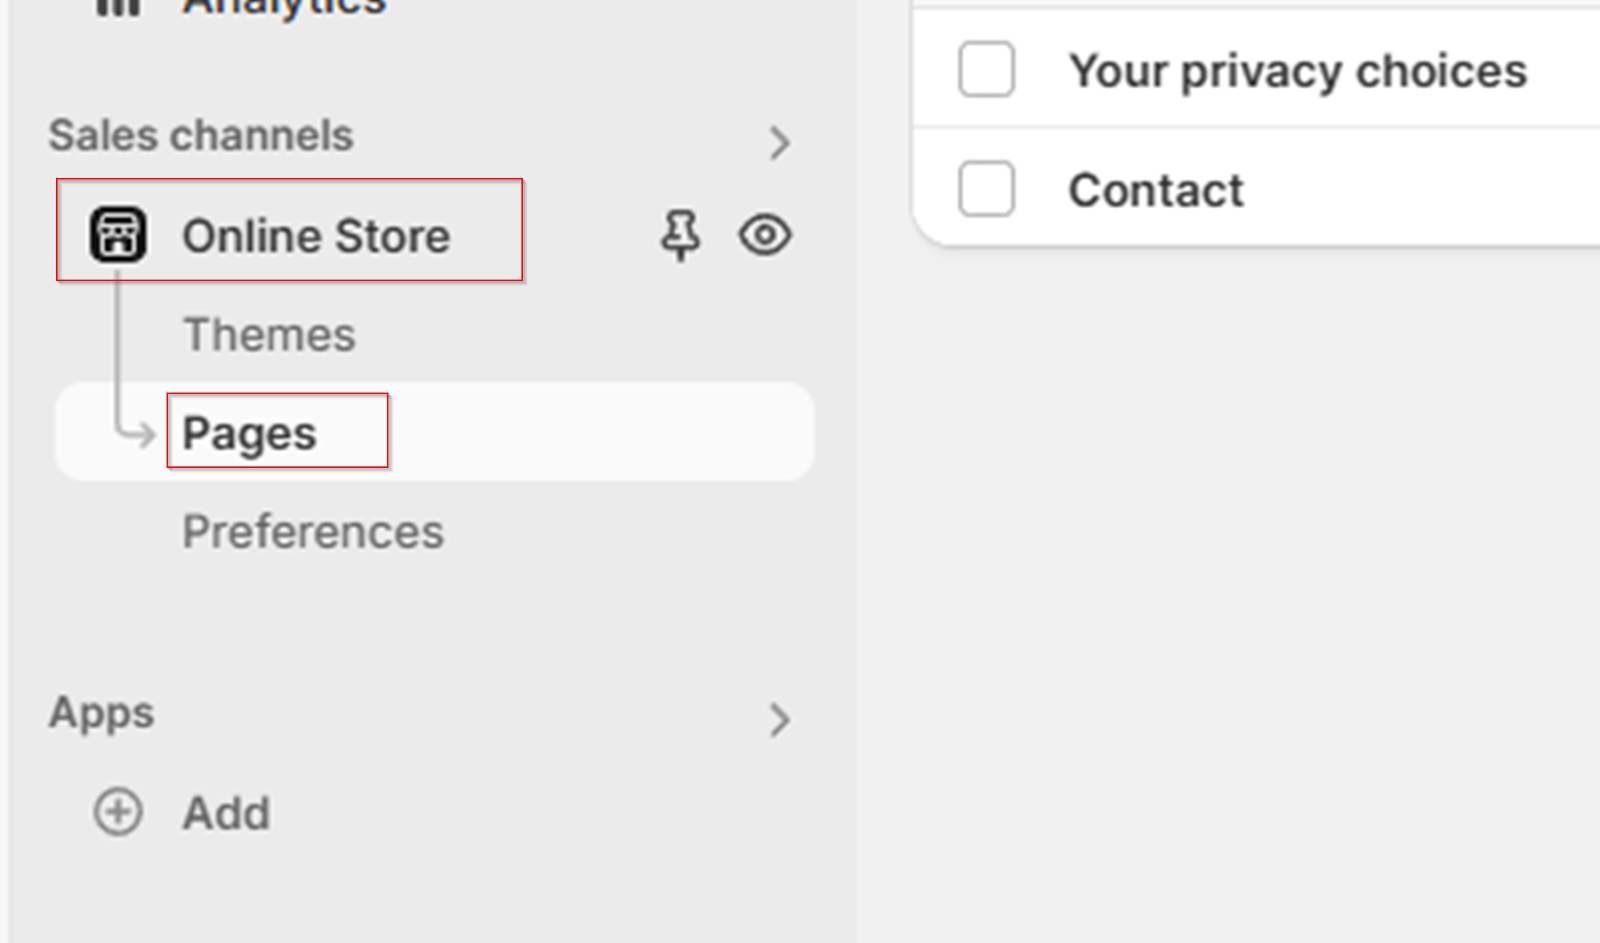
- Click Add Page
- Paste the copied title and content
- Under “Search Engine Listing Preview,” match the old Magento URL (e.g., /about-us)
- Click Save
Shopify also generates policy templates under Settings → Policies, but you can overwrite those with your original content to maintain tone and SEO structure.
Migrate Blog Content
If you published blog content on Magento (or externally on WordPress), it won’t transfer automatically. You’ll need to recreate each post manually or use an import app.
If your blog was hosted inside Magento:
- Copy each post’s title, content, featured image, and slug
- In Shopify, go to Online Store → Blog Posts
- Click Create Blog Post
- Paste the content, match the URL, and manually set the publish date
If your blog was on WordPress:
- Use the BlogFeeder app to import posts, or
- Manually copy each post into Shopify’s blog interface
Note: Shopify’s native blog system is simple and lightweight. For richer formatting and layout control, apps like Bloggle or DropInBlog offer more flexibility.
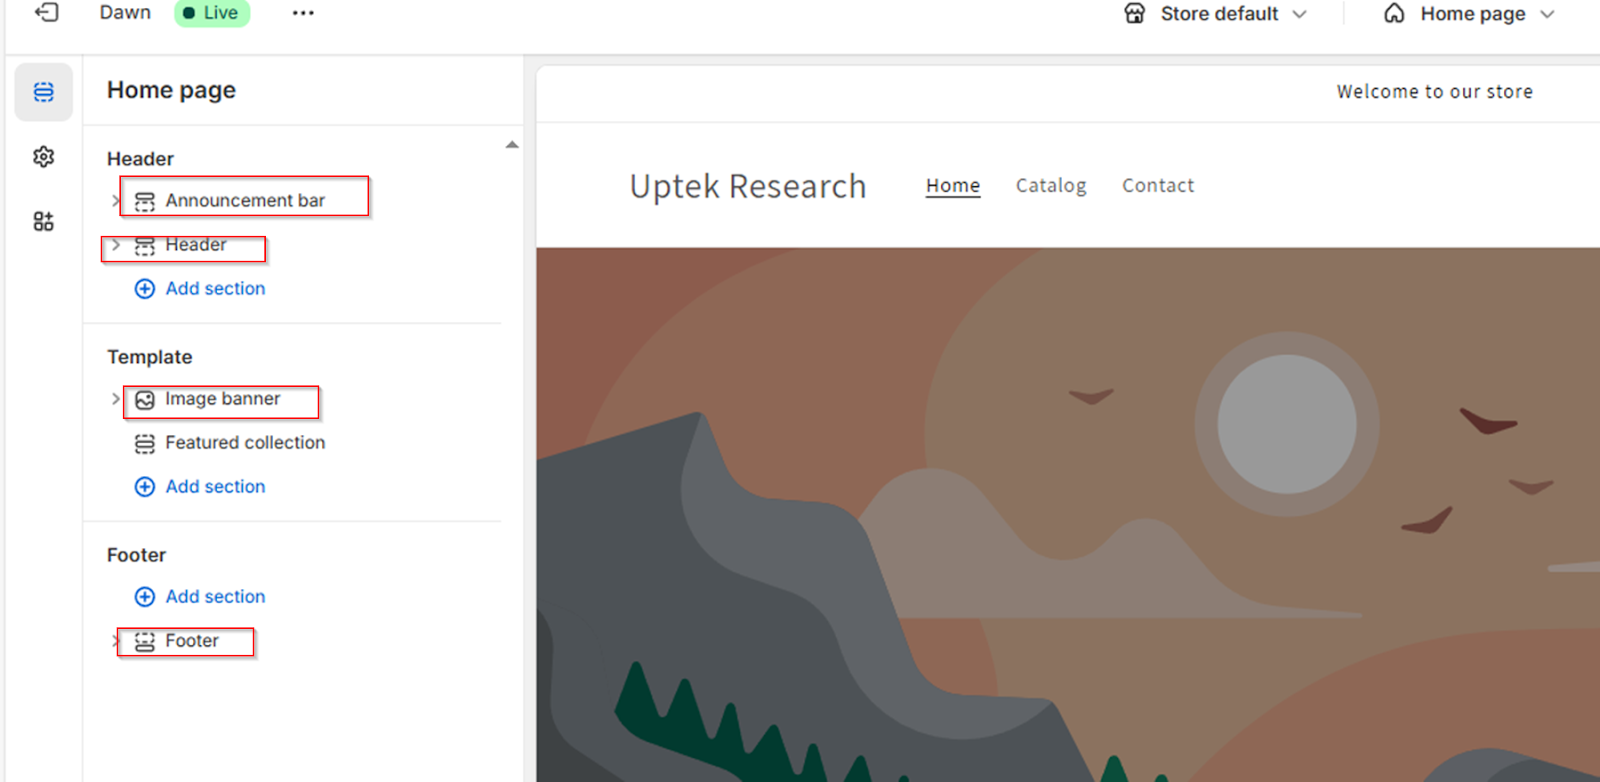
Set Up the Home Page Layout
Shopify’s home page uses a block-based layout called Sections.
To access:
- Go to Online Store → Themes → Customize
You’ll see common homepage sections like:
- Image banner or slideshow
- Featured products or collections
- Text and image blocks
- Email signup
- Testimonials
- Blog previews
Here’s how common Magento elements map to Shopify:
| Magento Section | Shopify Equivalent |
|---|---|
| Hero slider | Image Banner or Slideshow |
| Promo tiles | Image with Text or Text Columns |
| Category grid | Featured Collection |
| Testimonials | Rich Text or App Block |
| Blog preview | Blog Posts Section |
Use Shopify’s drag-and-drop builder to arrange the layout. All sections are mobile-responsive by default.
Tip: Want more creative control? Use a third-party builder like PageFly or Shogun to build fully custom landing pages.
Rebuild Navigation Menus
Magento menus are tied to your category structure, but Shopify uses manual menus that are easier to control.
Go to Online Store → Navigation to set up:
Main Menu:
Click on Main Menu → Add items like:
- Shop → link to All Products or a Collection
- About → link to your “About Us” page
- Contact → link to your contact form
- Blog → link to your blog homepage
Use drag-and-drop to reorder.
Dropdown / Nested Menus:
Shopify supports dropdowns by nesting menu items. For example:
nginx
CopyEdit
Shop
Men’s Collection
Women’s Collection
Simply drag the sub-items slightly to the right under the parent menu item to create the dropdown.
Footer Menu:
Click Footer Menu and add links like:
- About Us
- FAQ
- Shipping Info
- Return Policy
- Contact
The footer menu helps visitors find important info quickly from any page.
7: Finalize Store Settings: Payments, Checkout, Shipping, and Launch Checklist
You’ve migrated the data, rebuilt your storefront, and things are looking good. Now it’s time to set up the backbone of your store: payments, shipping, checkout, taxes, and domain.
These last few configurations are what make the difference between a test site and a fully operational business.
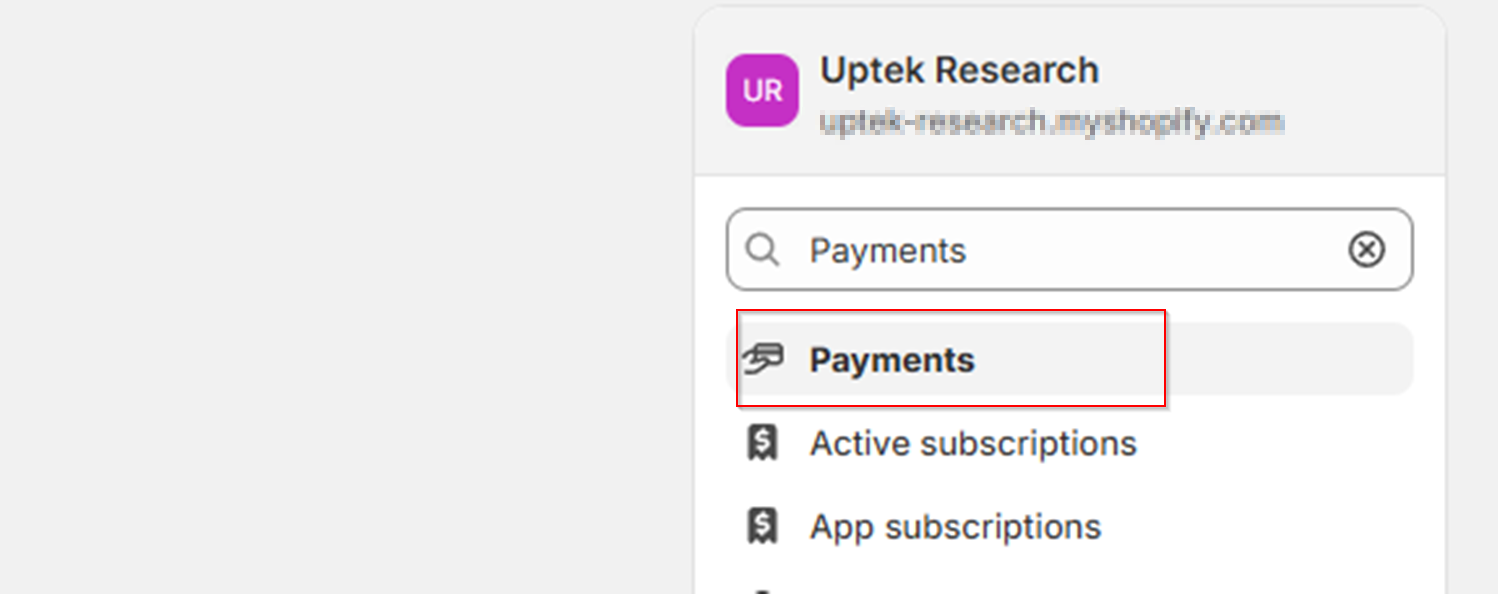
Activate Your Payment Gateway
To start accepting payments, head to Settings → Payments in your Shopify dashboard.
The most common and recommended option is Shopify Payments as it supports all major credit cards and digital wallets (like Apple Pay, Google Pay, etc.), with 0% additional transaction fees.
To activate:
- Select Shopify Payments and enter your business + banking info
- Enable test mode temporarily if you want to simulate purchases
- Optionally, add PayPal or manual methods like Cash on Delivery
If you’re using Stripe or another third-party gateway, you can connect those instead, but note that some may charge extra transaction fees.
Configure the Checkout Experience:
Navigate to Settings → Checkout to customize how your customers check out.
Key settings to review:
| Setting | Recommendation |
|---|---|
| Customer accounts | Optional or Required |
| Email/Phone collection | Choose Email for better deliverability |
| Order status page script | Add custom messaging or tracking if needed |
| Abandoned cart emails | Enable them to recover lost sales |
Enable fraud prevention and CAPTCHA for security, especially if you’re expecting high traffic or international buyers.
Set Up Shipping Zones and Rates:
Shipping setup lives under Settings → Shipping and Delivery.
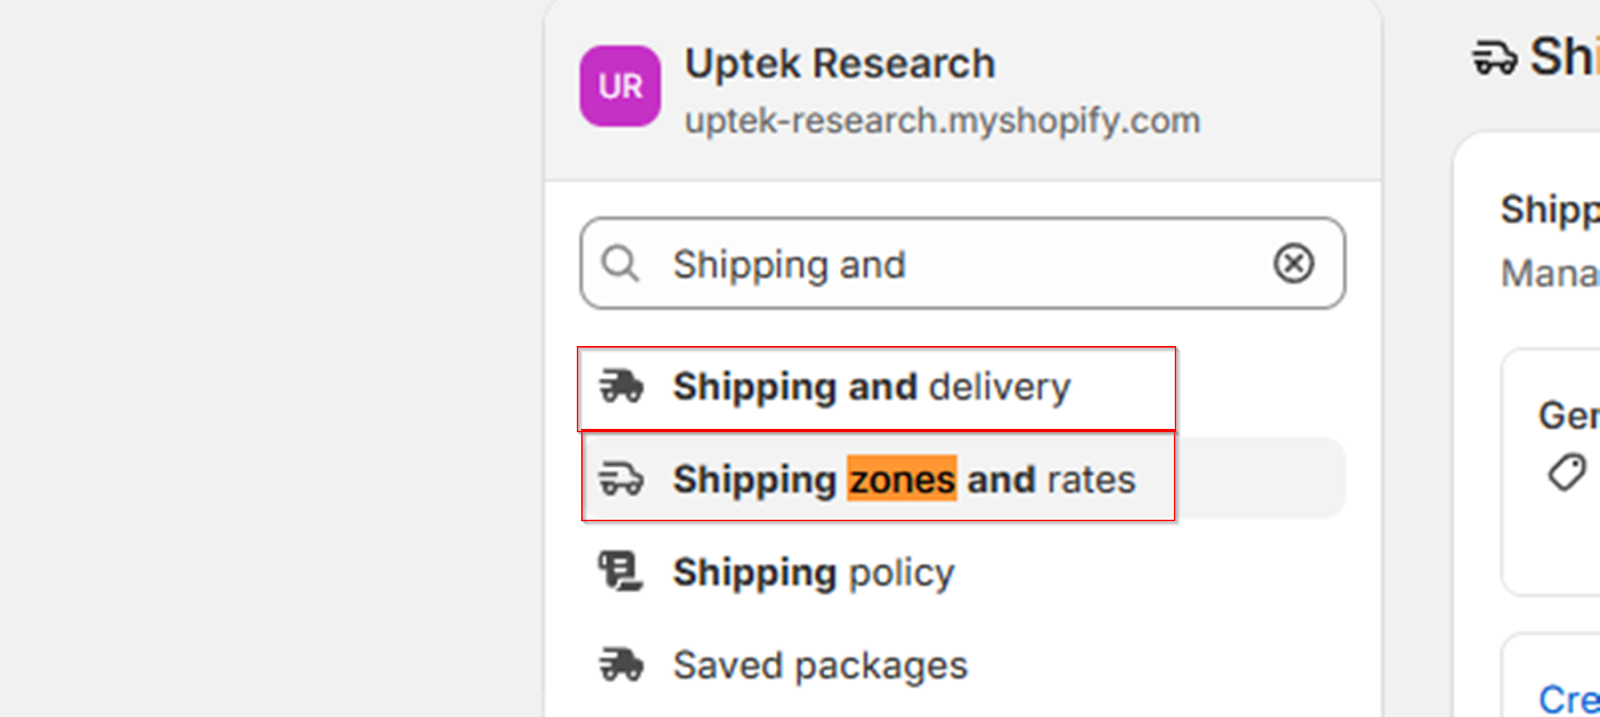
Here, you’ll define:
- Shipping zones: e.g., US, Canada, Europe
- Rates: flat rate, free shipping, or carrier-calculated (UPS, USPS)
Some common use cases:
| Shipping Strategy | Setup Notes |
|---|---|
| Flat Rate ($5/$10) | Easy to set up, good for simplicity |
| Free Shipping Over $X | Add a condition based on order total |
| Real-time Carrier Rates | Use Shopify Shipping or third-party plugins |
| Local Delivery | Configure radius and delivery instructions |
Make sure shipping rules are tested at checkout before going live, especially if you sell bulky or international products.
Connect Your Domain
If you’re using a custom domain (like yourbrand.com), connect it now via Settings → Domains.
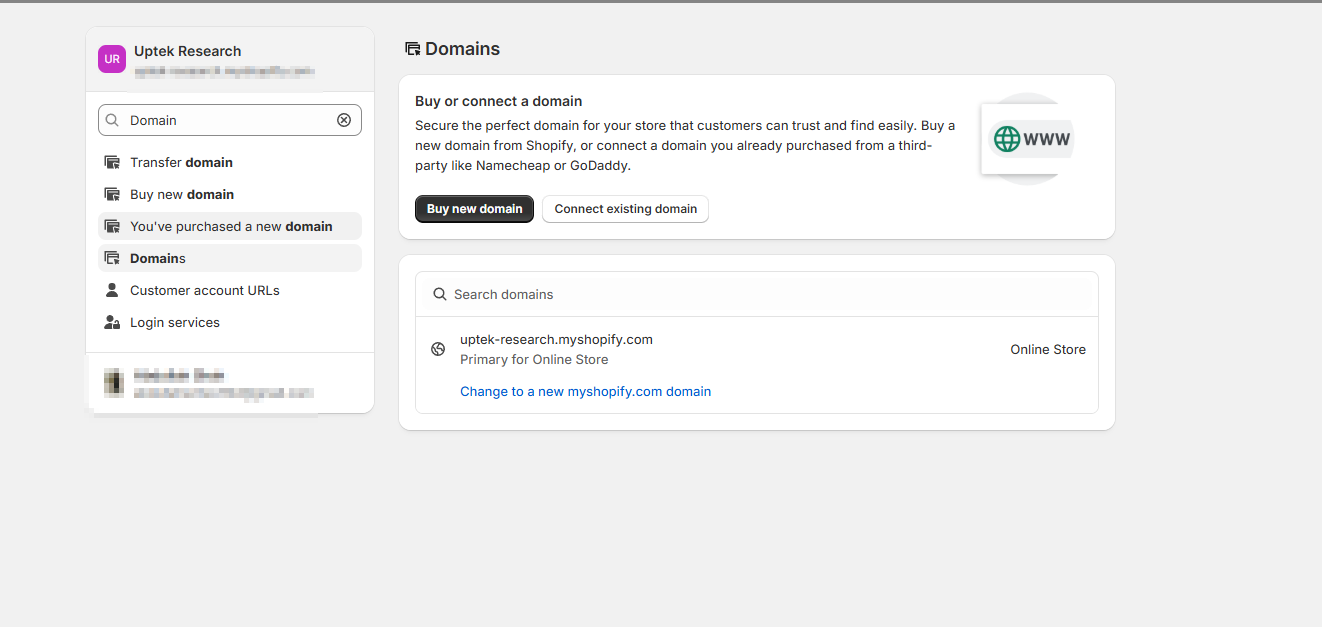
You can:
- Buy a new domain from Shopify
- Connect an existing one from another registrar (like GoDaddy or Namecheap)
Follow the on-screen DNS instructions. Shopify will guide you step-by-step. Make sure the SSL certificate is active (Shopify handles this automatically).
Enable Taxes and Add Legal Policies
Under Settings → Taxes, Shopify automatically calculates sales tax for most regions (U.S., Canada, EU).
Review each tax jurisdiction and verify:
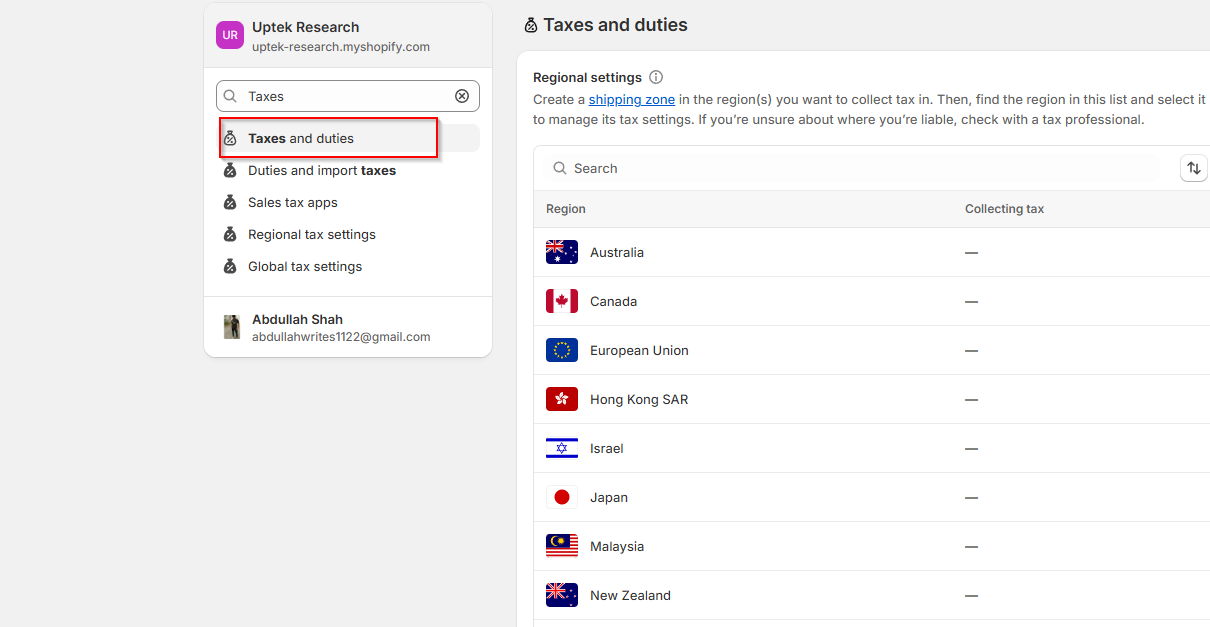
- Tax collection is enabled
- Shipping is taxed (if applicable in your state or country)
- VAT/GST details are correct (if you’re operating internationally)
Under Settings → Policies, paste in your:
- Refund Policy
- Privacy Policy
- Terms of Service
- Shipping Policy
These pages appear in your footer and at checkout for compliance.
How to Validate Your Imported Data: Final Q/A:
Use this as your final pre-launch QA to make sure everything migrated properly, and your store is functional, accurate, and customer-ready.
| What to Check | What to Look For | How to Fix It or Confirm |
|---|---|---|
| Product Listings | All products appear with correct titles, prices, variants, and inventory counts | Compare against the original Magento CSV or frontend |
| Images | Product images load correctly, especially variant-specific ones | Check for missing URLs or broken links in the import file |
| Collections (Categories) | Products appear under the correct collections | Review auto-tag rules or manually add missing products |
| Product Descriptions | HTML/formatted content displays cleanly | Fix any malformed HTML or reformat it in the Shopify editor |
| SEO Metadata | Meta titles and descriptions appear as intended | Check in Shopify under each product/page SEO settings |
| Redirects | Old Magento URLs correctly redirect to Shopify equivalents | Test using a browser or SEO crawl tools |
| Customer Records | Customer names, emails, and addresses are imported properly | Spot-check 5–10 customer profiles |
| Orders (if migrated) | Historical orders show correct items, totals, and dates | Use Matrixify reports for errors or missing references |
| Reviews | Imported reviews match the correct products | Validate via your review app (e.g., Judge.me dashboard) |
| Navigation Menus | Header and footer links work and lead to the correct destinations | Test on desktop and mobile views |
| Checkout Process | Cart, discount codes, and payment flows function end-to-end | Place test orders with different products |
| Store Speed & Performance | Pages load quickly, especially product and collection pages | Use tools like PageSpeed Insights or GTmetrix |
Magento to Shopify Migrations: 5 Common Mistakes!
Talk to anyone who’s been through a Magento-to-Shopify migration, and they’ll likely tell you it was more painful than expected.
Not because the platforms are bad, but because most people underestimate the structural differences.
Here are the 5 most ignored reasons why stores launch late, lose SEO rankings, or end up with broken product catalogs.
Data Inconsistencies Go Unnoticed:
One of the biggest culprits is data inconsistency.
Magento gives store owners extreme flexibility, which often results in products missing SKUs, attribute mismatches, or duplicated categories still tied to live products.
Shopify, on the other hand, expects clean, structured data. When your CSVs don’t match that standard, the result is broken variants and failed imports.
Complex Products Don’t Translate Cleanly:
Then there’s the issue of complex product configurations.
Magento supports deeply layered products with multiple option levels, custom child SKUs, and dynamic pricing logic.
Shopify doesn’t.
It caps you at three options and 100 total variants. That’s a hard limit. If you’re coming in with size, color, material, and sleeve type, you’re going to hit a wall fast.
Custom Features Aren’t Automatically Transferable:
The third challenge is the quiet killer. Custom features and business logic.
Magento stores often rely on bespoke modules like tiered B2B pricing, advanced shipping conditions, scheduled promotions, or wholesale portals tied to customer groups.
Shopify won’t carry these over. Not even with Plus. Every custom behavior needs to be rebuilt using apps, workarounds, or native tools.
The mistake most people make? Assuming there’s a “Shopify version” of everything.
SEO Damage from Unmapped URLs:
Even SEO, something many store owners don’t think about until traffic tanks, becomes a landmine.
Magento uses .html URLs, category-heavy slugs, and URL rewrites. Shopify does not.
If you launch without redirecting old URLs properly, you risk losing years of search rankings and backlinks. This happens more often than people admit, and the fix isn’t hard, but it has to be planned.
Platform Mindset Mismatch:
Lastly, there’s the bigger-picture issue: platform mindset.
Magento is customizable, code-first, and developer-centric. Shopify is structured, streamlined, and intentionally limited to keep things stable. Trying to “port over” the exact experience from one to the other usually fails.
FAQs About Magento to Shopify Migration
1. Can I run both stores in parallel during the transition?
Yes, many store owners keep Magento live while they build and test Shopify in the background.
This allows you to soft-launch, validate functionality, and switch domains only when you’re ready. Just be sure to manage inventory separately during the overlap to avoid order sync issues.
2. Will I lose my Magento extensions and their functionality?
Yes, Magento extensions won’t carry over.
However, many Shopify apps offer equivalent functionality, often with simpler setups. In rare cases, custom app development or Shopify Plus features may be needed.
3. How should I handle international stores or currencies?
If you’re running multi-store Magento setups for different countries, you’ll need to use Shopify Markets or expand using Shopify Plus. Shopify supports multi-currency and multi-language, but implementation depends on your plan and storefront setup.
4. What if I need to pause the migration midway?
You can pause, but consistency is key. If you’ve imported partial data (e.g., customers but not orders), ensure you document everything and maintain version control of your CSVs.
5. Can I migrate subscriptions or recurring billing products?
Not natively. Shopify doesn’t support subscription products out of the box. You’ll need a third-party app like Recharge or Loop to replicate that functionality.
Final Thoughts:
Migrating from Magento to Shopify is a strategic reset.
But it demands planning, precision, and an understanding of the subtle differences between both platforms. The businesses that succeed are the ones that adapt smartly.
Take your time, validate every step, and treat the migration not as a burden, but as an opportunity to streamline and grow.
And if you’re still unsure, let the experts at Uptek handle your migration.