How to Migrate from BigCommerce to Shopify
At some point, every growing eCommerce business hits a ceiling.
And for many BigCommerce users, that ceiling looks like
- Limited design flexibility
- Rising development costs
- An outdated app ecosystem
Shopify offers a modern alternative in the form of a flexible, fast, and highly integrable platform.
That’s why more and more merchants are making the switch.
This guide walks you through the entire BigCommerce-to-Shopify migration process, step by step, with zero room for guesswork.
Why Migrate from BigCommerce to Shopify? Is It Worth It?
While BigCommerce serves many businesses well, it often becomes harder to scale without developer support.
Shopify, on the other hand, focuses on usability, performance, and a deep third-party ecosystem, making it easier for non-technical teams to run and grow an online store.
Here’s how they stack up in the areas that matter most:
| Feature/Need | BigCommerce | Shopify |
|---|---|---|
| Ease of Use | More complex dashboard, dev-friendly | Beginner-friendly UI, intuitive workflows |
| App Ecosystem | Smaller marketplace | 8,000+ apps with stronger integrations |
| Theme Customization | Limited drag-and-drop options | Fully customizable (especially with OS 2.0) |
| Checkout Optimization | Basic options, limited extensibility | One-page checkout, high-converting flow |
| Support & Resources | Ticket-based + dev docs | 24/7 live chat + large community |
| Scalability for Non-Devs | More dev-dependence over time | Easily scalable with apps and automation |
For most modern DTC and B2B brands, Shopify is a competitive edge.
Let’s walk through exactly how to migrate without breaking a thing.
Pre-Migration Checklist: What to Do Before Leaving BigCommerce
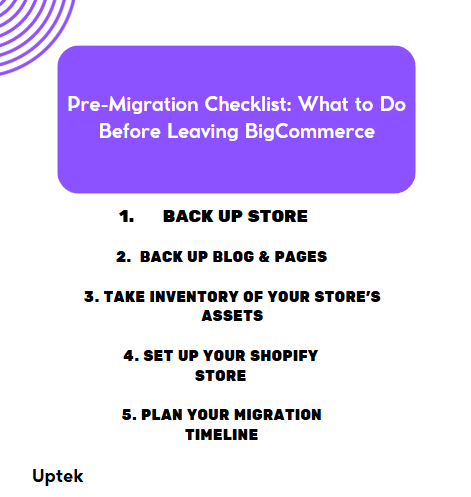
Before migrating, preparation is everything. Backing up the right data, auditing what you need, and setting up Shopify correctly ensures the move is smooth and scalable.
Below is your complete prep roadmap.
1: Back Up Your BigCommerce Store
Never migrate without creating a full snapshot of your store’s data.
BigCommerce doesn’t auto-store historical versions, so if something breaks, you’ll need a fallback.
- Download full exports of your product, customer, and order data as CSVs
- Take screenshots of key store settings (shipping, taxes, payment)
- Copy theme files or custom code if used
- Export CMS content (pages, blog posts) manually or with an app
- Save backups securely in cloud storage (e.g., Google Drive or Dropbox)
- Label each file clearly with date + data type for easy reference
2: Back Up Blog & Pages
If your site has blog posts or policy pages:
- Go to Storefront > Web Pages.
- Manually copy content or use a third-party backup tool.
- Store in Google Docs or Notion to paste into Shopify later.
3: Take Inventory of Your Store’s Assets
During the migration, it’s not just about data. Store owners are moving structure, functionality, and SEO history.
Know the important store elements such as:
- Custom fields/modifiers
- Category structure (for mapping to Shopify collections)
- Product filtering logic
- Page URLs (to create redirect map)
- Apps or extensions that power current store features
- Embedded scripts or 3rd-party tools (chat, analytics, subscriptions, etc.)
Document everything in a spreadsheet. If a feature is essential, we’ll need to replicate it in Shopify using native tools or apps.
4: Choose the Right Shopify Plan
Shopify has 3 core plans, and Shopify Plus for enterprise.
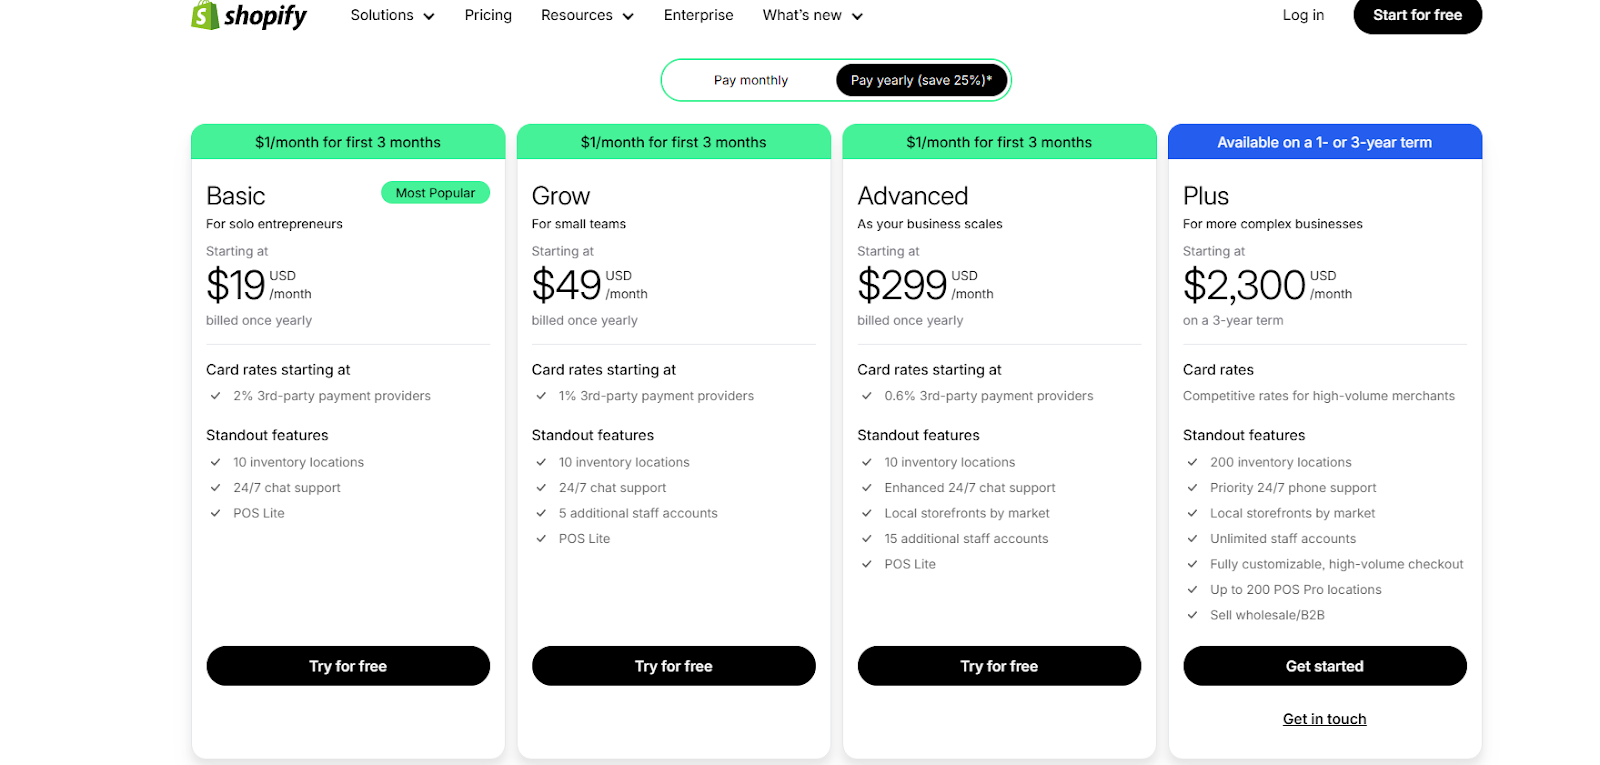
Here’s a short comparison to explain their differences.
| Plan | Best For |
|---|---|
| Basic Shopify | Small stores with basic needs |
| Shopify | Growing stores need reporting an scaling |
| Advanced Shopify | Larger stores with complex shipping, automation |
| Shopify Plus | Enterprise or high-volume brands (>$ 1 M+) |
Make sure the plan you pick supports:
- Staff accounts
- API calls (if using apps)
- Reports and automation (for scaling needs)
Insider Secret: Most BigCommerce merchants land on Shopify or Advanced Shopify for feature parity.
5: Set Up Your Shopify Store
Once your plan is selected, it’s time to initialize your store, but don’t worry about launching yet.
We’ll do that later.
First:
Create Your Shopify Store

- Go to shopify.com
- Start free trial or log in
- Add your store name, which will generate your Shopify URL (e.g., mybrand.myshopify.com)
- Choose the primary country and language
Configure Legal Settings
Go to:
- Settings > Store Details
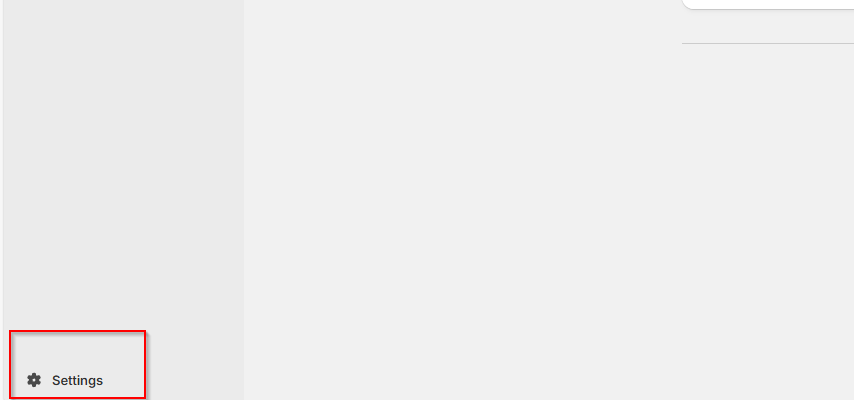
- Set your currency, timezone, and store address
- Add basic legal pages: Privacy, Terms, Refund (or paste BigCommerce versions)
6: Plan Your Migration Timeline
Migration should not be rushed. Plan it around your low-traffic window and allocate time for testing.
A checklist would look like:
- Freeze changes in BigCommerce 24–48 hours before final export
- Notify the staff or the fulfillment team of the migration window
- Create temporary password protection for your new Shopify store
- Prepare soft launch window (no ads, no email flows until QA is complete)
How to Migrate from BigCommerce to Shopify – A Step-By-Step Guide:
Many merchants are making the move to Shopify’s flexibility, app ecosystem, and ease of use.
But migration can feel overwhelming if you don’t have a clear roadmap.
That’s exactly why this guide breaks down every step so you can confidently make the transition without missing a beat.
Firstly:
1: Migrate Products from BigCommerce to Shopify
Products are the backbone of your business. And migrating them is about making sure every detail lands in Shopify with the right format, structure, and images intact.
Let’s walk through the process from export to import.
Export Products from BigCommerce
To begin, you’ll need to generate a clean CSV export from BigCommerce.
This file will include all your products, variants, SKUs, images, and descriptions.
Here’s how to do it:
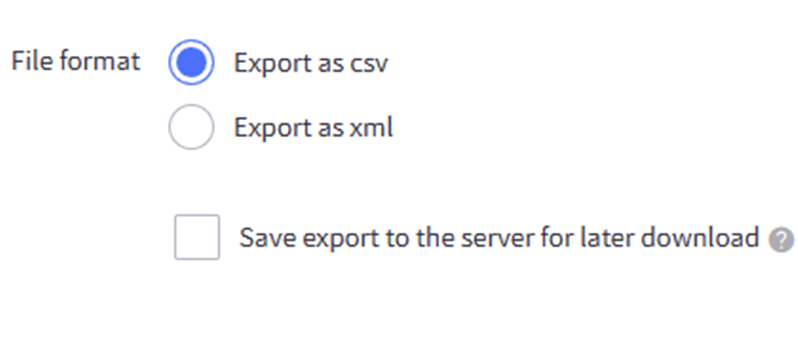
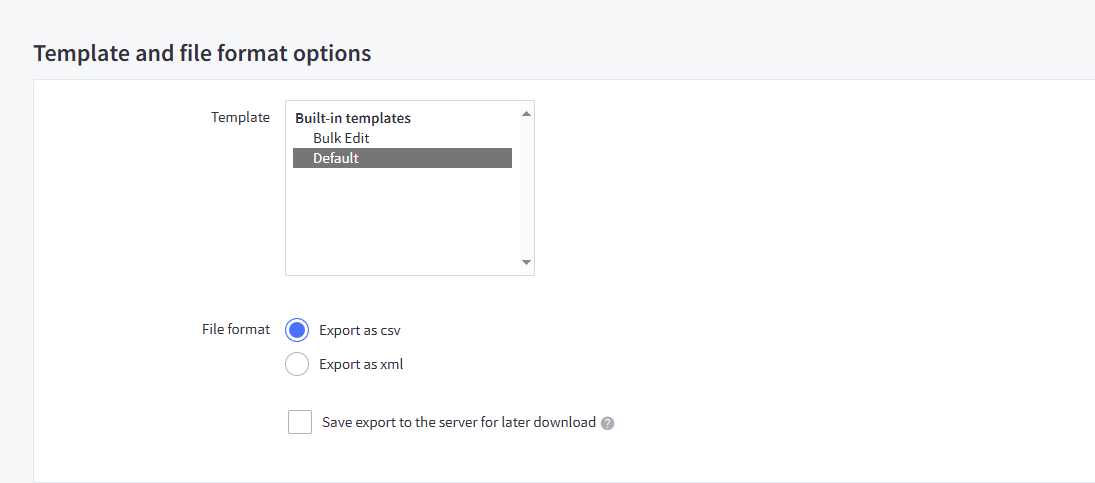
- In your BigCommerce dashboard, go to Products → Export
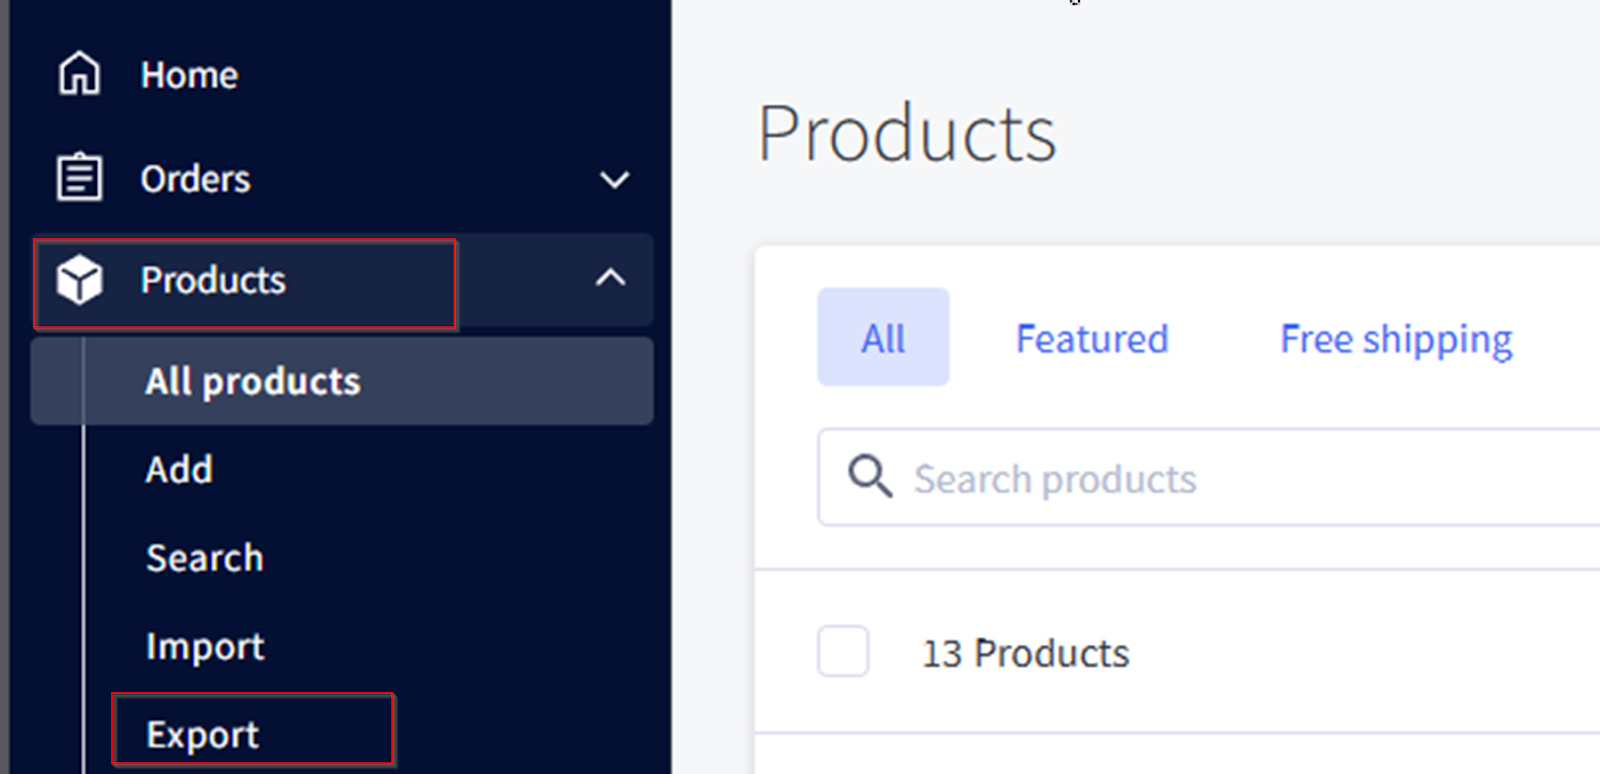
- Choose the Default Template (or create a custom one with only the fields you plan to import)
- Select Export to File and wait for the CSV download
- Open the file in Excel or Google Sheets
Before moving on, scan through the file and look for:
- Missing SKUs
- Merged or nested variants (Shopify needs these flattened)
- Product titles or descriptions that are too long or include broken HTML
- Categories that may not translate directly into Shopify’s structure
Note: Shopify handles variants differently. While BigCommerce often nests variants under one row, Shopify requires a separate row for every variant, all tied together by a shared product “Handle.”
Clean and Reformat for Shopify’s Import Template
Once your product CSV is ready, it needs to match Shopify’s exact import schema. That includes proper column headers, variant structure, image formatting, and inventory fields.
Shopify provides a downloadable sample template to guide you:
- Go to Shopify Admin → Products
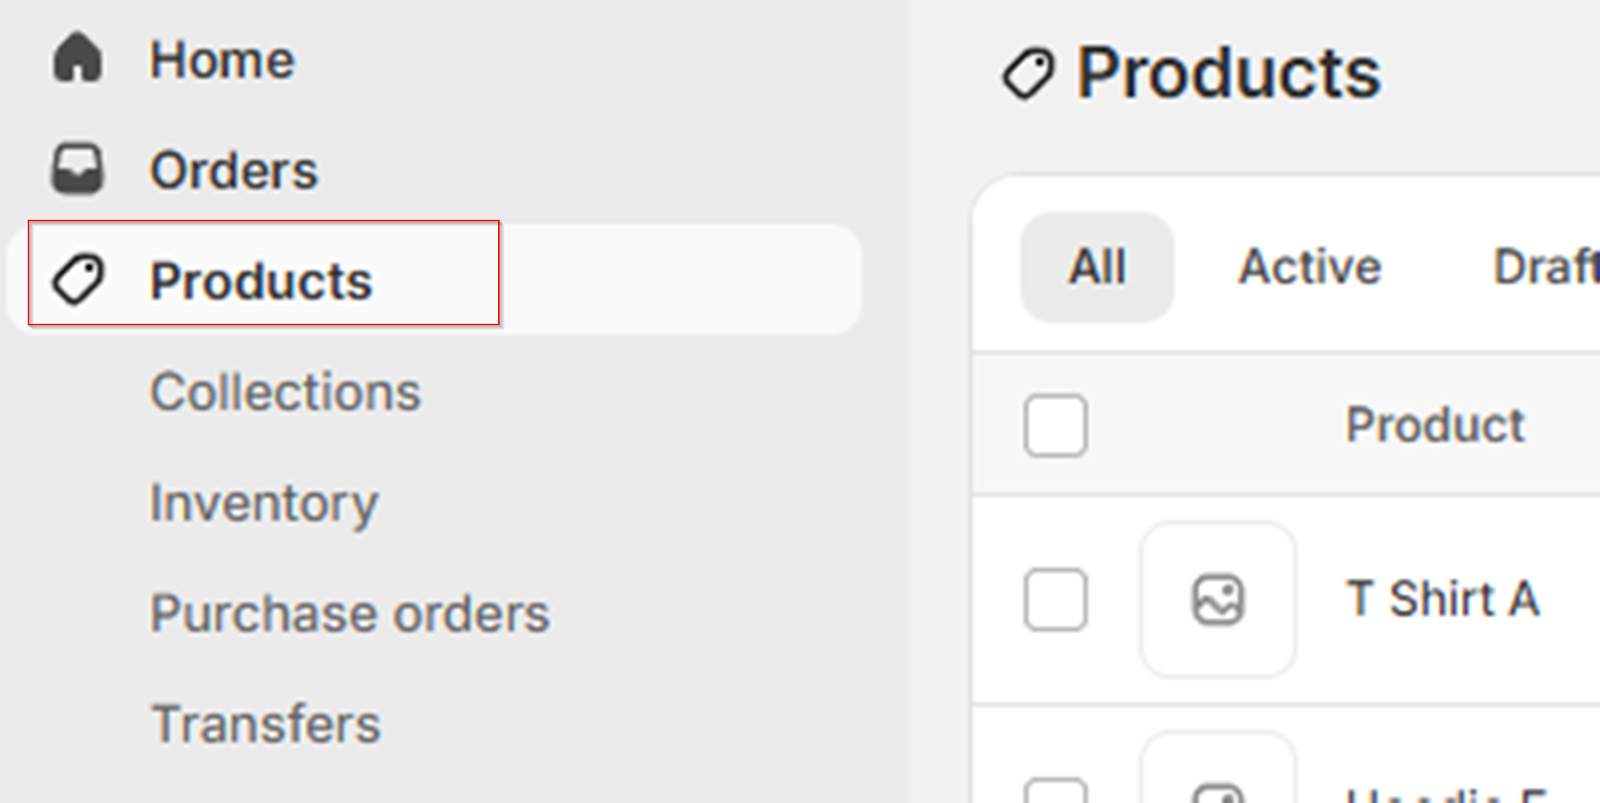
- Click Import in the top-right
- Download the Sample CSV Template
Now, compare your BigCommerce export to Shopify’s format. You’ll likely need to:
- Split grouped variants into separate rows
- Add a unique Handle value to tie variants together
- Rename columns (e.g., Product Name → Title)
- Make sure image URLs are in the Image Src column, and publicly accessible
- Add fields like Option1 Name, Option1 Value for sizes, colors, etc.
Here’s a quick reference table:
| BigCommerce Field | Shopify Equivalent |
|---|---|
| Product Name | Title |
| SKU | Variant SKU |
| Description | Body (HTML) |
| Price | Variant Price |
| Category | Tags or Manual Collection |
| Image URL | Image Src |
Pro Tip: Shopify supports UTF-8 encoded CSVs only. If you’re working in Excel, always save your file as a UTF-8 CSV to avoid import errors.
Import Products into Shopify
Now that your file is formatted correctly, it’s time to bring your catalog into Shopify.
- Go to Shopify Admin → Products
- Click Import
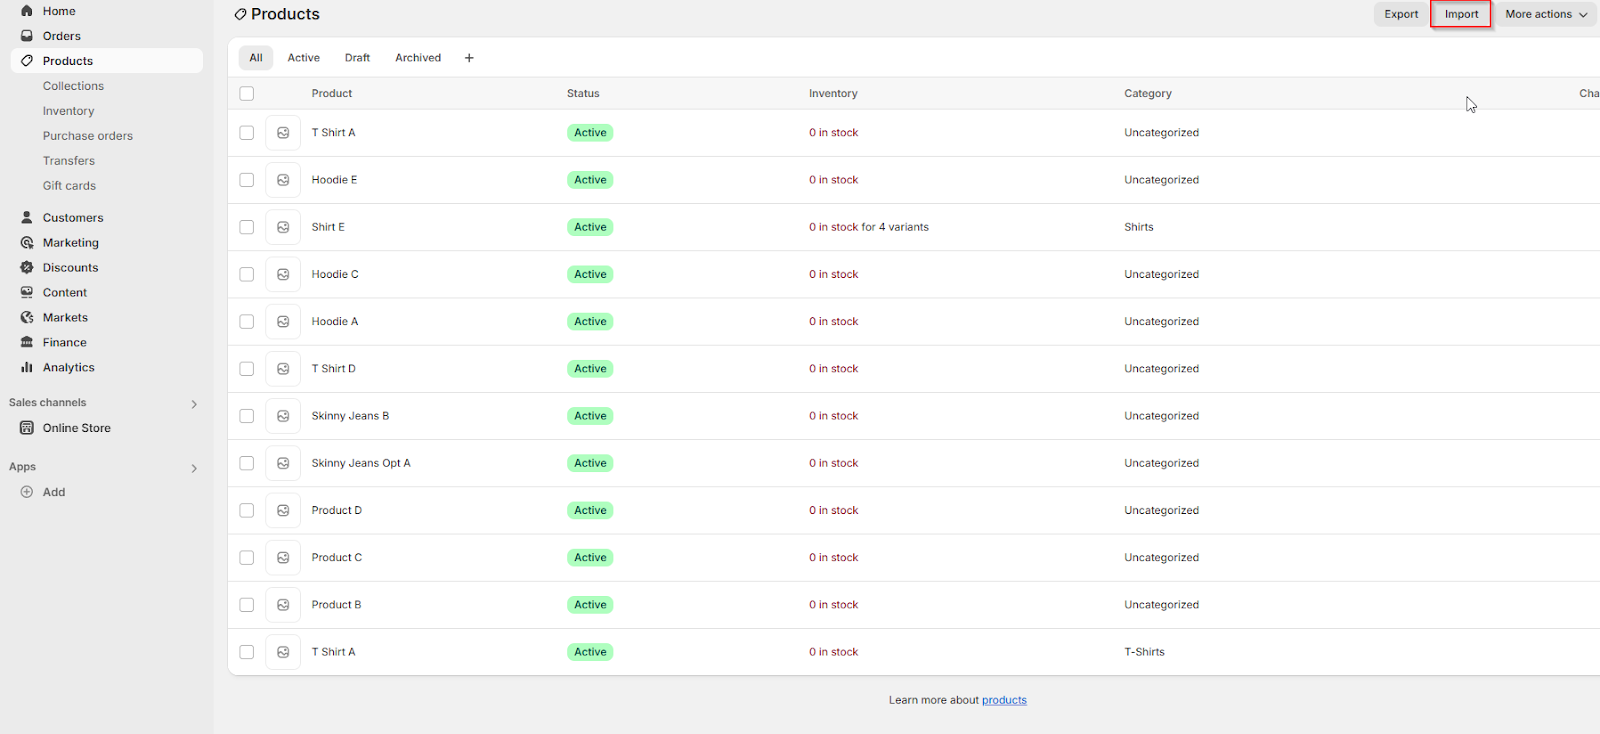
- Upload your cleaned product CSV

- Click Upload and preview
- Preview your import, Shopify will show the first few rows
- Confirm everything looks correct (titles, prices, variants, images)
- Click Import Products
Shopify will process the file and display a success summary. If you see any skipped rows or errors, download the error report, fix the issues in your CSV, and re-import.
Check and Fix Image Imports (if needed)
In most cases, Shopify will automatically fetch product images from the URLs provided in your CSV.
But sometimes, especially with private or expired links, the images may fail to load.
If that happens:
- Go to Content → Files in Shopify and upload your images manually
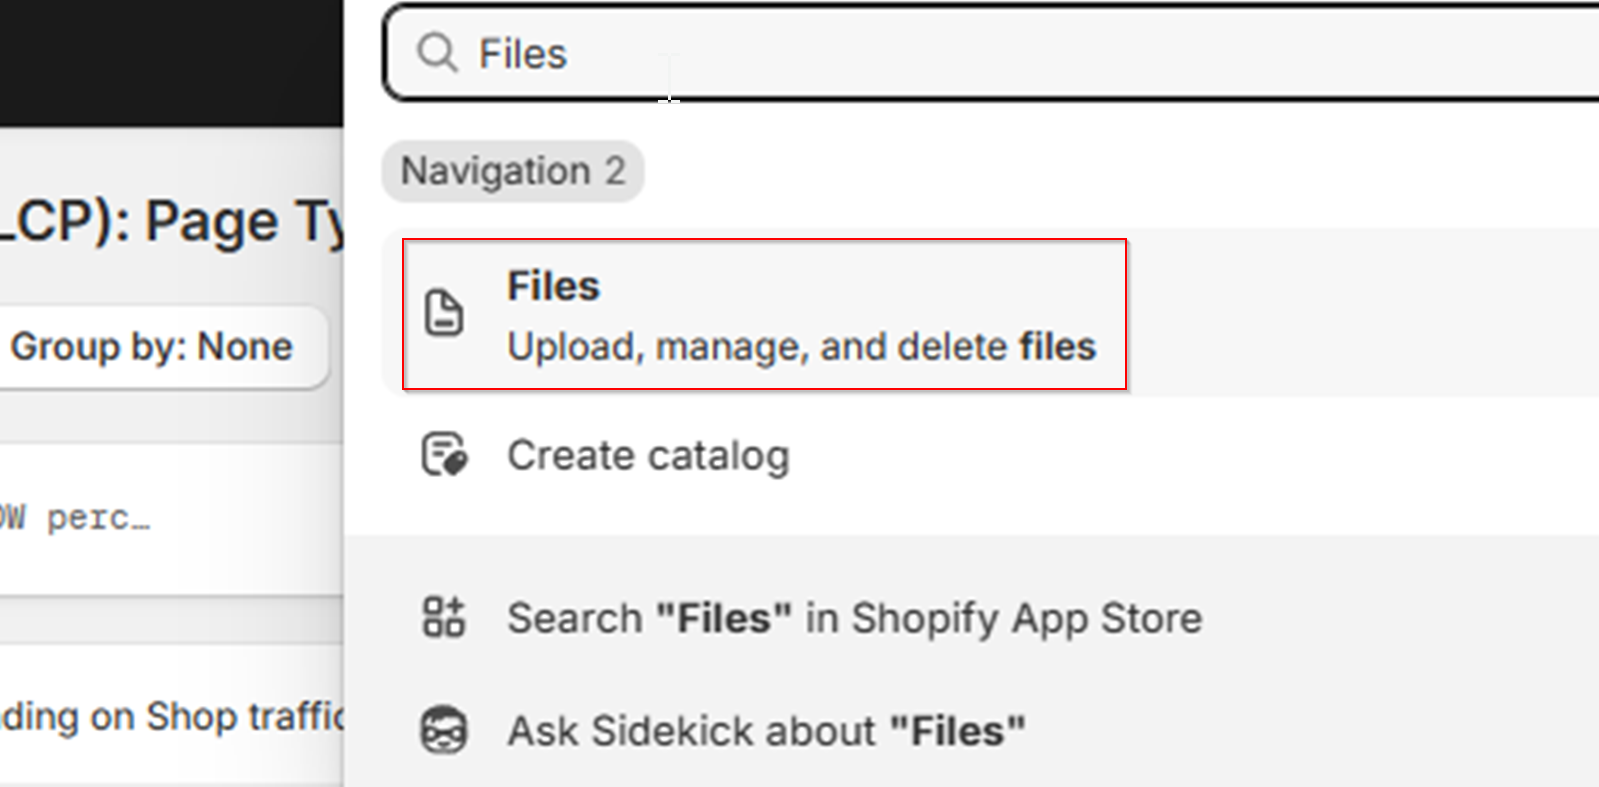
- Then, edit products individually and assign images from your uploaded library
For large stores, tools like Matrixify can help automate this.
Verify Your Imported Products
Once your catalog is uploaded, take time to review your listings. Spot check for:
- Correct product titles and prices
- Clean descriptions (no leftover HTML tags)
- Properly structured variants (size, color, etc.)
- Working images
- Accurate inventory levels
- Tags or collections assigned
If anything looks off, you can delete the imported batch, fix your file, and try again.
To bulk delete imported products:
- Go to Products → All Products
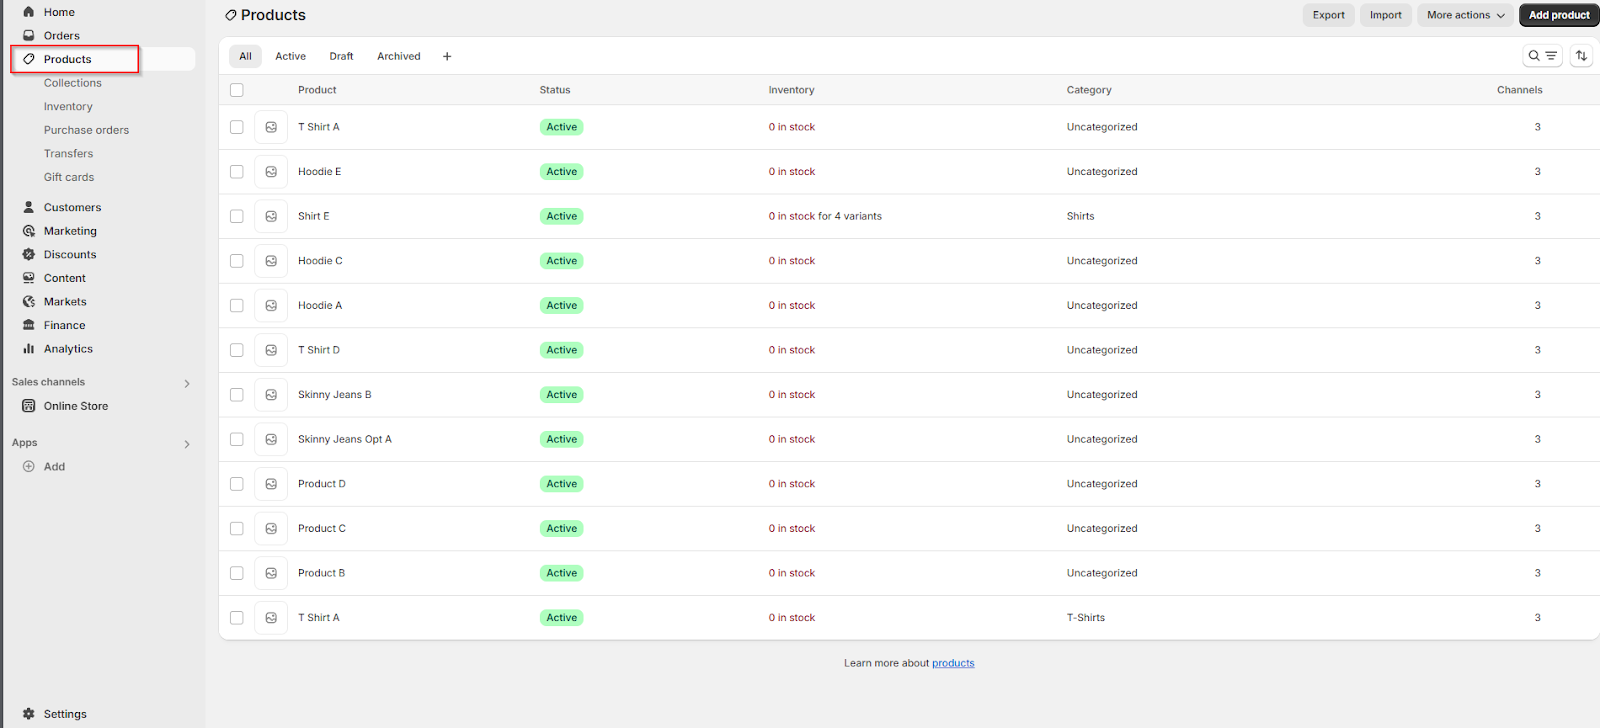
- Use filters to select the batch
- Click Actions → Delete selected products
You can safely repeat imports as Shopify will not overwrite data unless the Handle matches.
2: Migrate Customers from BigCommerce to Shopify
While your products bring in revenue, your customer data holds long-term value. Preserving that data ensures your loyal shoppers don’t lose their accounts, and it allows you to keep marketing effectively post-migration.
That said, customer migration comes with its quirks, especially around account logins and passwords.
Let’s walk through it all, cleanly and clearly.
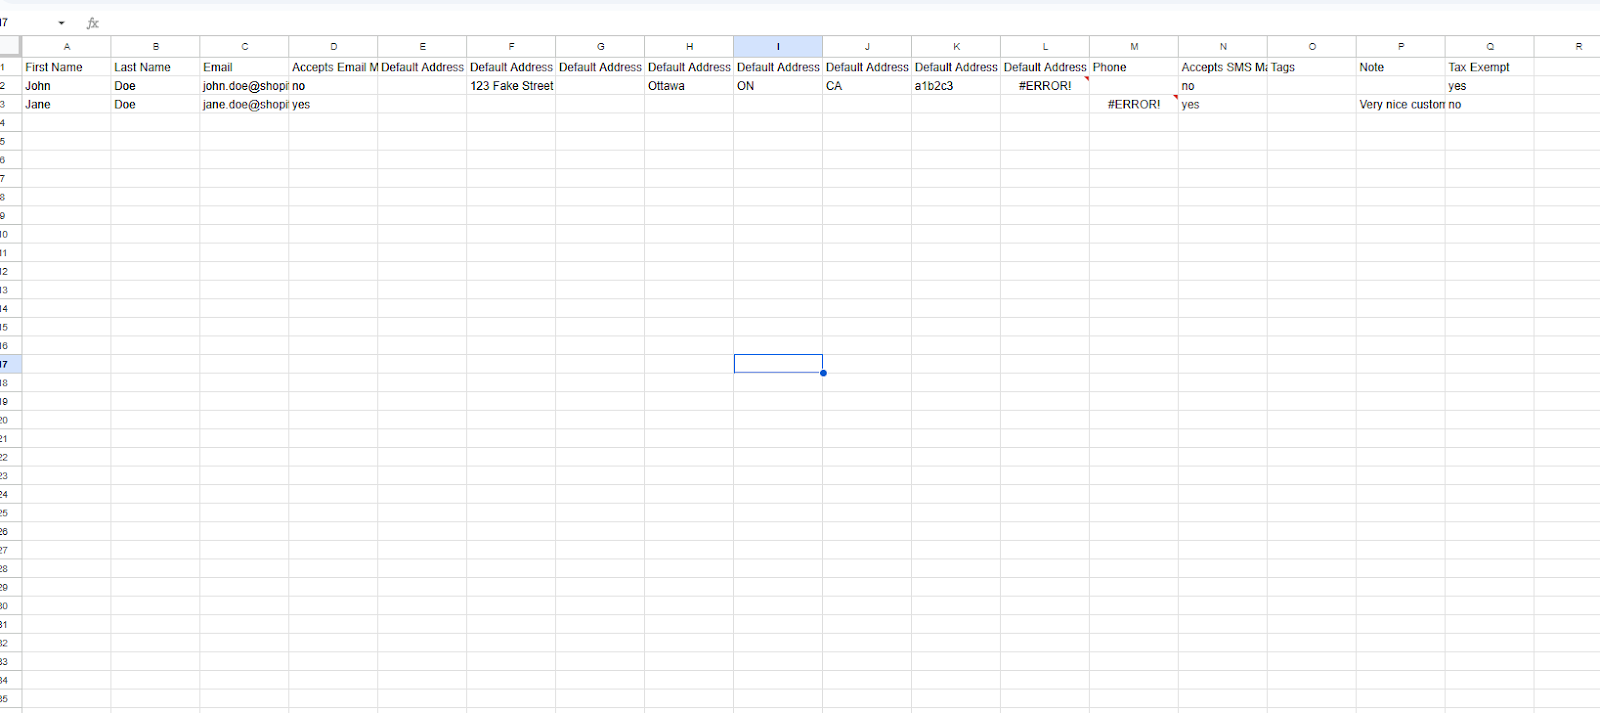
Export Customer Data from BigCommerce
Start by exporting your entire customer database, including names, emails, phone numbers, and addresses. BigCommerce gives you a built-in export tool for this.
- Go to Customers → Export
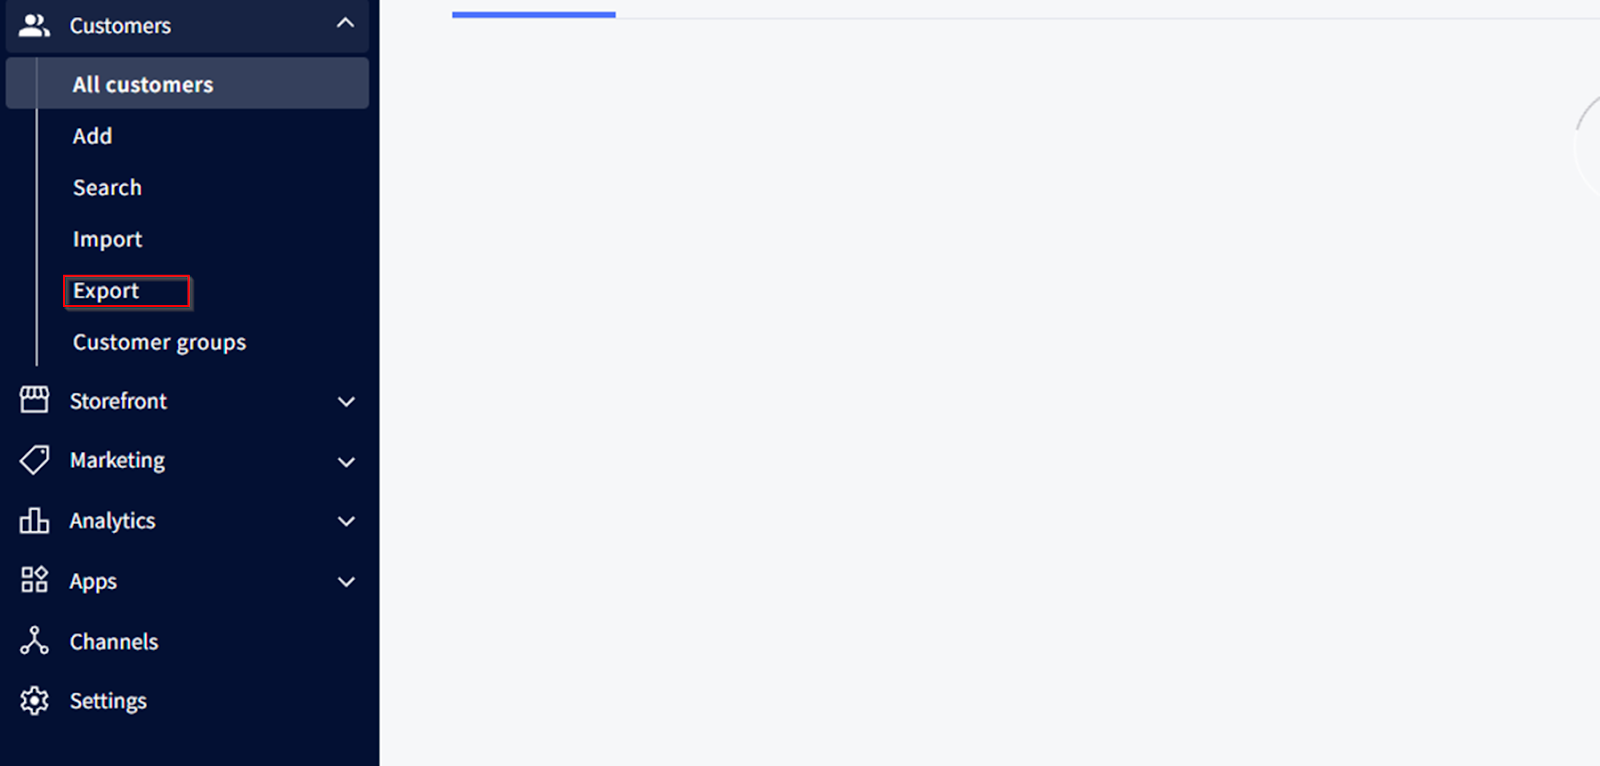
- Select the Default Template (or create a custom one if needed)
- Click Export to File
- Download and open the CSV (follows the same process as in exporting products)
Check that your file includes:
- First Name
- Last Name
- Phone Number
- Billing Address
- Shipping Address
- Customer Group / Tags
You’ll use this file as the base to format your Shopify import.
Note: Some customer fields (like passwords) cannot be transferred due to encryption. More on that in a moment.
Format the CSV for Shopify’s Import Template
Just like with product data, Shopify requires a specific column structure for customer imports.
Start by downloading Shopify’s sample customer CSV:
- Go to Shopify Admin → Customers
- Click Import in the top right
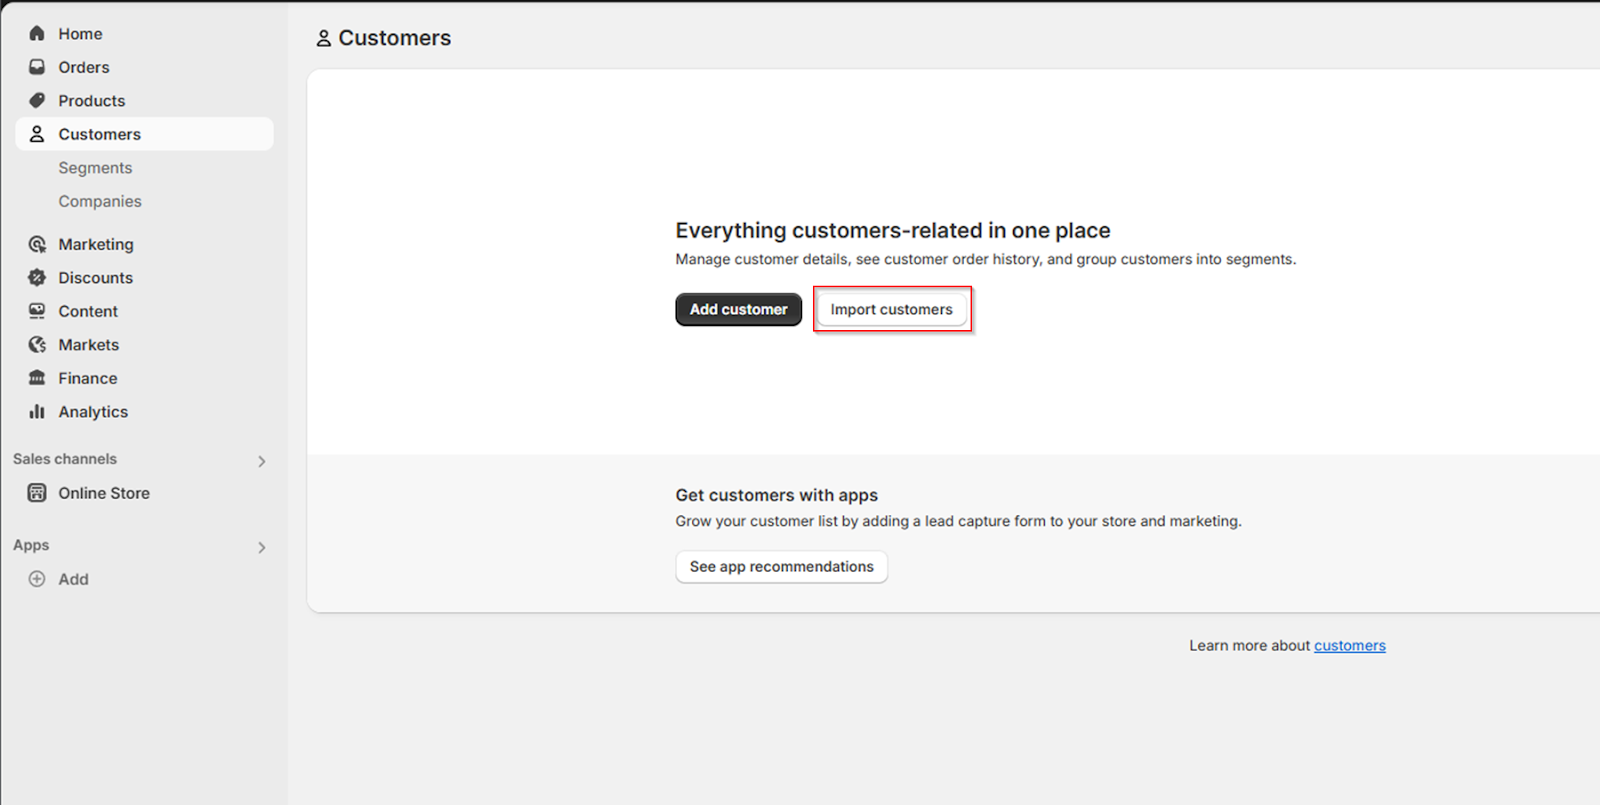
- Select Download Sample CSV Template
Now, compare the Shopify format to your BigCommerce export. You’ll likely need to:
- Rename columns to match Shopify’s format (e.g., Email, First Name, Tags)
- Remove extra or unused fields
- Combine address components into Shopify’s structure
- Ensure phone numbers and postal codes are formatted cleanly (no stray characters or line breaks)
Important: Shopify’s import won’t create customer passwords. Even if you export encrypted passwords from BigCommerce, Shopify doesn’t accept them.
Import Customers into Shopify
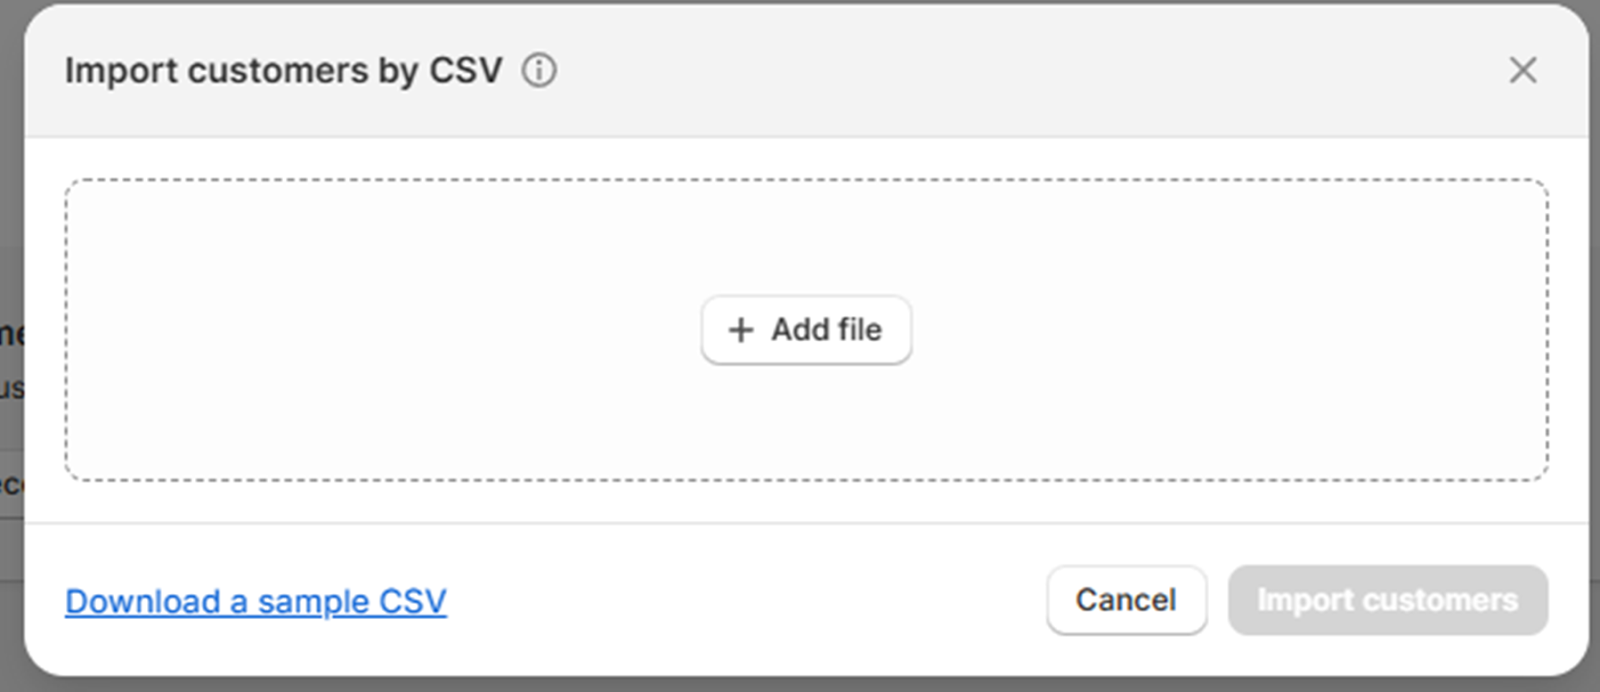
Once your customer CSV is ready and formatted, here’s how to import it:
- Go to Shopify Admin → Customers ( same as before)
- Click Import
- Upload your customer CSV
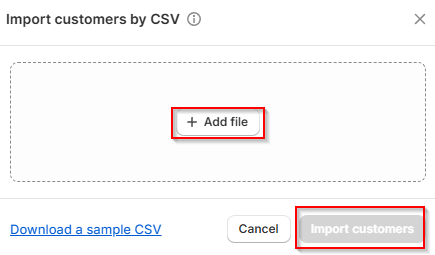
- Preview the records, make sure names, emails, and addresses display correctly
- Click Import Customers
If there are errors or formatting issues, Shopify will stop the import and ask for corrections. You can download the error report, fix the problems, and re-import the updated file.
Trigger Customer Account Invitations
After the data is imported, customers still need to activate their accounts. Otherwise, they won’t be able to log in or view their order history.
To invite them:
- In Shopify Admin → Customers, filter the list to show “Imported” or “Uninvited” customers
- Select all, then click Send Account Invite
This sends an email prompting customers to create a password and activate their account, without losing their data.
You can customize the invite email under Settings → Notifications → Customer Account Invite, so it matches your brand voice.
Verify Your Imported Customer Records
Double-check your import by viewing individual customer profiles. Look for:
- Correct email addresses
- Linked order history (if using Matrixify or similar for order import)
- Address accuracy
- Customer tags or group info
If you notice duplicate records or missing fields, adjust your CSV and reimport. Shopify will merge customers if their email address matches — so keep emails clean and consistent.
3: Migrate Order History (Optional)
Order history is valuable as it helps you understand customer behavior, track past sales, and maintain accurate internal reporting.
But Shopify doesn’t make it easy.
You can’t import orders directly via CSV like products or customers.
Instead, Shopify treats historical order data as something only available through third-party apps, and even then, orders are imported as “archived” records, not active orders.
Still, if you want continuity across platforms, here’s how to do it right.
Export Order Data from BigCommerce
Begin by extracting your full order archive from BigCommerce.
This will give you order numbers, customer details, products purchased, payment status, and fulfillment history.
- Go to Orders → Export
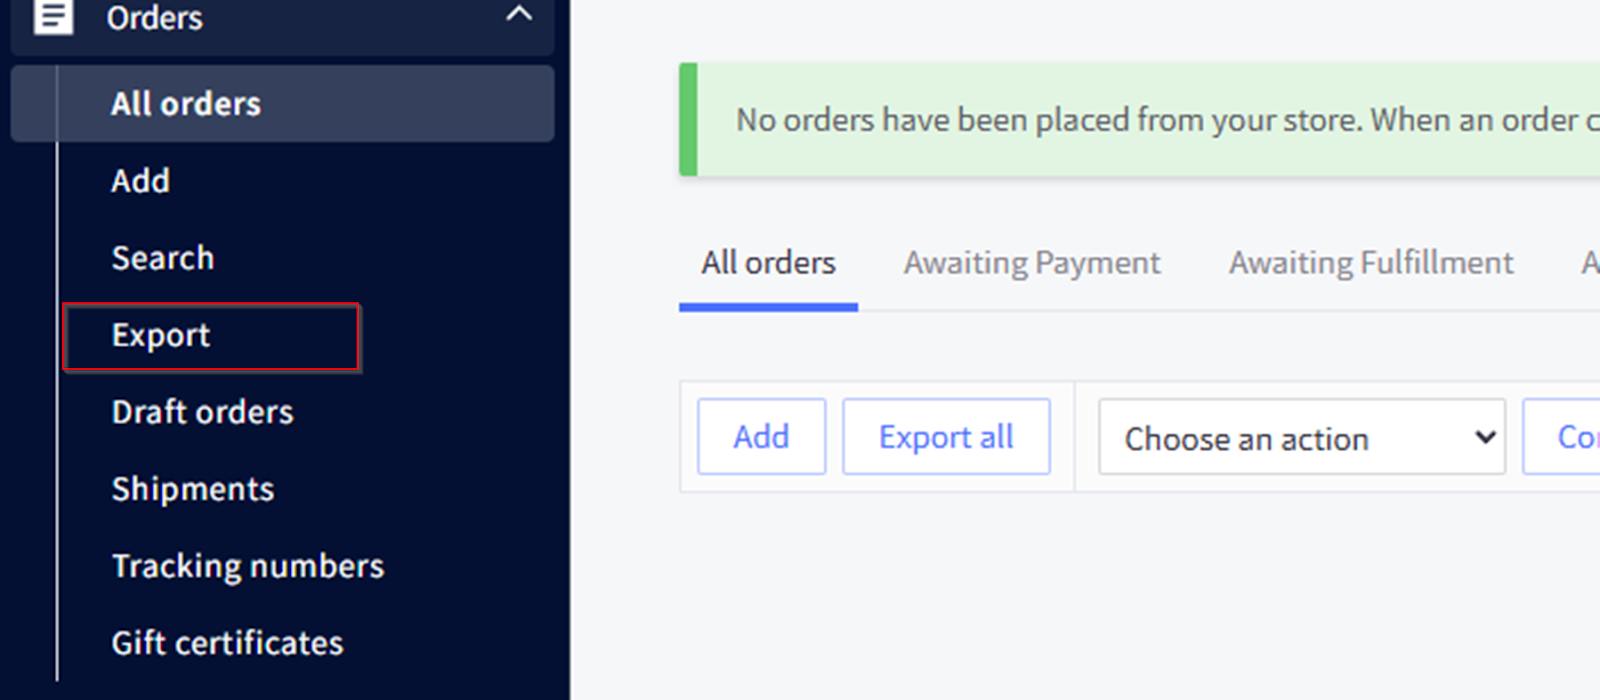
- Choose the Advanced Template
- Select fields, including:
- Order Number
- Order Date
- Customer Name and Email
- Product SKUs and Quantities
- Payment Status
- Fulfillment Status
- Shipping Address
- Click Export to File
- Open the CSV in Google Sheets or Excel to check for missing or malformed data
You’ll use this file with a migration tool like Matrixify or LitExtension, which are built to handle Shopify’s limitations around orders.
Format the Data for Matrixify
Matrixify is the most widely used app for importing complex datasets into Shopify, including order records.
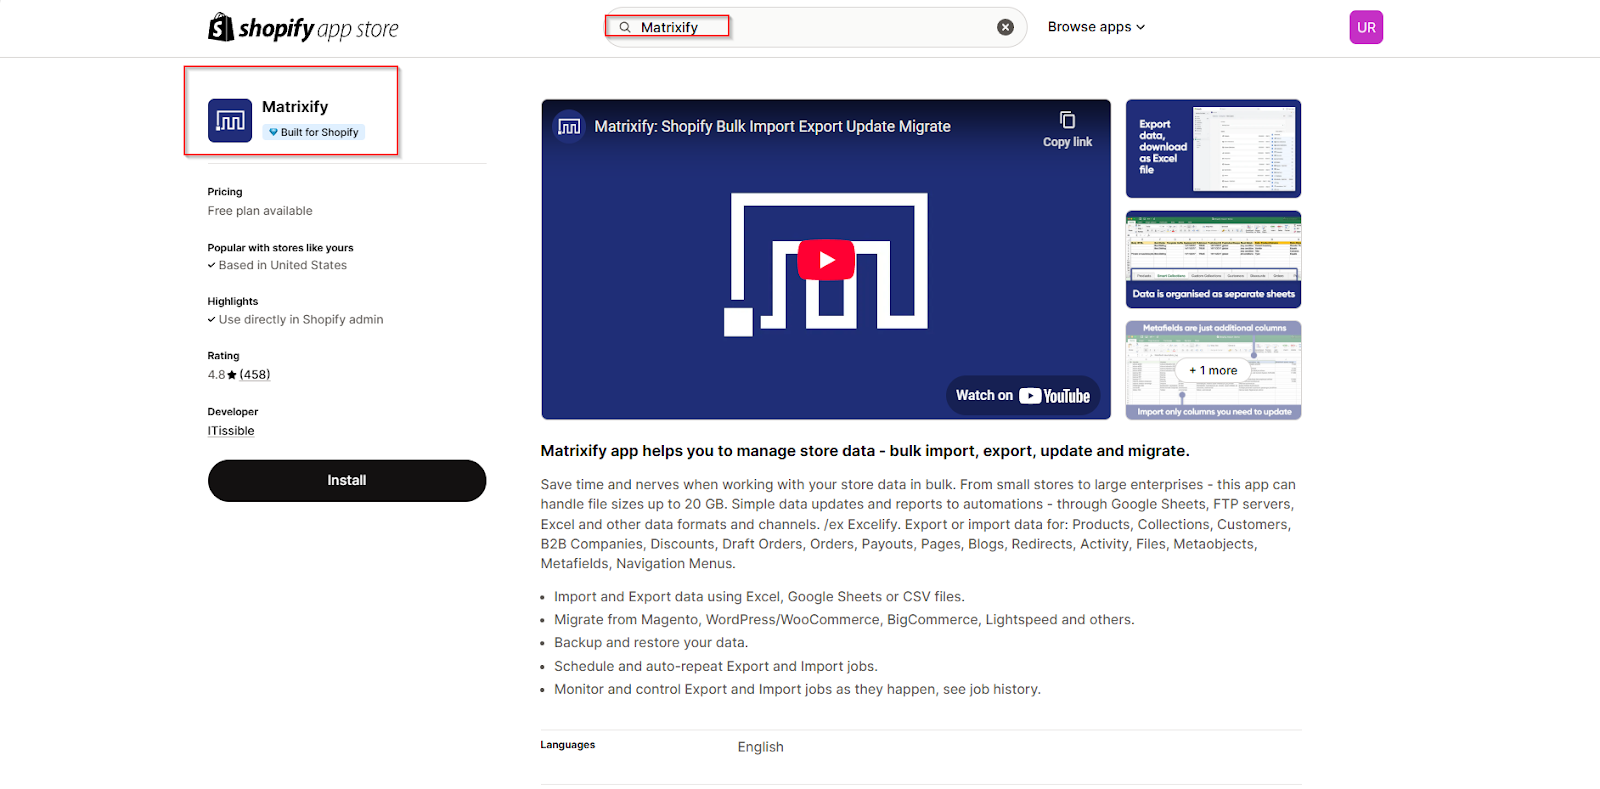
You don’t need to reformat everything manually, but you need to:
- Match the CSV headers to Matrixify’s expected schema
- Use proper date formats (e.g., ISO 8601 — 2023-07-15T14:35:00Z)
- Ensure all products in the order match SKUs you’ve already imported
- Include accurate email and address fields for customer association
- Save the file as UTF-8 CSV before upload
Matrixify provides a sample order import template on their help docs, which you can use as a reference.
Pro Tip: Start with 5–10 orders as a test batch. If everything looks good, scale up to your full dataset.
Import Orders into Shopify via Matrixify
Once your file is ready:
- Install the Matrixify app from the Shopify App Store
- Open the app and go to Import → Orders
- Upload your prepared order CSV
- Select Dry Run Mode to test the import (Matrixify will simulate the import and show any issues without changing your store)
- Review the preview
- If it looks good, run the Actual Import
Matrixify will begin importing your orders as historical records. These won’t be editable or fulfillable, but they’ll exist in your Shopify dashboard for reference.
Plus, you can find them under Orders → All Orders, typically marked with a “custom” payment gateway and a note that they were imported.
Alternative Tools for Order Migration
If Matrixify feels too technical or you’re migrating a high volume of data, other tools like LitExtension or Cart2Cart offer a more automated, concierge-style experience.
Here’s a side-by-side comparison.
| Tool | What It Does | Best For |
|---|---|---|
| Matrixify | Manual CSV import with full control | Users who want to fine-tune imports |
| LitExtension | One-click migration from BigCommerce to Shopify | Full-service, hands-off migration |
| Cart2Cart | Real-time sync and migration assistant | Stores are still running on BigCommerce |
Verify Imported Orders
Once the import is complete:
- Go to Shopify Admin → Orders
- Filter by “Imported” or “Custom” payment method
- Open several records to confirm:
- Correct product SKUs and quantities
- Accurate customer email and address
- The purchase date matches the original
- Fulfillment and payment statuses are preserved
You can’t edit historical orders in Shopify, but they’ll be evident to your staff and tied to customer profiles.
4: Rebuild Pages, Blogs, and Store Content
Migrating data is only half the battle. Now it’s time to make your store feel like you again.
Your About page, Contact form, FAQ, and blog posts are often the first touchpoints for new visitors.
Unlike product and customer data, content pages can’t be migrated through simple CSVs; they need to be manually recreated or transferred using specialized tools.
Recreate Standard Pages in Shopify
Start with your essential pages:
- About Us
- Contact Us
- FAQs
- Shipping Policy
- Return & Refund Policy
- Privacy Policy
- Terms of Service
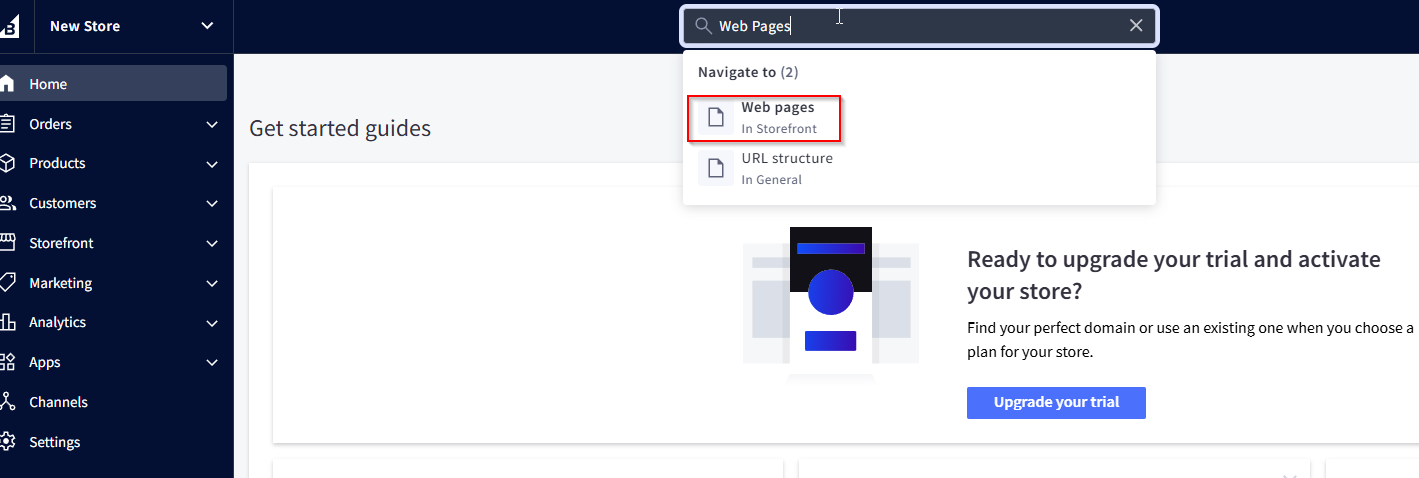
To build these pages, head to:
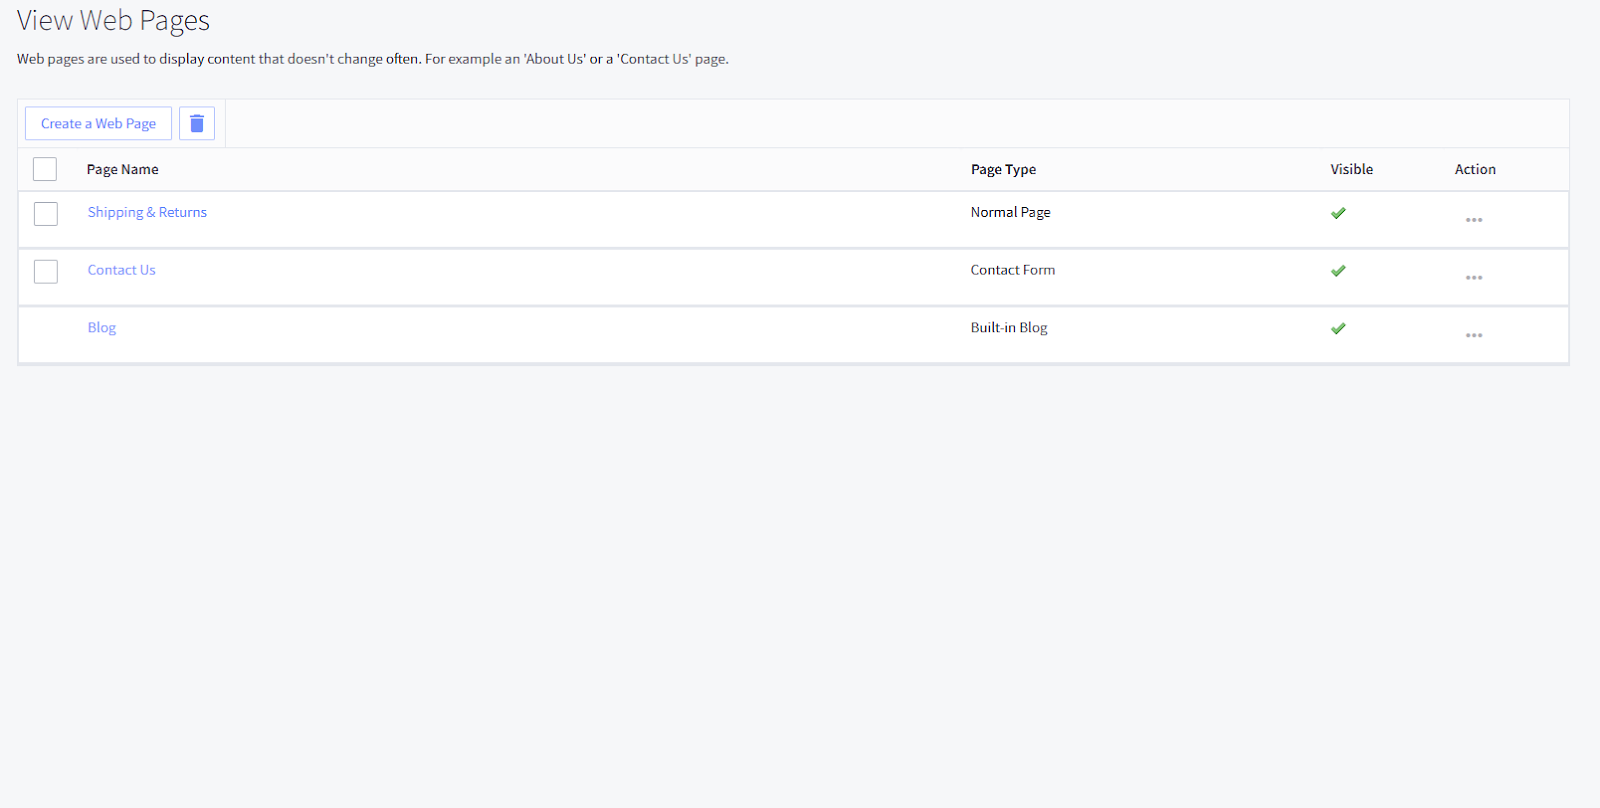
- BigCommerce admin, go to Storefront → Web Pages

- Open each page, copy the:
- Title
- Page content (HTML or text)
- URL slug
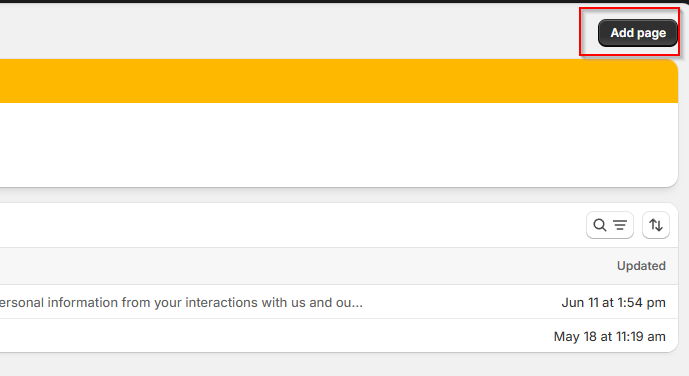
- In Shopify:
- Go to Online Store → Pages → Add Page
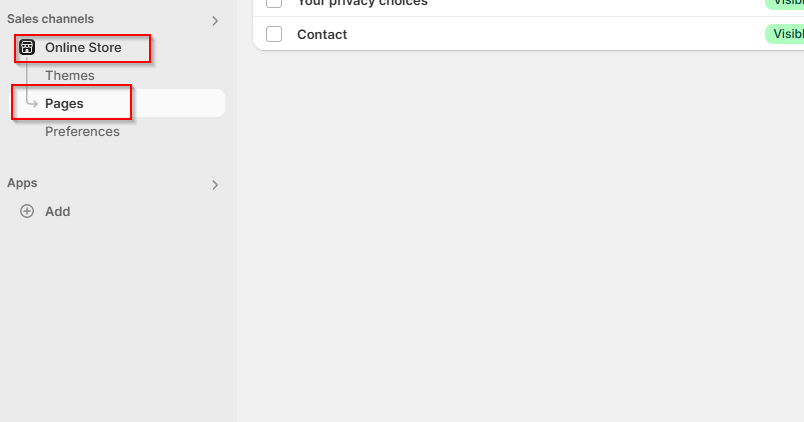
- Paste your content into the rich text editor or use HTML view for full formatting control
- Match the original URL as closely as possible (e.g., /about, /shipping, etc.)
Caution: Shopify won’t automatically recreate your URL slugs; you have to match them manually, especially if you want your redirects to work properly later.
Rebuild Your Navigation Menus
Once your pages are set, update your site menus so visitors can find them.
- Go to Online Store → Navigation
- Click into:
- Main Menu (header)
- Footer Menu (bottom of page)
- Add links to your rebuilt pages
- Create dropdowns for better organization (e.g., “Support” → FAQ, Shipping, Returns)
Transfer Blog Content
If you maintained a blog on BigCommerce or used an external one like WordPress, that content still has value. Blog posts can drive organic traffic, build authority, and re-engage returning visitors.
Shopify includes a basic blog feature under Online Store → Blog Posts, and you can either migrate your posts manually or use an import tool.
Option 1: Manual Blog Copy
Best for stores with 20–30 posts or fewer.
- Copy each post title, body content, author name, and publish date
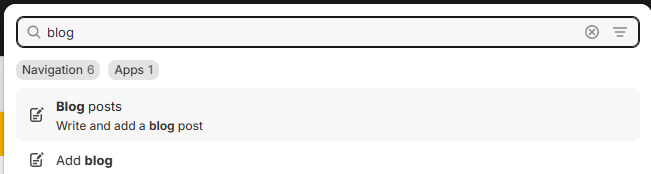
- Recreate the post under Admin Search → Blog Posts → Add Blog Post
- Upload the same featured image
- Use the Search Engine Listing Preview to copy over your meta titles and descriptions
Option 2: Use a Migration Tool
If you have dozens or hundreds of blog posts, manual work becomes impractical. In that case:
- Use a service like LitExtension or Matrixify
- Export your blog posts from BigCommerce (or WordPress) in their recommended format
- Upload them into Shopify via the app’s interface
These tools can carry over categories, authors, publish dates, and SEO metadata, but always review imported posts afterward for layout issues.
Rebuild Your Homepage
At this point, your core content pages are back, but your homepage still needs to reflect your brand.
We’ll handle that fully in the next section when we dive into Shopify’s theme editor.
But for now, make a list of the homepage sections you want to preserve or rebuild:
- Hero banner or slider
- Featured collections or categories
- Testimonials or reviews
- Email signup block
- Brand logos or trust badges
- Store announcements or promotions
5: Customize Your Shopify Theme and Navigation
Now that your products, customers, and content are in place, it’s time to shape how your store feels, visually and functionally.
A well-designed Shopify storefront builds trust, reduces bounce rates, and helps customers navigate your catalog with ease.
Let’s build it out, section by section.
Choose a Theme That Matches Your Brand
Shopify offers a range of free and premium themes, all optimized for mobile and built to load fast.
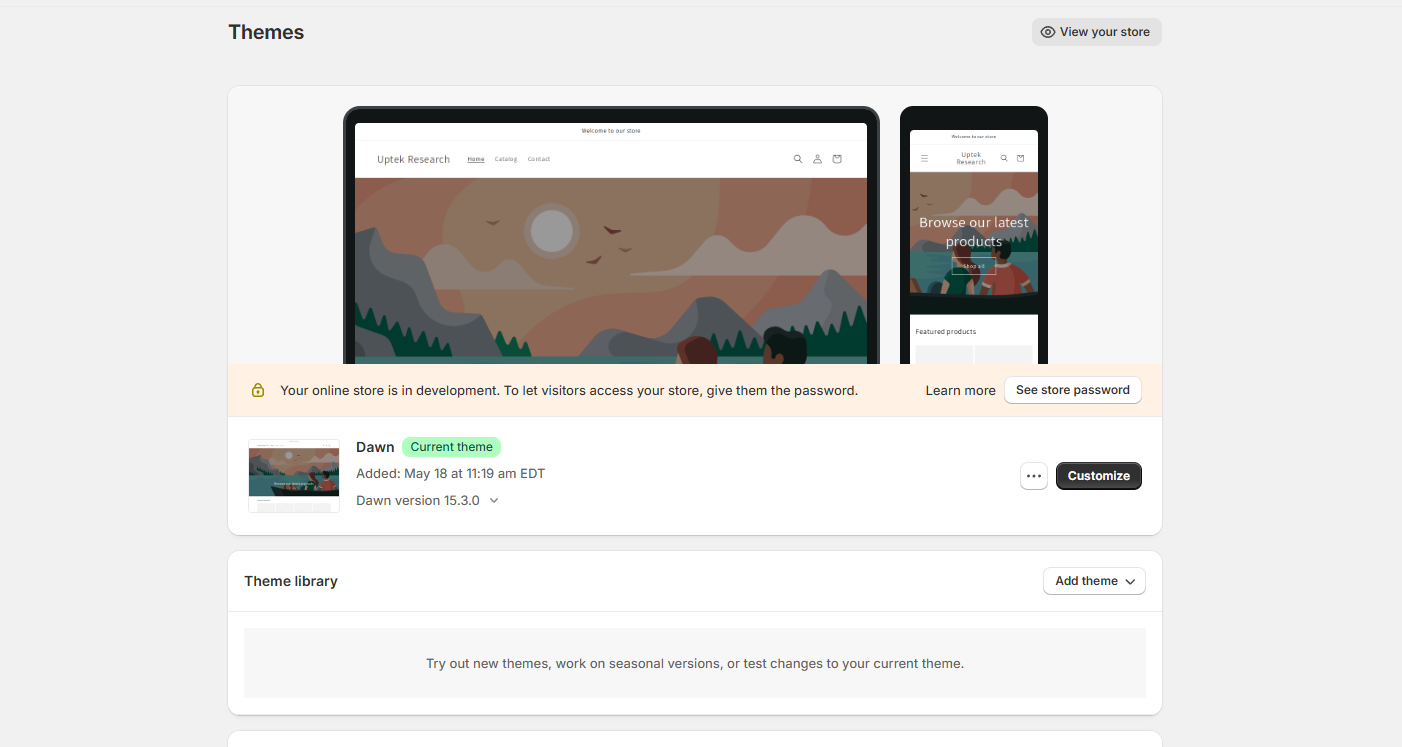
You’ll start with a default like Dawn, but you can switch or upgrade at any time.
To pick your theme:
- Go to Online Store → Themes

- Browse the Shopify Theme Store
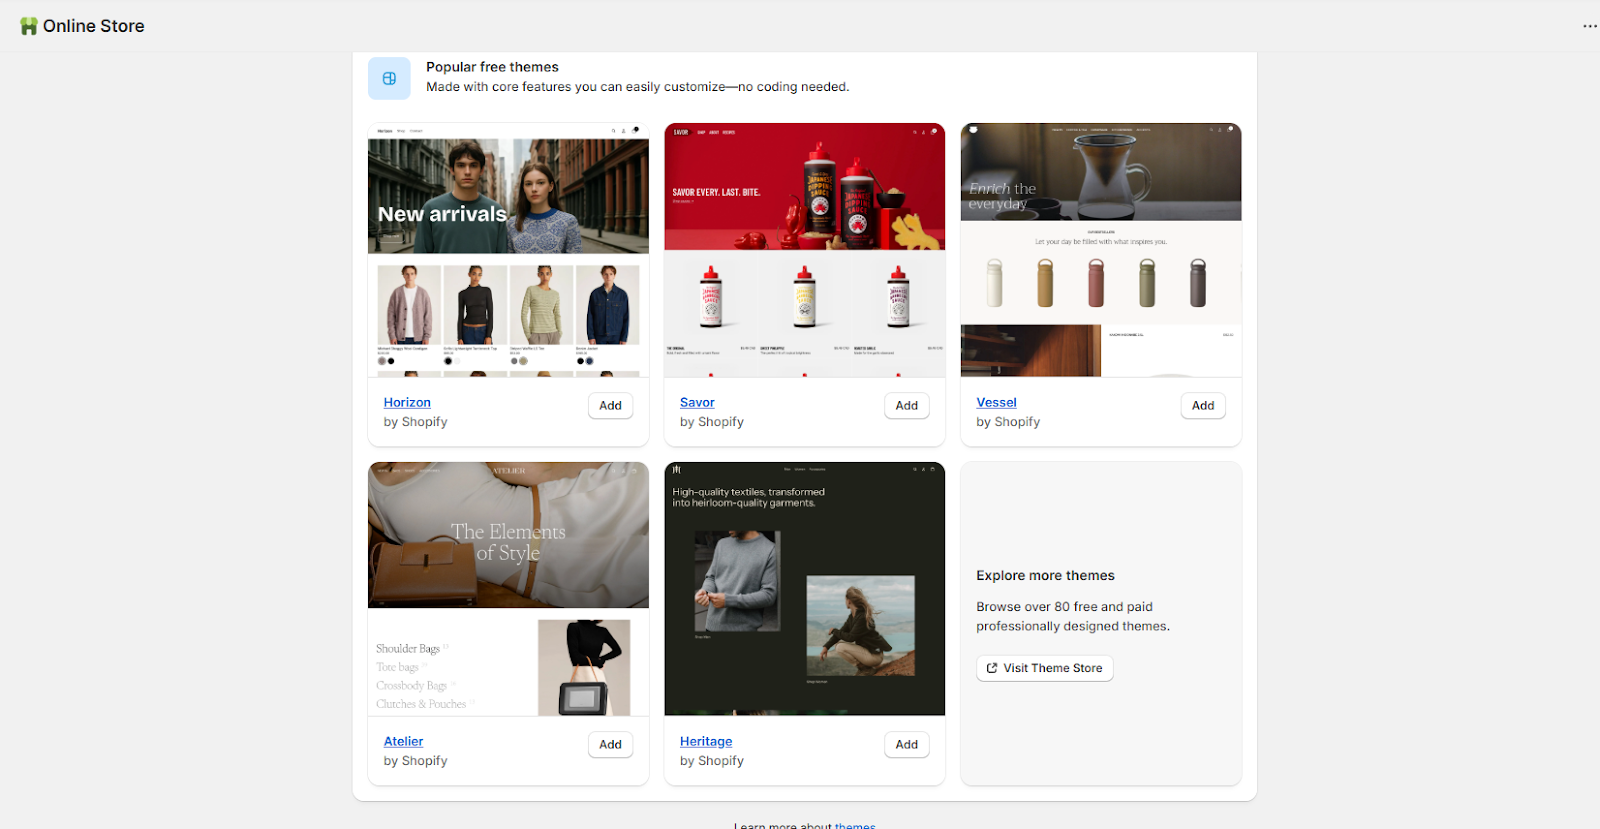
- Preview themes in both desktop and mobile views
- Click Add to install your chosen theme
- Then hit “Customize” to enter the visual editor
Pro Tip: There’s no need to find perfection. Start with a basic theme like Dawn and later adjust as you develop expertise with Shopify.
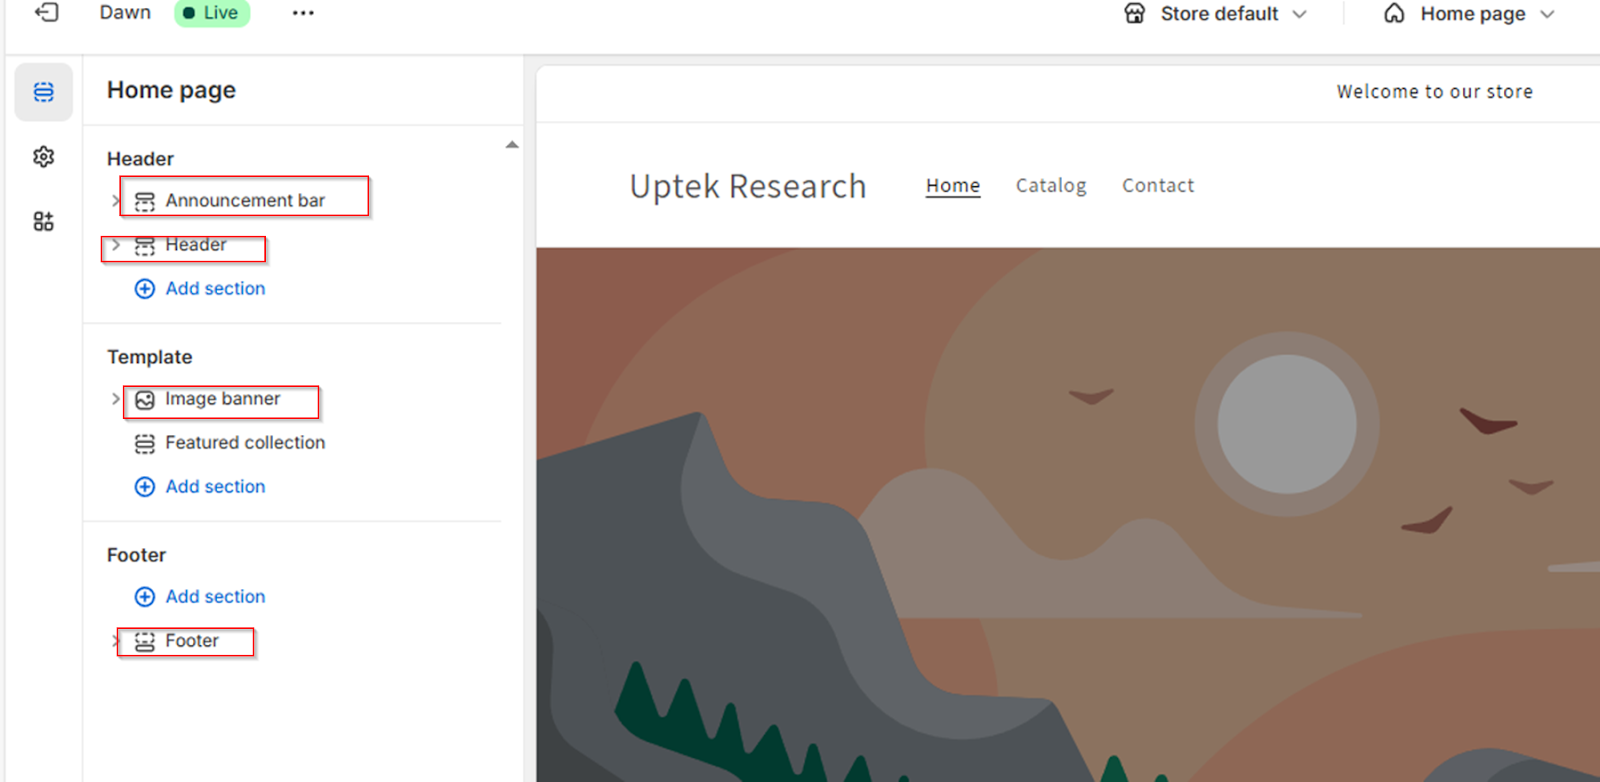
Customize the Homepage Layout
Inside the theme editor, you’ll find a drag-and-drop builder for adding, removing, and rearranging sections.
Here’s how to rebuild a homepage that feels professional:
- Header: Upload your logo (PNG or SVG), adjust padding, and enable sticky navigation
- Hero Section: Add a banner image or slider with a CTA button (e.g., “Shop New Arrivals”)
- Featured Collection: Showcase a category like “Best Sellers” or “Summer Picks”
- Testimonials: Drop in customer reviews (or embed a third-party app like Judge.me)
- Newsletter Signup: Connect with Klaviyo, Mailchimp, or Shopify Email
- Trust Section: Add icons for “Free Shipping,” “Secure Checkout,” and “30-Day Returns.”
- Footer: Add links to policies, social media, and contact info
You can rename, duplicate, or hide any section depending on your layout preferences.
Customize Theme Settings (Colors, Fonts, Branding)
Next, head to “Theme Settings” inside the editor:
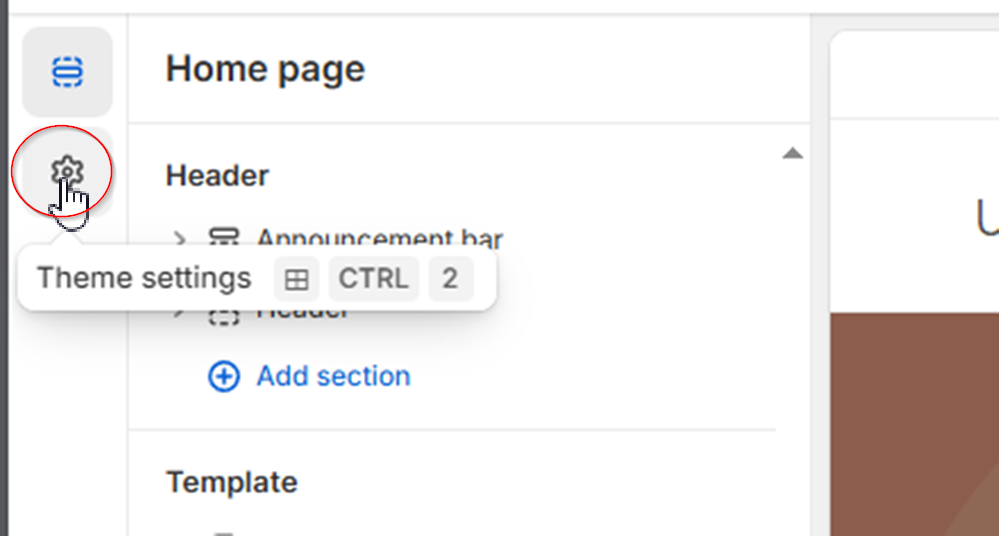
- Colors: Set your brand’s primary, secondary, and background colors
- Typography: Choose fonts for headers and body text from Shopify’s integrated Google Fonts
- Favicon: Upload a small brand icon that shows in browser tabs
- Buttons: Adjust styles and hover states for CTAs
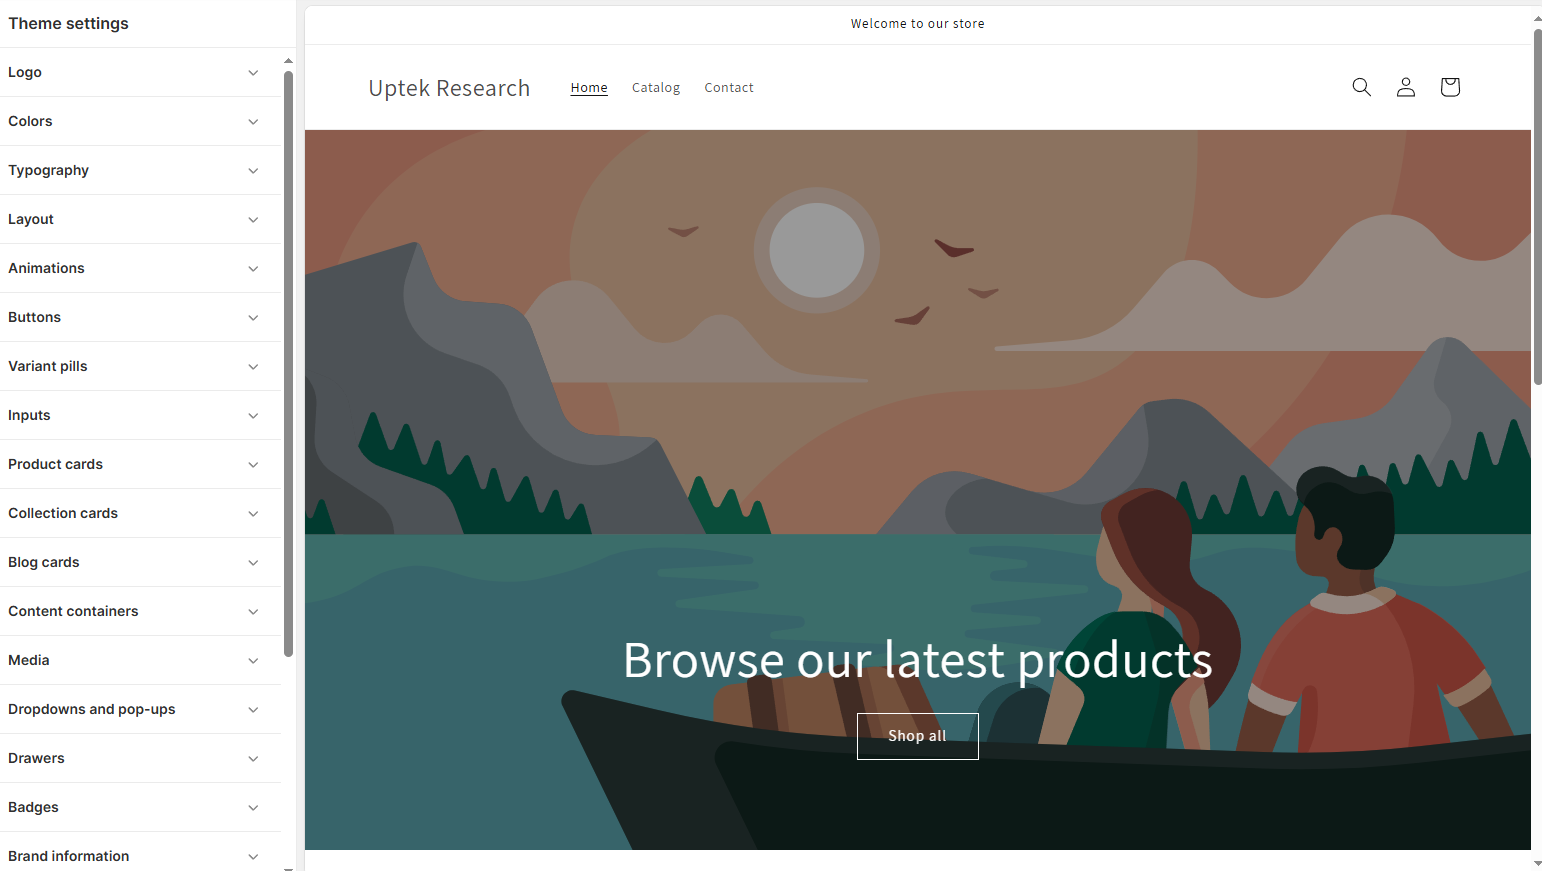
Everything is live-previewed, but changes won’t go live until you click Save.
Set Up Navigation Menus
Clean navigation always results in better conversions. Don’t make visitors guess where to click.
Adjust the “Main Menu” (Header) by opening:
- Online Store → Navigation → Main Menu

- Add links like:
- Home
- Shop (linked to “All Products” or specific collections)
- About
- Contact
- Create dropdowns for categories (e.g., Shop → Hoodies, Accessories)
After the Main Menu, adjust the “Footer Menu”:
- Go to Navigation → Footer Menu

- Add links like:
- FAQ
- Refund Policy
- Terms of Service
- Privacy Policy
- Social media links
Shopify’s menus are dynamic, which means you can rearrange links, add nested items, or link directly to collections.
Recreate Product Collections (Categories)
In BigCommerce, you likely used categories. In Shopify, the equivalent is collections.
To create them:
- Go to Products → Collections → Create Collection
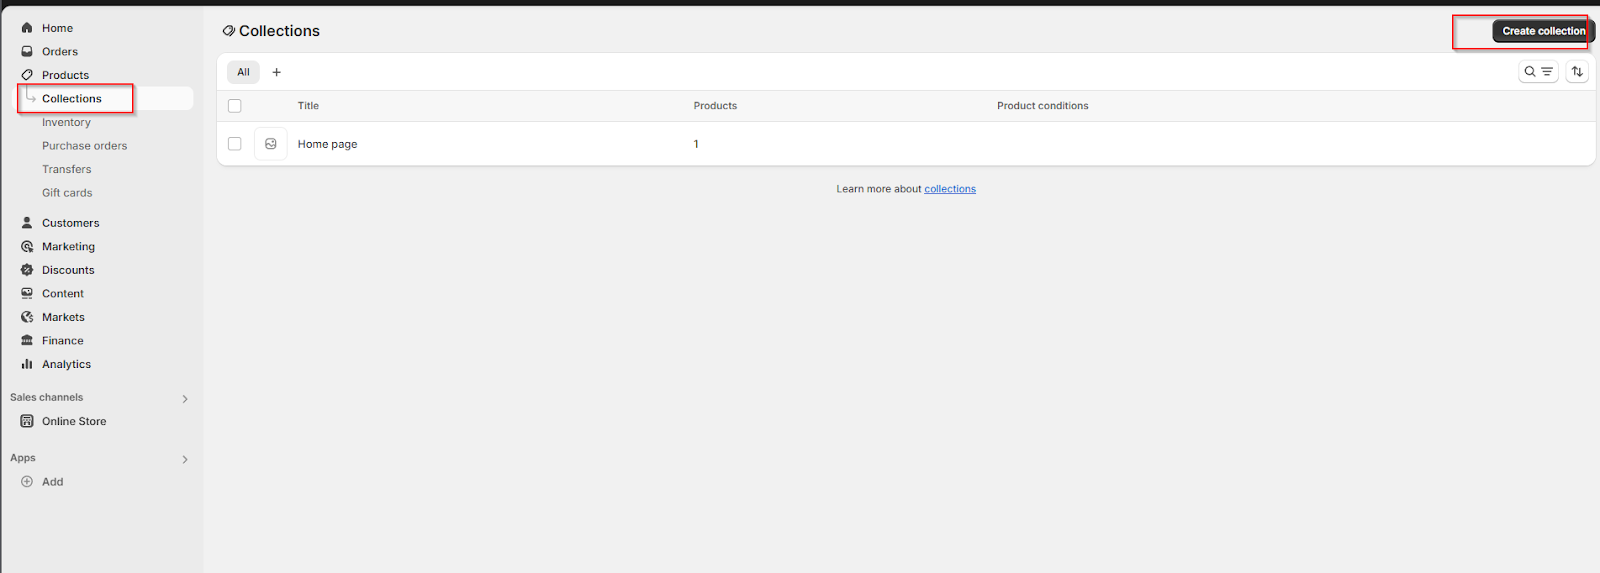
- Choose between:
- Manual: You hand-pick products
- Automated: Set rules like “Product tag is hoodie” or “Price is greater than $50”
- Add a title, description, and featured image
- Assign products and save
You can then link these collections in your main menu or homepage sections.
Add Trust Signals and Conversion Boosters
Small tweaks go a long way. Use the Shopify theme editor or apps to add:
- Product reviews (via Judge.me)
- Trust badges under the Add to Cart buttons
- Countdown timers for limited offers
- Popups or slide-ins for first-purchase discounts
- Exit intent offers or cart reminders
#6: Set Up Payments, Shipping, and Taxes
You’ve got the storefront, the products, and the content.
Now it’s time to make your store operational, so you can take payments, ship orders, and charge the right taxes.
This is where the Shopify engine shines with its admin dashboard, configure your business rules faster than most platforms.
Here’s how to get things done:
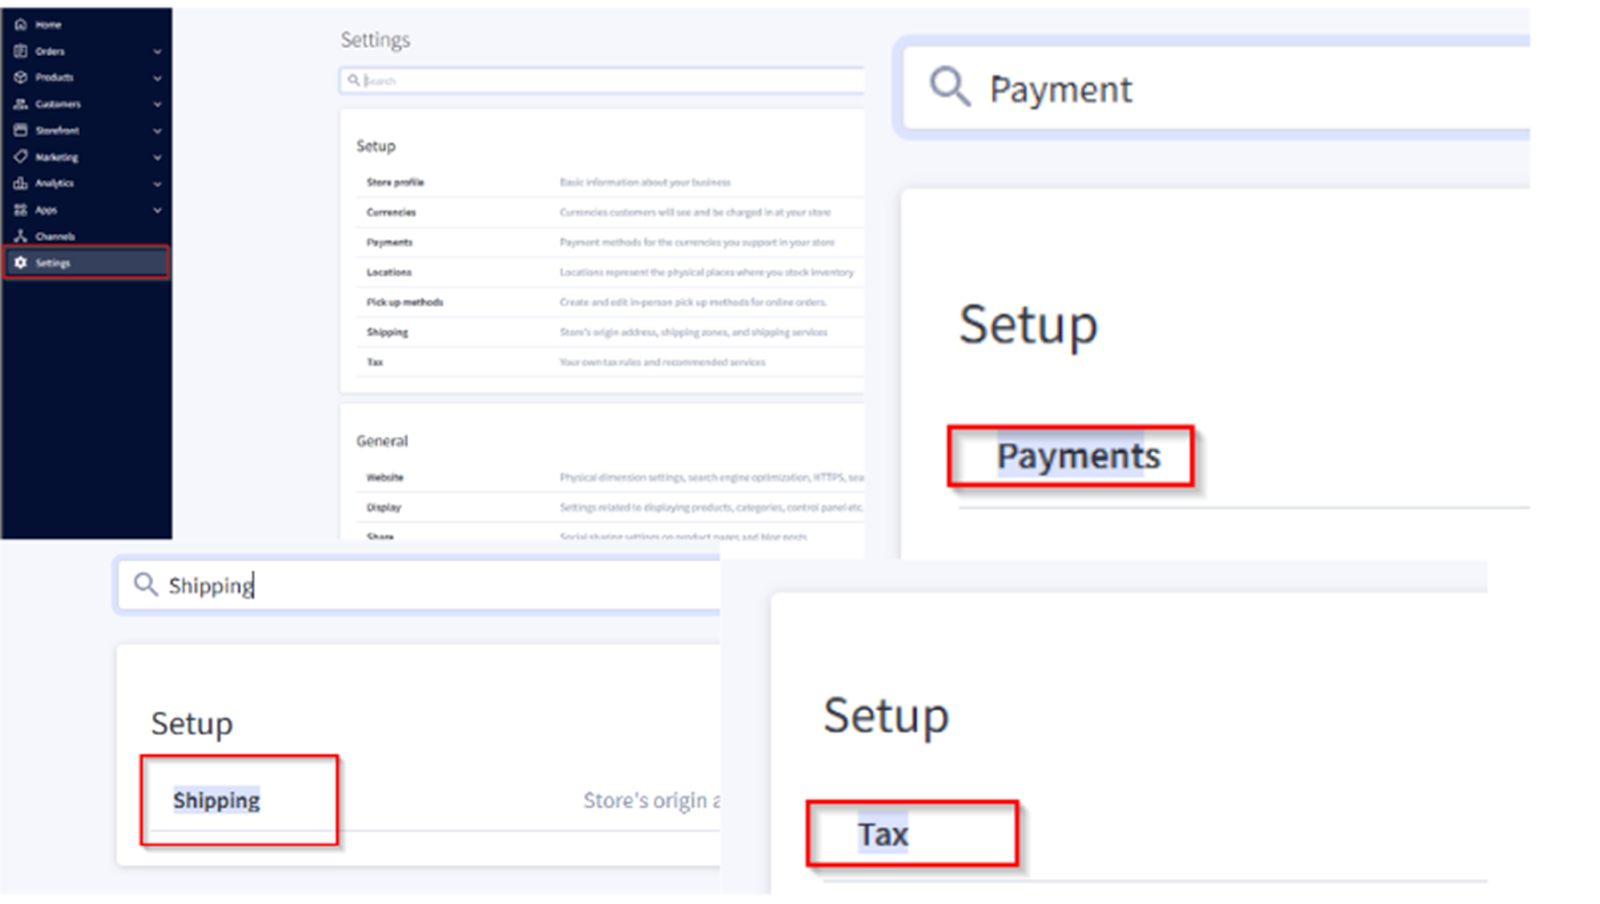
Set Up Payments
Shopify supports multiple payment processors, but if you’re eligible, Shopify Payments is the easiest, fastest option, with no extra transaction fees.
To activate:
- Go to Settings → Payments
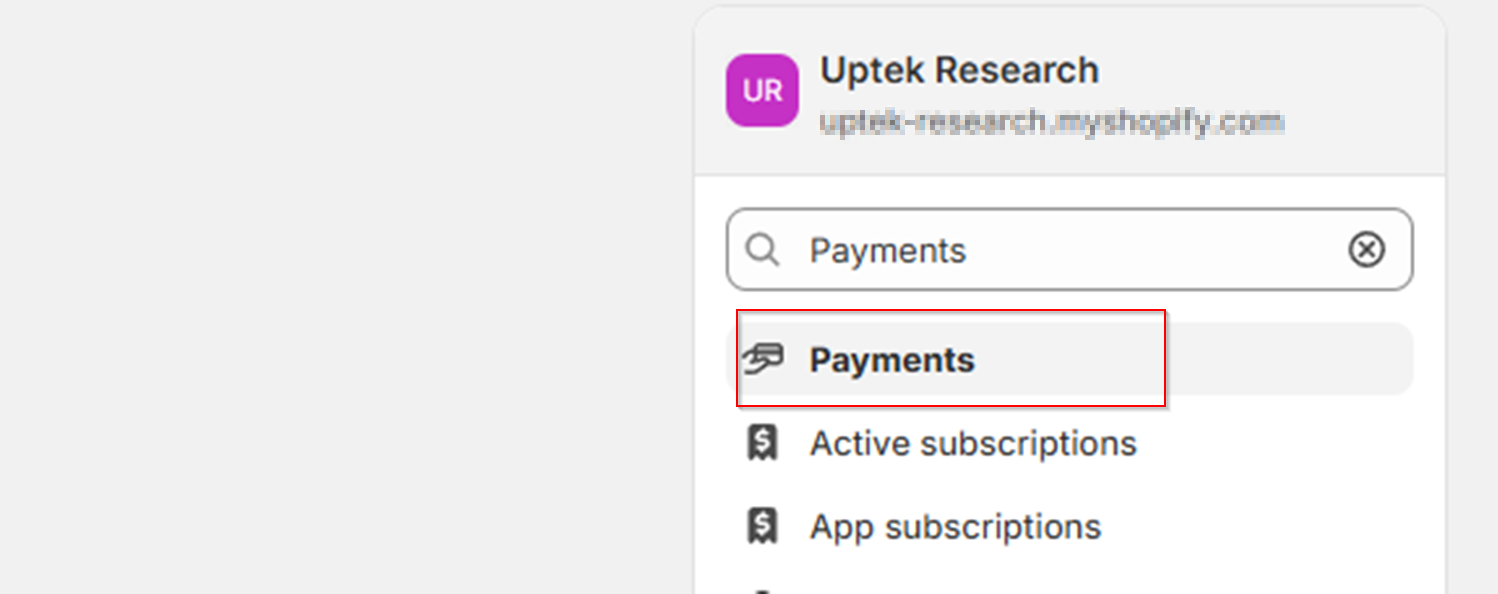
- Click Complete Setup under Shopify Payments
- Enter your:
- Business info (legal name, business type)
- Bank account details
- Product category and customer support info
- Save and enable
Once approved, you’ll be able to accept:
- Visa, Mastercard, American Express
- Apple Pay, Google Pay
- Shop Pay (Shopify’s one-click checkout)
Shopify Payments automatically deposits funds into your bank on a rolling 2–3 day schedule.
Third-Party Gateways:
If you’re in a region where Shopify Payments isn’t available, you can connect:
- PayPal
- Stripe
- Authorize.net
- 2Checkout
Just scroll down in the Payments settings, click Add Provider, and follow their connection steps.
Pro Tip: If you used PayPal on BigCommerce, make sure you connect the same PayPal email in Shopify to avoid refund or order sync issues.
Configure Shipping Rates and Zones
Shipping setup determines how much customers are charged and how your fulfillment team gets orders out smoothly.
To set up shipping:
- Go to Settings → Shipping and Delivery
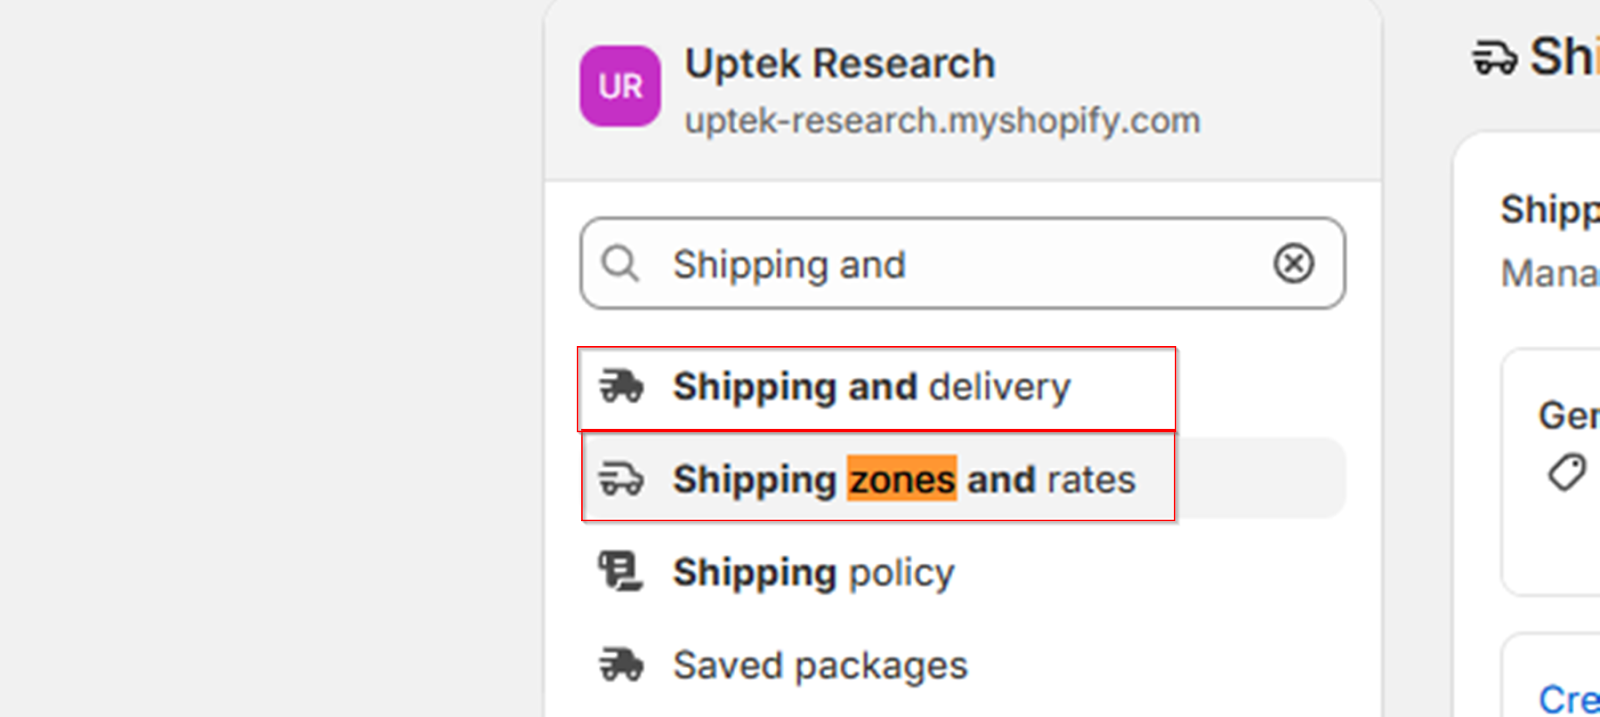
- Under General Shipping Rates, click Manage Rates
- Set up Shipping Zones:
- U.S. only, or U.S. + Canada, etc.
- U.S. only, or U.S. + Canada, etc.
- Add rates for each zone:
- Flat rate (e.g., $5.99 per order)
- Free shipping (for orders over a certain amount)
- Real-time carrier rates (UPS, USPS, FedEx — if connected)
Shopify will apply the correct rate at checkout based on the customer’s shipping address and your settings.
You can also customize packaging types and connect fulfillment apps like ShipStation, Easyship, or Pirate Ship for a better workflow.
Set Up Taxes
Shopify automatically calculates sales taxes in most regions based on your store’s physical location and where you’re shipping to.
To review your tax setup:
- Go to Settings → Taxes and Duties
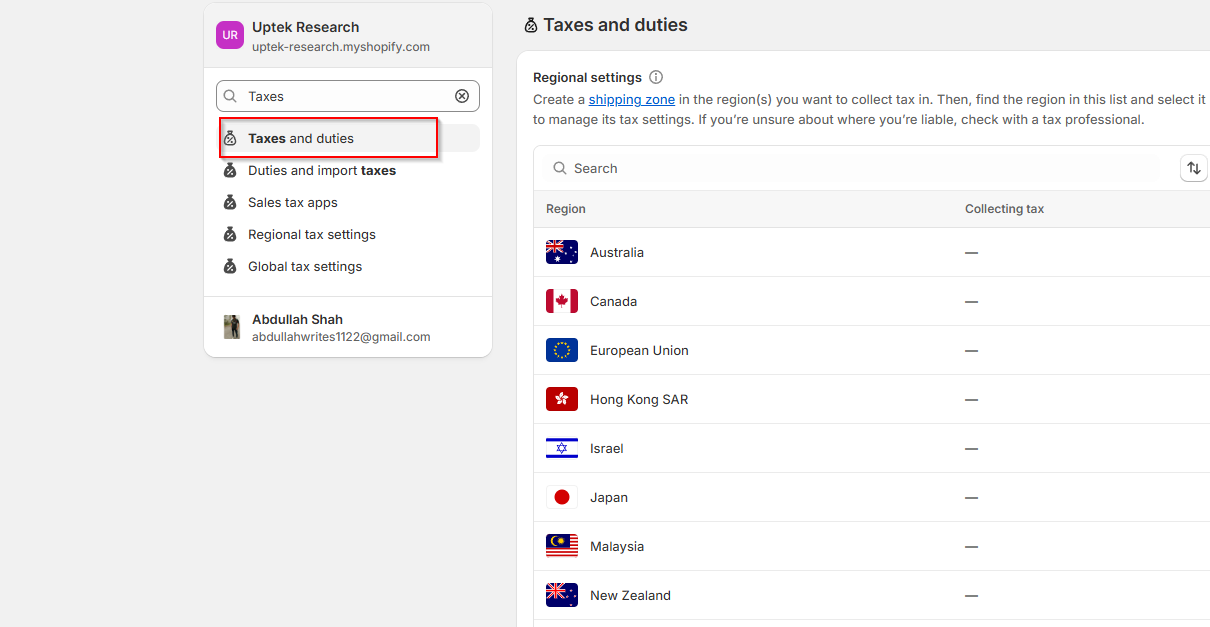
- Add your Business Location
- Enable Automatic Tax Calculation
- Review overrides if:
- You sell tax-exempt items (like clothing in some U.S. states)
- You charge VAT/GST (EU, UK, Australia, Canada)
Shopify keeps up with tax rate changes and applies them in real-time at checkout, so you don’t have to worry about rate updates.
Know VAT & Inclusive Pricing:
If you’re selling in VAT regions:
- Enable VAT collection under Taxes
- Choose whether prices are inclusive or exclusive of VAT
- Add your VAT number to invoices via the Shopify Tax settings
Shopify will automatically create tax reports you can use for filing. Just export under Analytics → Reports → Taxes.
7: Set Up 301 Redirects and Preserve SEO
You’ve migrated your content and launched your storefront, but without proper redirects, every old product link, blog post, and category URL from your BigCommerce site will break.
That means:
- Lost traffic from Google
- Broken links in customer emails
- Lower trust and higher bounce rates
Shopify gives you full control over URL redirects. The idea is to create a 1-to-1 map between your old BigCommerce URLs and your new Shopify structure.
Understand the URL Differences
BigCommerce and Shopify use different URL formats.
Here’s a quick comparison:
| BigCommerce URL | Shopify Equivalent |
|---|---|
| /product/sneaker-123 | /products/sneaker-123 |
| /category/mens-shoes | /collections/mens-shoes |
| /blog/post-title | /blogs/news/post-title |
| /shop | /collections/all |
These changes might seem small, but Google treats them as entirely new URLs, unless you implement proper 301 redirects.
Manually Create Individual Redirects in Shopify
For smaller stores or unique high-traffic pages, manual setup is fine.
Steps:
- Go to Online Store → Navigation → URL Redirects
- Click Create URL Redirect
- Enter:
- Redirect from: /product/sneaker-123
- Redirect to: /products/sneaker-123
- Click Save
Repeat for other important pages (About, FAQ, old categories, blog posts, etc.)
Shopify automatically applies a 301 status code, which tells search engines the change is permanent and transfers link equity (SEO juice).
Use a CSV for Bulk Redirects
For larger stores, manual redirects are tedious. Instead, use a CSV file to upload redirects in bulk.
The format is:
Create a spreadsheet with two columns:
- Redirect from
- Redirect to
Example:
| Redirect from | Redirect to |
|---|---|
| /product/shirt-001 | /products/shirt-001 |
| /category/t-shirts | /collections/t-shirts |
| /blog/how-to-style | /blogs/news/how-to-style |
Save as a CSV file. Then for uploading it:
- Go to Online Store → Navigation → URL Redirects
- Click Import
- Upload your CSV and confirm
Check for Broken Links
After importing redirects, test them to ensure they’re working.
You can:
- Use tools like Screaming Frog or Ahrefs Site Audit to crawl your site
- Monitor 404 errors under Shopify Admin → Analytics → Reports → Behavior → 404 Pages
Fix any missed pages manually or re-upload your redirect list with corrections.
Resubmit Your Sitemap to Google
Once your redirects are in place, help Google discover and index your new site structure faster. To resubmit:
- Go to Google Search Console

- Select your new Shopify site (or verify it first)
Submit your new sitemap URL:
arduino
CopyEdit
https://yourstorename.myshopify.com/sitemap.xml
8: Final QA and Launch Checklist
You’ve migrated your data, customized your storefront, and mapped all your redirects. Now it’s time to walk through your site like a customer and fix any final issues before flipping the switch.
This last step is all about catching friction points, testing functionality, and making sure your Shopify store is ready to run, without surprises.
Browse the Store Like a First-Time Visitor
Start from your homepage and navigate your store the way a customer would.
Check:
- Every menu item and dropdown link
- Collection pages: Do filters work? Are products showing?
- Product pages: Do variants switch? Are images clear and sized correctly?
- Content pages: About, Contact, FAQ, Policies — are they clean and readable?
- Blog layout and individual post formatting
- Mobile layout: Use a phone and tablet to test responsiveness
Pro Tip: Ask someone unfamiliar with the store to do a walk-through. Watch where they hesitate or get confused. These are your UX leaks.
Place a Test Order
Shopify makes this easy with a built-in test gateway.
To enable:
- Go to Settings → Payments
- Search for “Bogus Gateway” and enable it
- Add a product to your cart and check out as a fake customer
What to test:
- The add-to-cart button works on all product pages
- Cart page updates correctly
- Shipping rates appear based on your settings
- Discount codes (if enabled) apply properly
- The checkout flow is smooth
- The order confirmation screen shows
- A confirmation email gets sent to the customer
After testing, disable the Bogus Gateway and reactivate your real payment method.
Review and Send Customer Emails
Email templates help you stay on-brand, and they’re often overlooked.
Go to Settings → Notifications and review:
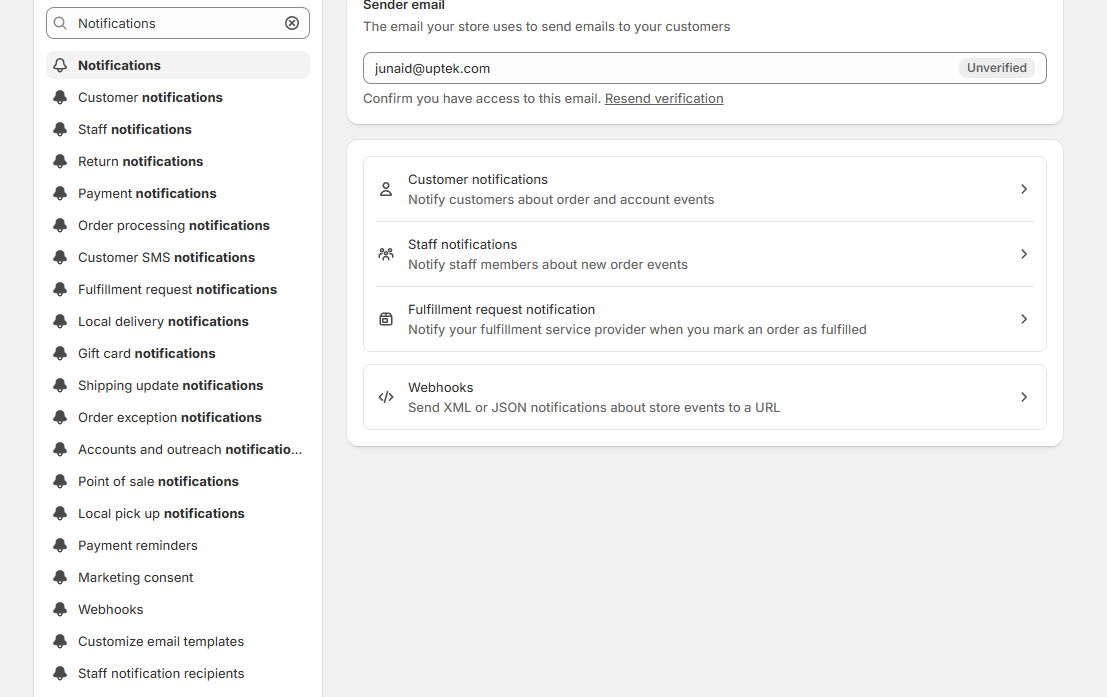
- Order confirmation
- Shipping update
- Refund issued
- Account invitation
- Abandoned cart recovery
- Contact reply
Click into each one, send yourself a test, and edit the content if needed. Update:
- Store name and contact details
- Logo image (optional)
- Brand language and tone
- Email footer and links
Test the Backend Operations
You’ll be in the backend every day, make sure it works the way you expect.
Check:
- Orders appear correctly in Orders → All Orders
- Inventory levels update after a test purchase
- Refund, archive, and fulfill buttons work
- Product filters (in admin) help you manage SKUs
- The analytics dashboard is tracking visits and conversions
Caution: Shopify doesn’t track data while your store is password protected, so some analytics might not show until you go live.
Final Go-Live Actions
Here’s the last-minute checklist before you flip the switch:
| Action | Why It Matters |
|---|---|
| Disable password protection | So customers can access the store |
| Submit sitemap to Google | Helps search engines index new URLs |
| Turn on email flows (Klaviyo, Mailchimp) | Resume marketing automation |
| Enable live chat (if used) | Support customers in real-time |
| Test mobile checkout | 70 %+ of users will use mobile |
Go to Online Store → Preferences → Password Protection and uncheck “Enable password.” Click Save.
Your store is now live.
FAQs
1. Can I keep using my old BigCommerce URLs on Shopify?
Not exactly, Shopify uses a different URL structure.
For example, /product/shirt-001 becomes /products/shirt-001. That’s why 301 redirects are critical. By setting them up properly, you preserve your search rankings and ensure old links still work.
2. Will my customers have to create new accounts on Shopify?
Yes.
Due to password encryption, Shopify cannot import customer login credentials.
After migration, you’ll send account activation emails prompting them to create a new password, and their order history and contact details will still be intact.
3. How long does the entire migration take?
It depends on your catalog size and complexity.
For most stores, a full migration (including data prep, testing, redirects, and launch) can take anywhere from 3–10 days. If you’re using apps like Matrixify or LitExtension, the timeline can be shortened, but always budget time for QA.
4. What happens to my apps and integrations from BigCommerce?
Most BigCommerce apps won’t transfer directly to Shopify as they’re built for different ecosystems.
Instead, list out your current apps and check if Shopify has an equivalent (or better) version in the Shopify App Store.
For essentials like reviews, email marketing, subscriptions, and product filters, Shopify has a wide selection. Just note that pricing and features may vary, so test before launch.
5. Can I keep my BigCommerce store live while building the Shopify version?
Yes, and you should.
Keeping your BigCommerce store live lets you avoid downtime while setting up and testing Shopify.
Just make sure to freeze content changes (products, orders, blogs) 24–48 hours before the final migration to avoid missing data. Once Shopify is fully ready, you can point your domain to Shopify, disable BigCommerce billing, and go live without disruption.
Wrap-Up:
Migrating from BigCommerce to Shopify is about building a store that’s easier to grow, manage, and optimize long-term.
By following this step-by-step guide, you’ve:
- Backed up and preserved your essential data
- Rebuilt your catalog, customers, and content with precision
- Customize your storefront for conversions
- Protected your SEO with redirects and metadata
- Fully tested and launched a functional, scalable Shopify store
Now you’re ready for the next phase: more sales, better marketing, and faster growth.